
A 100$ Quest to Build a Linux Gaming PC
Back in December 2019, I was going to be away from home for the holidays. What can a man do for a week without their gaming PC? Read a book? Binge watch Netflix? Nah. That’s too little involvement.
How about a little challenge: could I build a (Linux) Gaming PC for less than 100 USD? Of course, with this kind of costs contraints, I was not going to build it from new shiny parts. Used parts only. Still, it made me think of how “cheap” I could go and still be able to play recent PC games nonetheless.
When looking for hardware, most reviews out there are about the highest frame rates you can get with the newest and most expensive cards out there. I find it even more interesting to look at how capable the very low end of the Gaming PC spectrum is: this is where the largest market should be, as used hardware get recycled many times from one user to the next.
And the result?
Success!
To be entirely fair, I was a hair over 100 USD. Yet, I did not end up with some integrated Intel GPU machine either. This is a real (albeit modest) gaming machine we are talking about here.
The below config is not going to run anything in 4k or make you dive into the fantastic world of VR to play HL Alyx any time soon. But can you still play a LOT of games with this kind of hardware, even recent titles? You bet!
Configuration and Total Cost (exact prices paid):
- HPZ210 SFF with 4 gigs of RAM and an included 250GB hard drive: 4,231 JPY
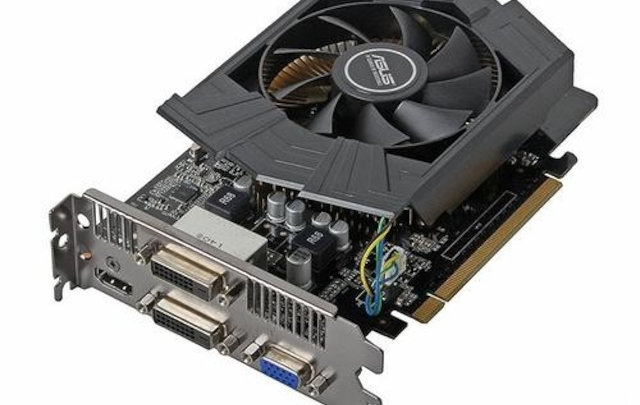
- ASUS GTX750TI-PH-2GD5: 5000 JPY
- RAM: an extra 4 Gigs: 2250 JPY
Total: 11481 JPY = 104.9 USD (based on 100 US Dollars = 10,937.27 Japanese Yen on 12/19/2019. It’s just a little above 100 USD - I could have saved a few bucks on getting the cheapest RAM possible but I played it safe with some RAM sticks that are supposed to be not half rotten.
It’s a fairly straightforward machine. The base is simply a HP Z210 Small Form Factor (SFF) workstation. This is your typical office desk computer: small, silent, reliable, and built just to do the bare minimum office work for a good number of years. In Japan, such units sell by the dozen on the local version of Ebay (called Yahoo Auctions) and cost typically less than 50 USD, because companies typically replace their pool of installed machines every 4-5 years and throw the old ones away. While you may not find the same prices for this particular system there are equivalent Small Form Factor workstations from other brands pretty much all around the world, that sell for similar prices.
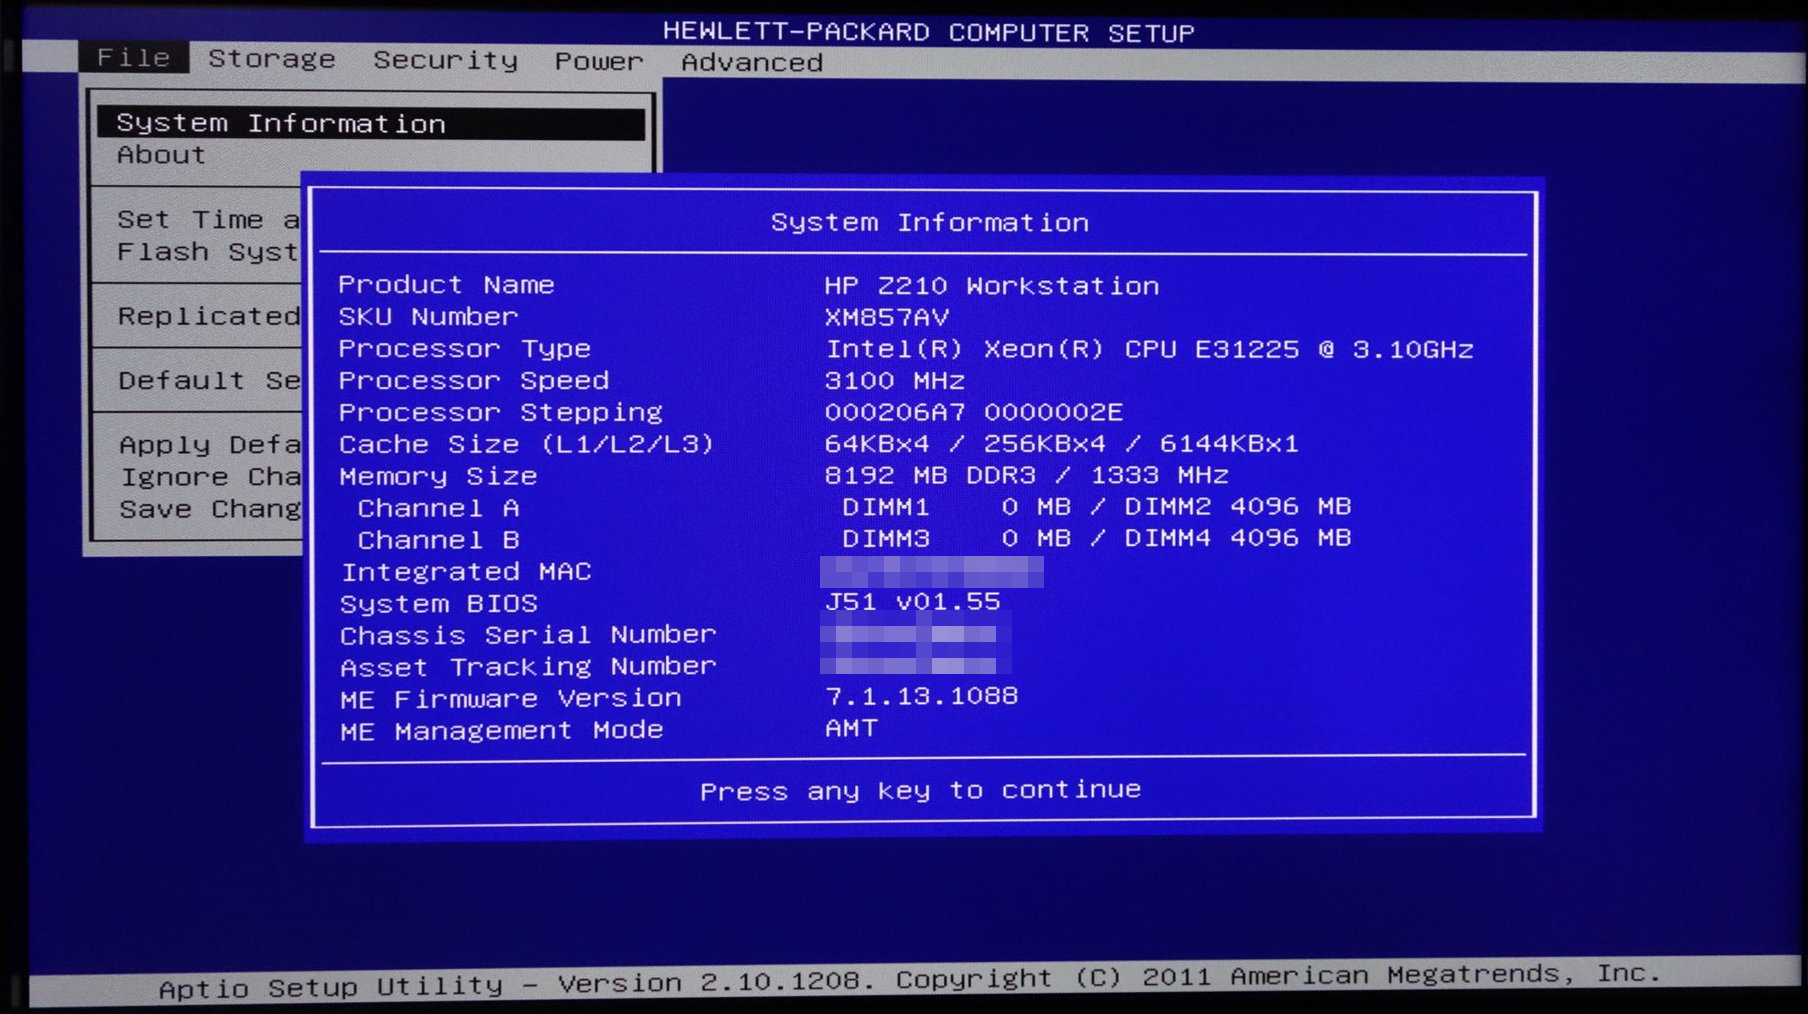
What do you get with such a workstation? The one I found (and wanted to purchase) was equipped with a Xeon E1225 CPU. Xeon are not good you say? Well, a Xeon E1225 is actually a 4 core processor which is roughly equivalent to an i7 from 2011~2012 (you can check the specs sheets). Not the fastest CPU around but very decent all things considered. It comes with a hard drive as well, that we will re-use for the purpose of being cheap, and 4GB of RAM that we expand to 8GB to run a great amount of games out of the box.
This CPU is certainly going to become a bottleneck in some games to reach high FPS, but we are not planning to show off in the PCMasterRace community here. We’re trying to hit as high as possible with as few bucks as we can.
The main drawback of that SFF configuration is that it only has a 240W power supply. This is going to rule out any GPU card that requires an external power source on top of the PCI Express lane (there are no additional power supply connectors in the unit).
I was also wondering before purchasing this configuration if a simple GPU card would actually run on 240W or not. It’s a simple question, but it was pretty hard to get an actual answer anywhere. I was comforted by several niche YouTube videos where a few people did make the jump and made it work with other Small Form Factor models - albeit different models. I decided to take my chances.
After all, the TDP of the usual GPUs on PCI lanes is around 75W, and the whole motherboard + peripherals/drives is easily eating another 100W+ (old Xeon CPUs are not known for being low-power) so we’re actually pretty close to hitting the limits of a 240W PSU.
My choice of GPU was therefore motivated by cost and no external power source requirement. I could not find anything better than the GTX 750Ti, as my budget was around 50 USD or less. Luckily the GTX750Ti is still a beast in its el cheapo category (better than a GTX 1030 for example) and will run many games at medium-high settings at constant 30 fps (sometimes 60 fps for less demanding ones). If one was a little more flexible on cost, a GTX 1050Ti would be a better choice but it would overall bring us beyond 100 USD at the time of writing, at least in Japan.
In case you have more budget, or if you wait a little longer for prices to fall down further, you can consider the following options for GPUs that do not required additional power:
- GT 1030 2GB (you probably want to avoid that one, it’s too low in performance)
- GTX 1050 2GB
- GTX 1050 Ti 4GB (not all of them, look for the ones that don’t require external power)
- GTX 1650 4GB (better performance than GTX 1050 Ti)
- AMD Radeon RX460 4GB (should be between 750 Ti and 1050)
- AMD Radeon Rx550 2GB
- AMD Radeon RX560 4GB
It seems like nowadays you can get pretty much the same performance without any dedicated GPU with the Ryzen 5, but that’s at a much higher pricepoint even used.
Ideally you could target the GTX 1050 Ti for best performance, since it would almost double the FPS you get in games - but our goal is to be as cheap as Scrooge here, so it won’t fit our budget of 100 USD.
There were several issues before getting everything to work as expected. First, I did not realize until purchasing the GPU card that the SFF accepts only “low profile” cards, which are half-height GPU cards. This means:
- The bracket that came with the GPU card had to be removed (a screwdriver will do the trick) as it did not fit at all with the unit’s standard bracket.
- I cannot close the unit cover anymore when I attach the GPU on the PCI lane, which makes for a good laugh once you realize you have to run the whole thing guts open.
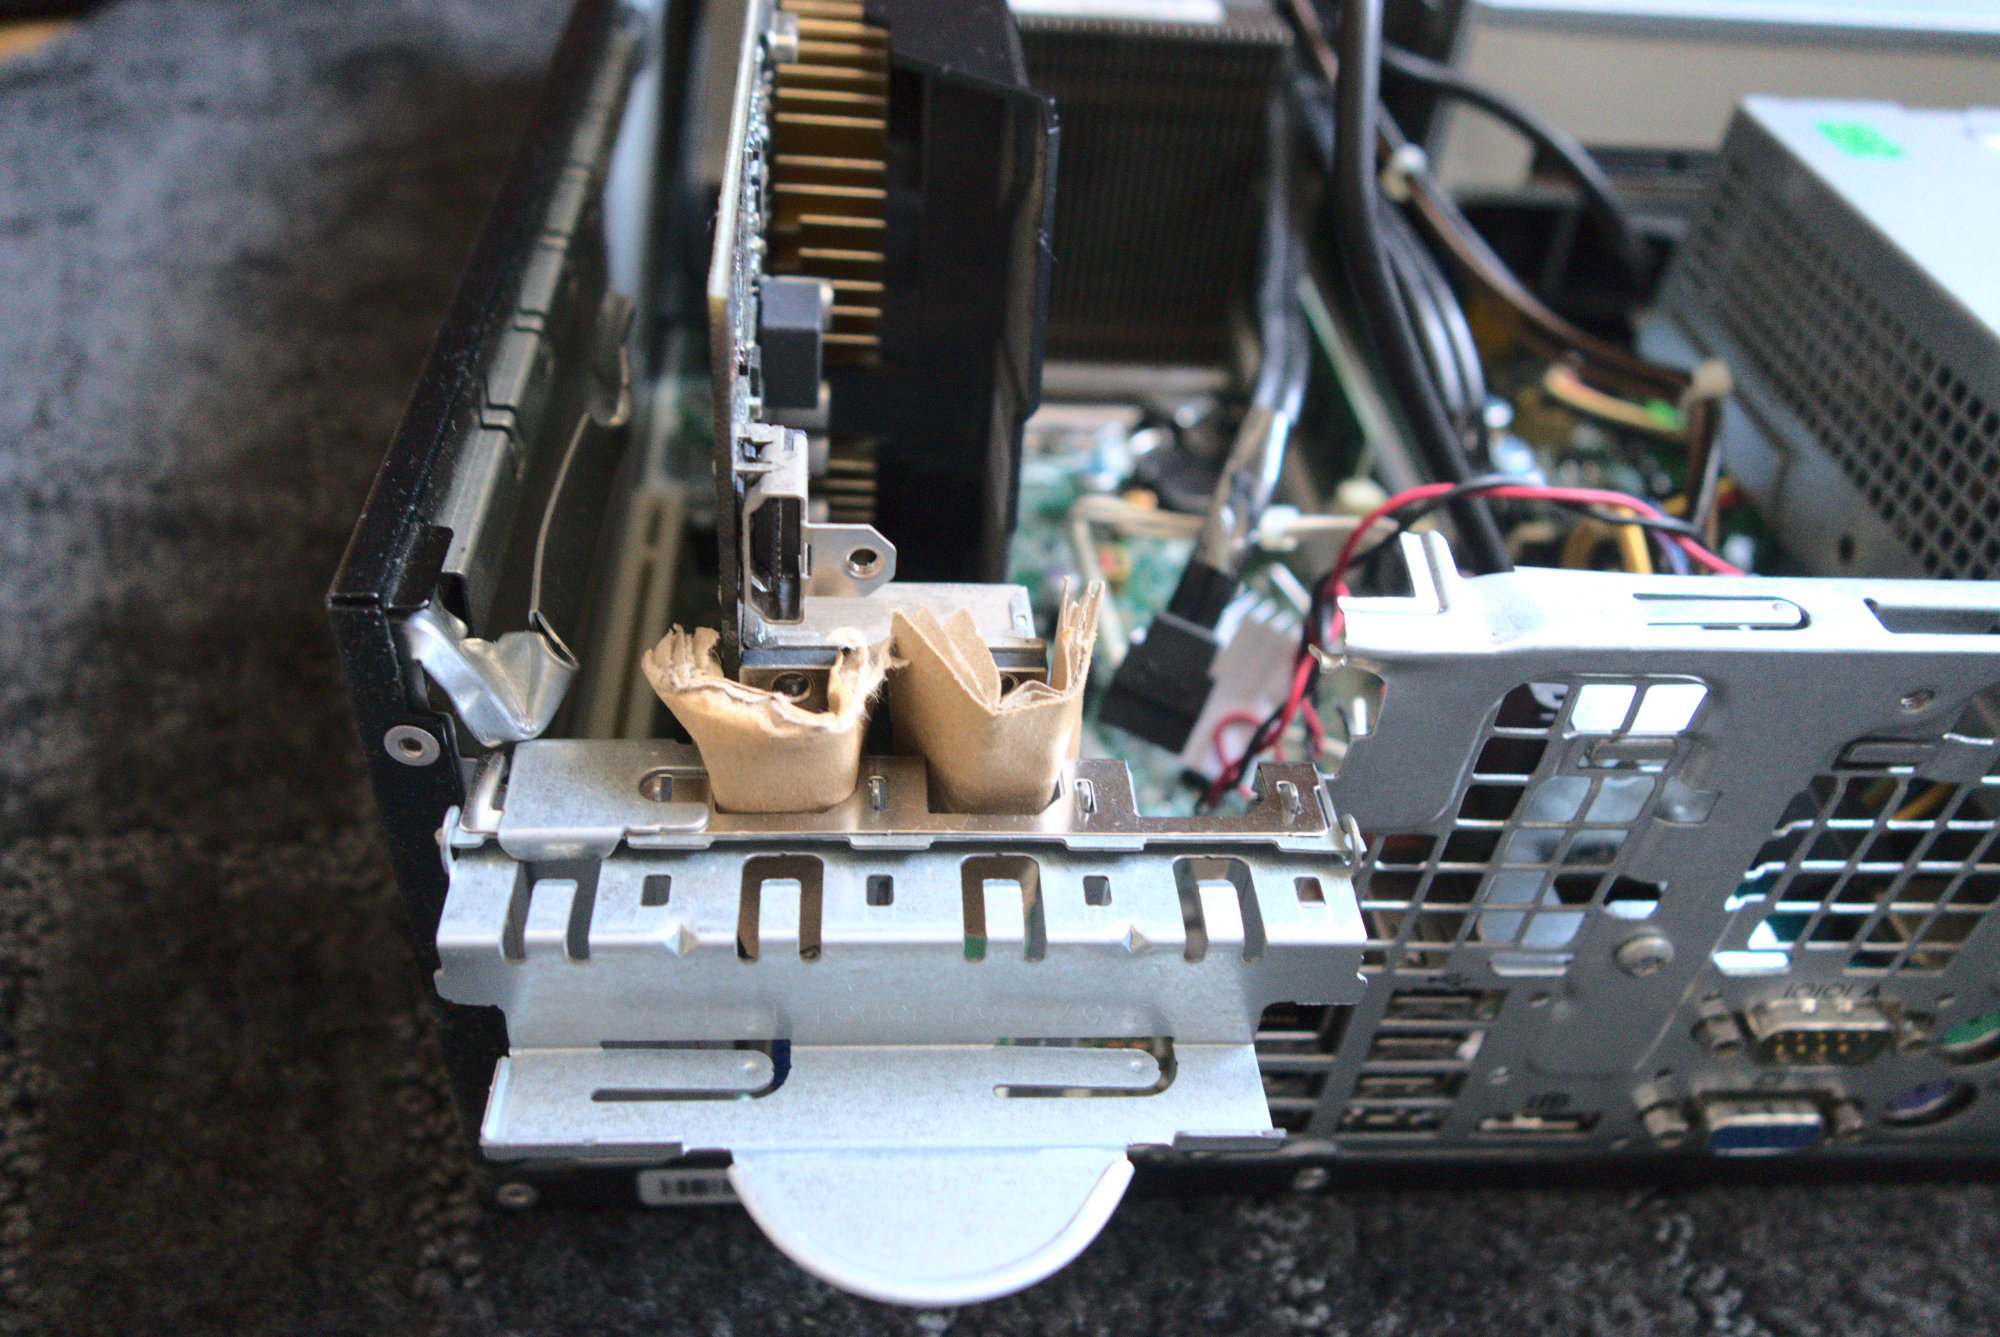
- Since the bracket does not hold the GPU card anymore, I used some good old MacGyver tricks to keep the card holding up. No extra cost involved!
To be honest, I could not care less about bad this all looks, since that unit is going to sit well hidden behind a desk.
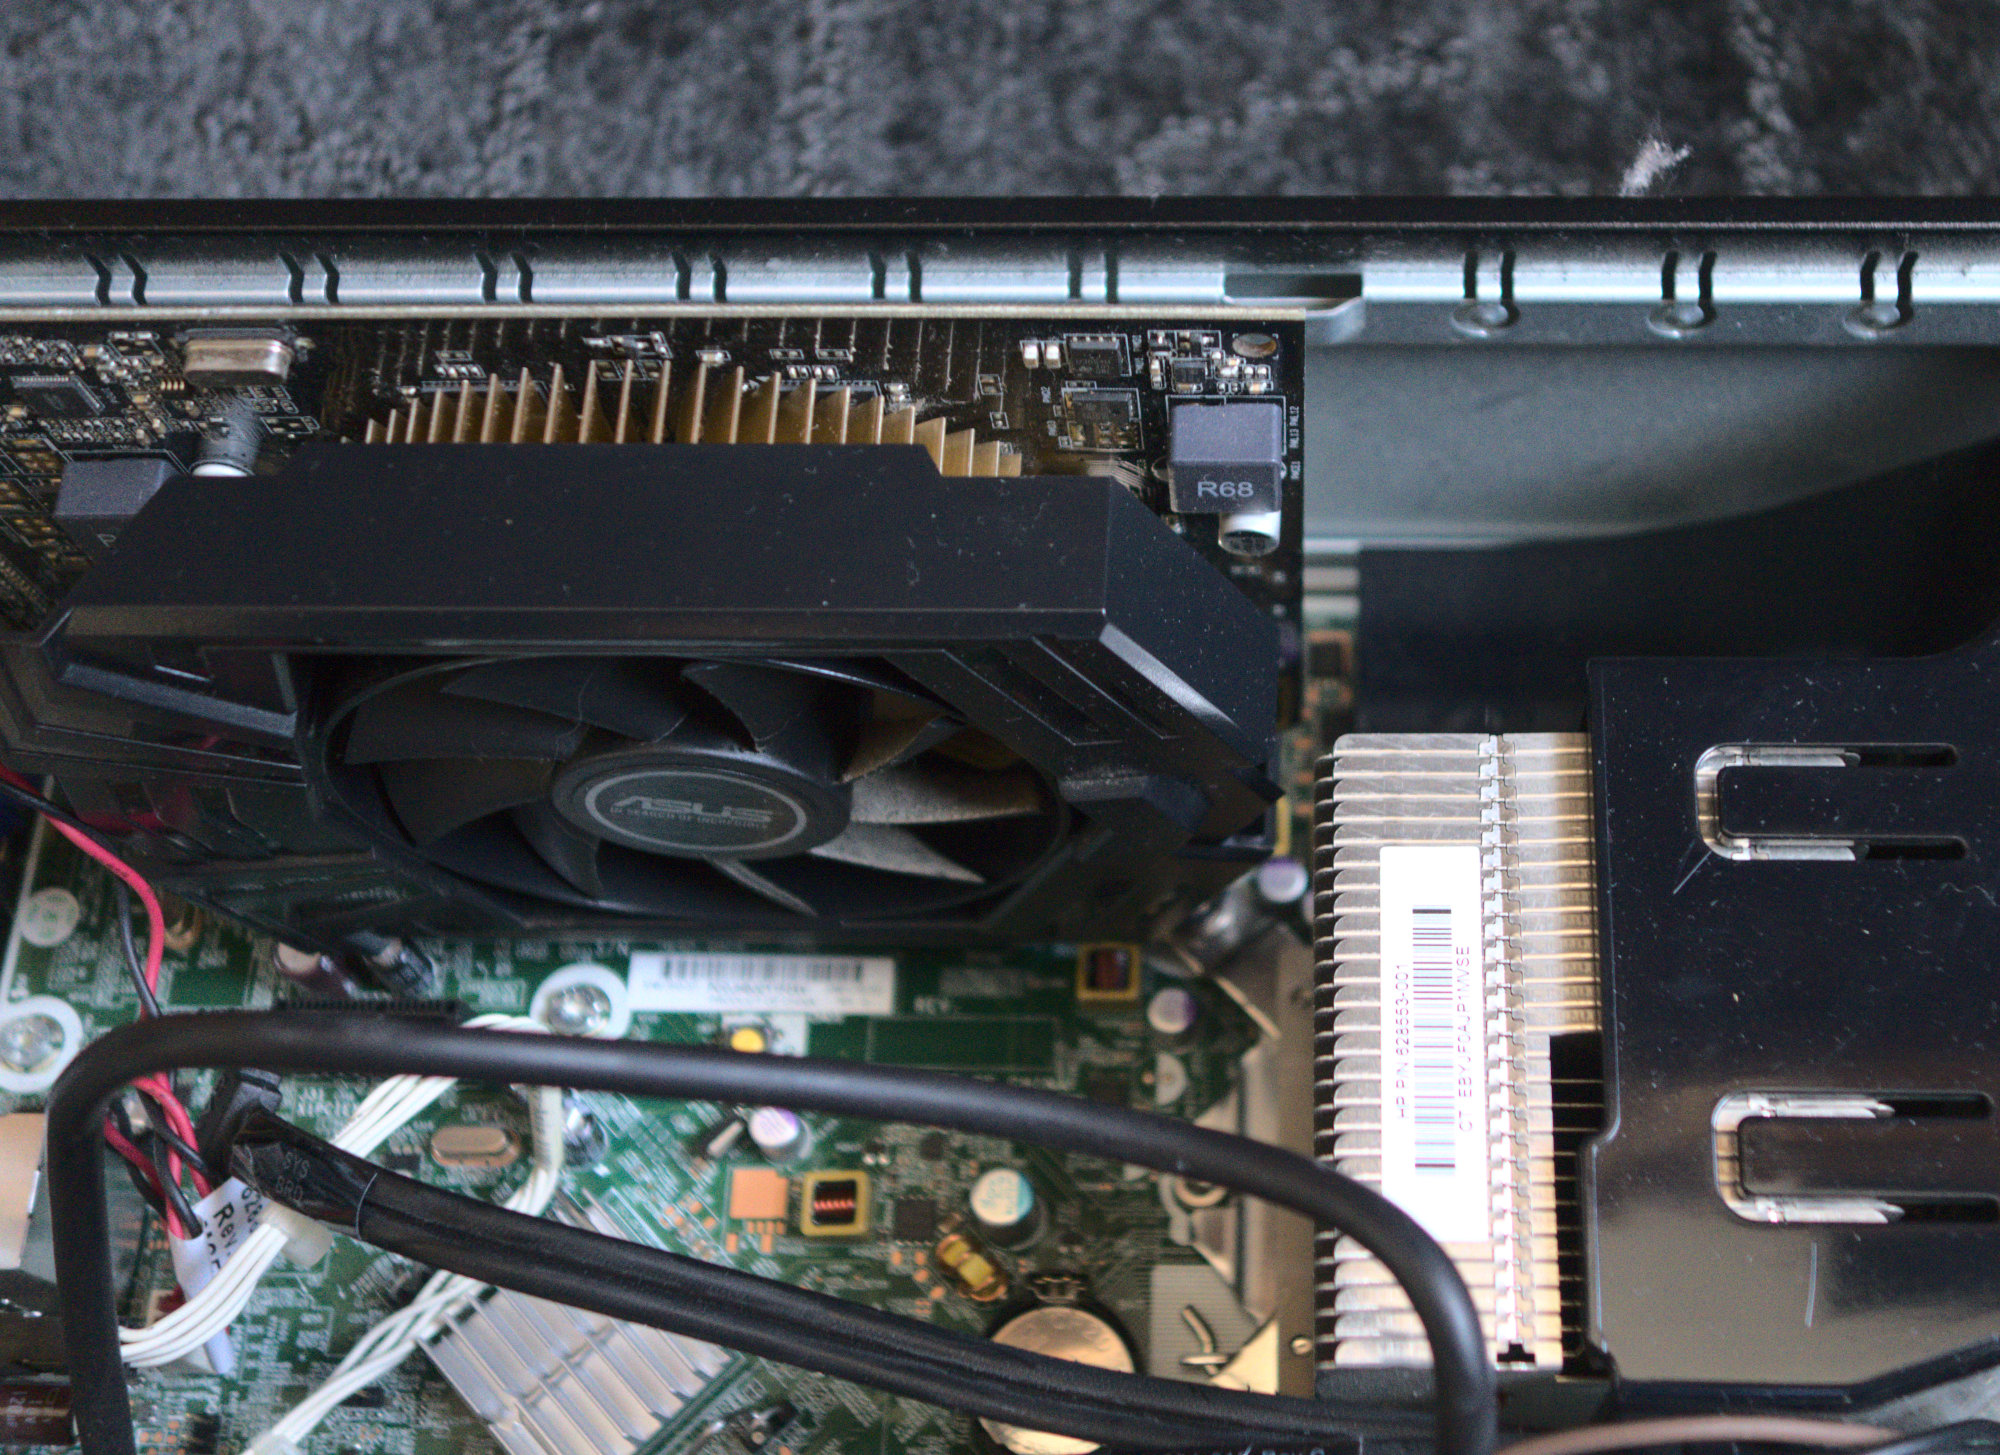
Another issue with the SFF is that it does not accept LONG cards. Yes, size matters. A card with 2 fans will SO NOT fit in our gutted unit, as it would start conflicting with the heat sink for the CPU. See below how narrow the gap between the GPU card and the CPU unit is. Phew! I did do some rough estimations of the dimensions before purchasing the Video card, but I did not expect it to be such a close call.
Of course, there’s always the possibility of using a PCI Express Extender/Riser cable, but that’s another 20/30 USD at least so that drives us away from the 100 USD goal.
To sum it up, ideally:
- GPU card should be cheap
- GPU card should be half-height (that’s rare)
- GPU card should be short in length
- You cannot have your cake and eat it, so suck it up
So, you want a card made for hobbits if you can find one. I did not.
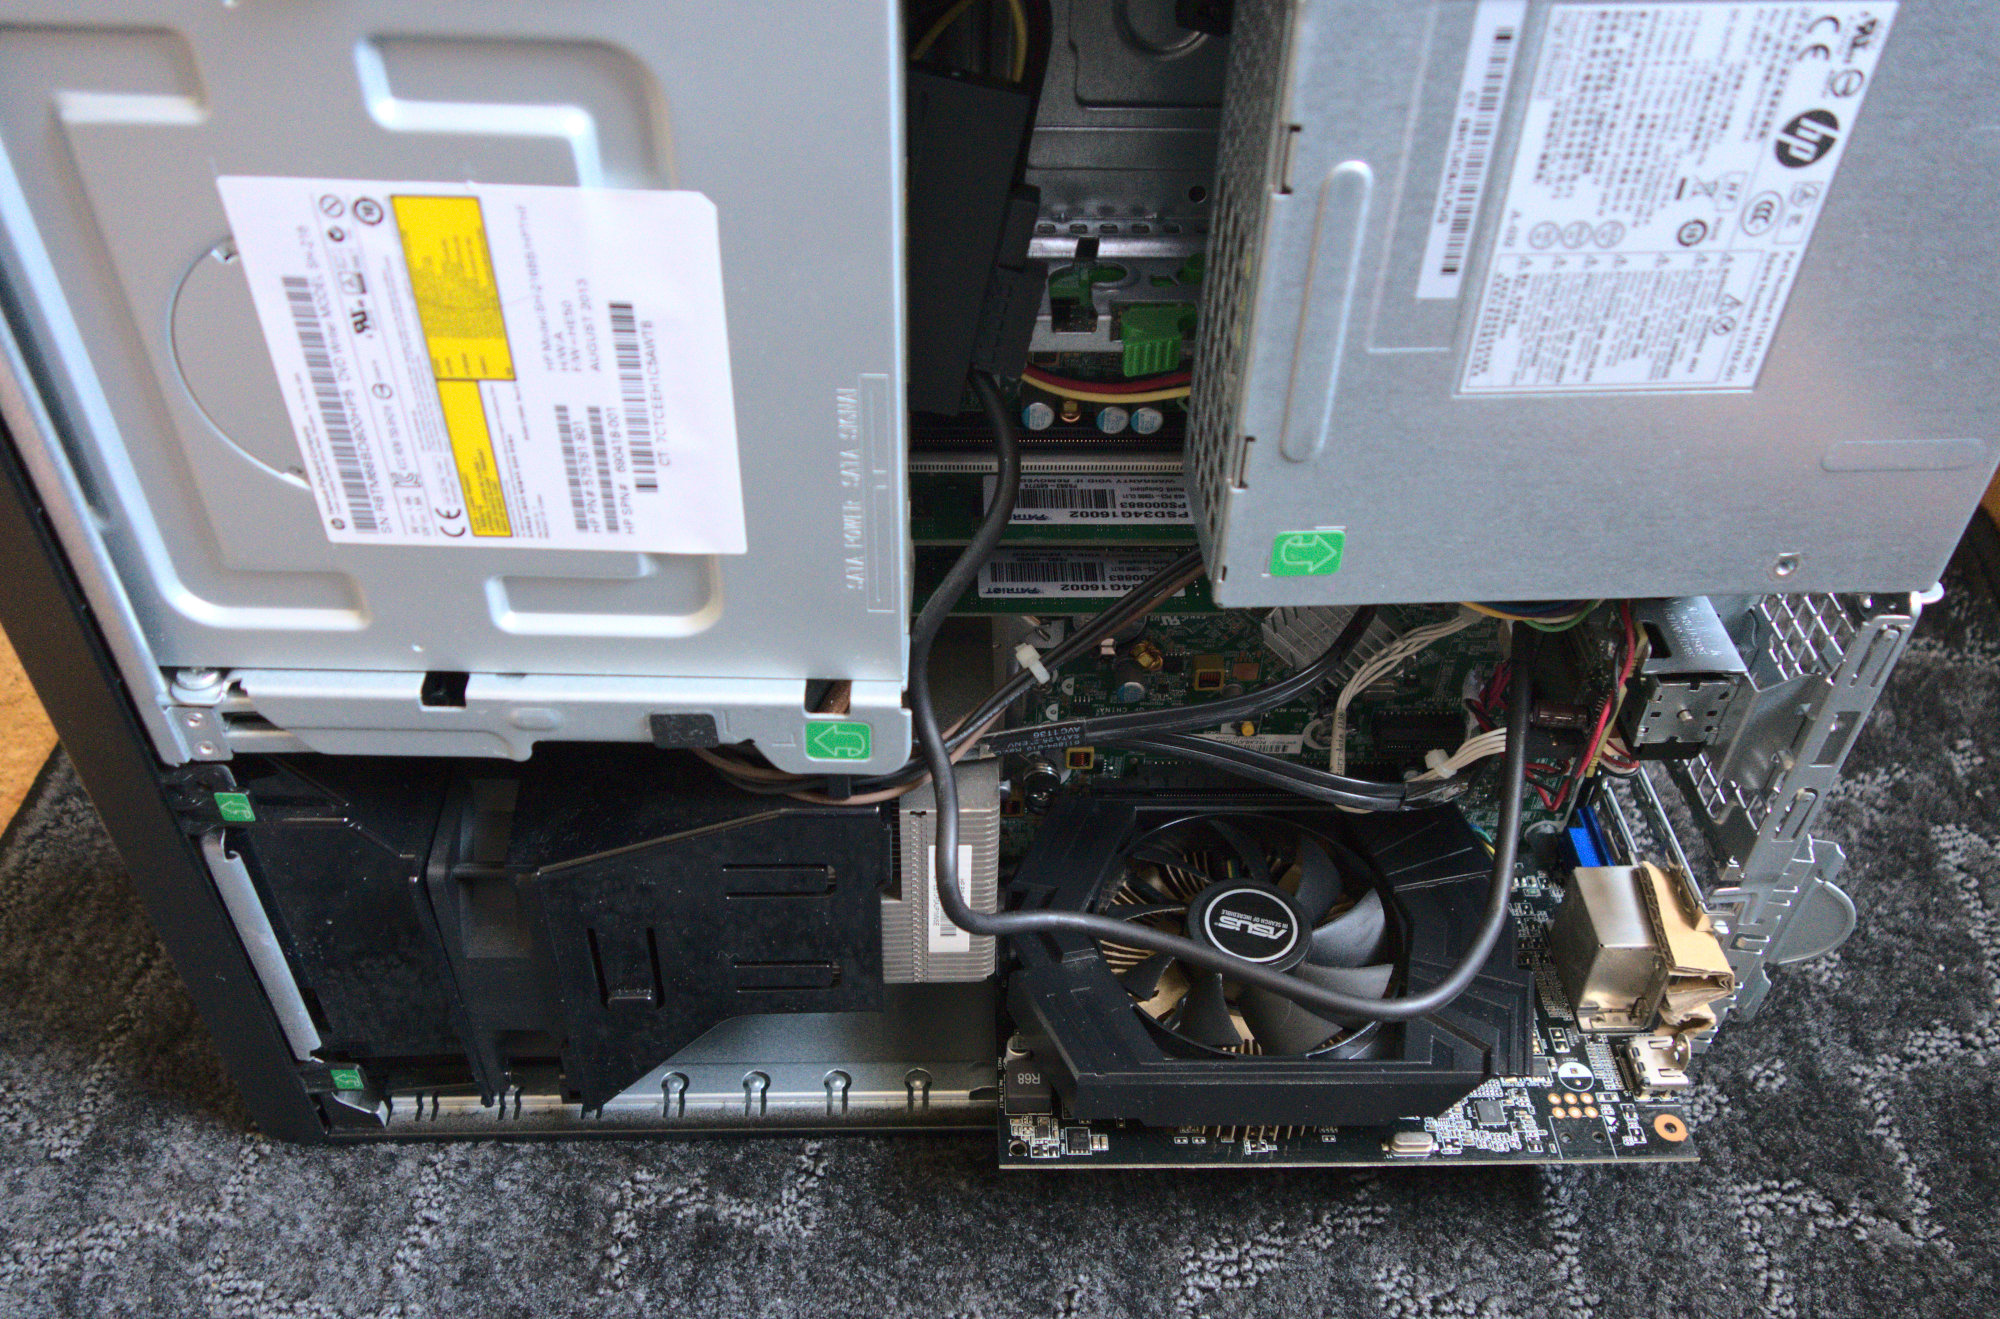
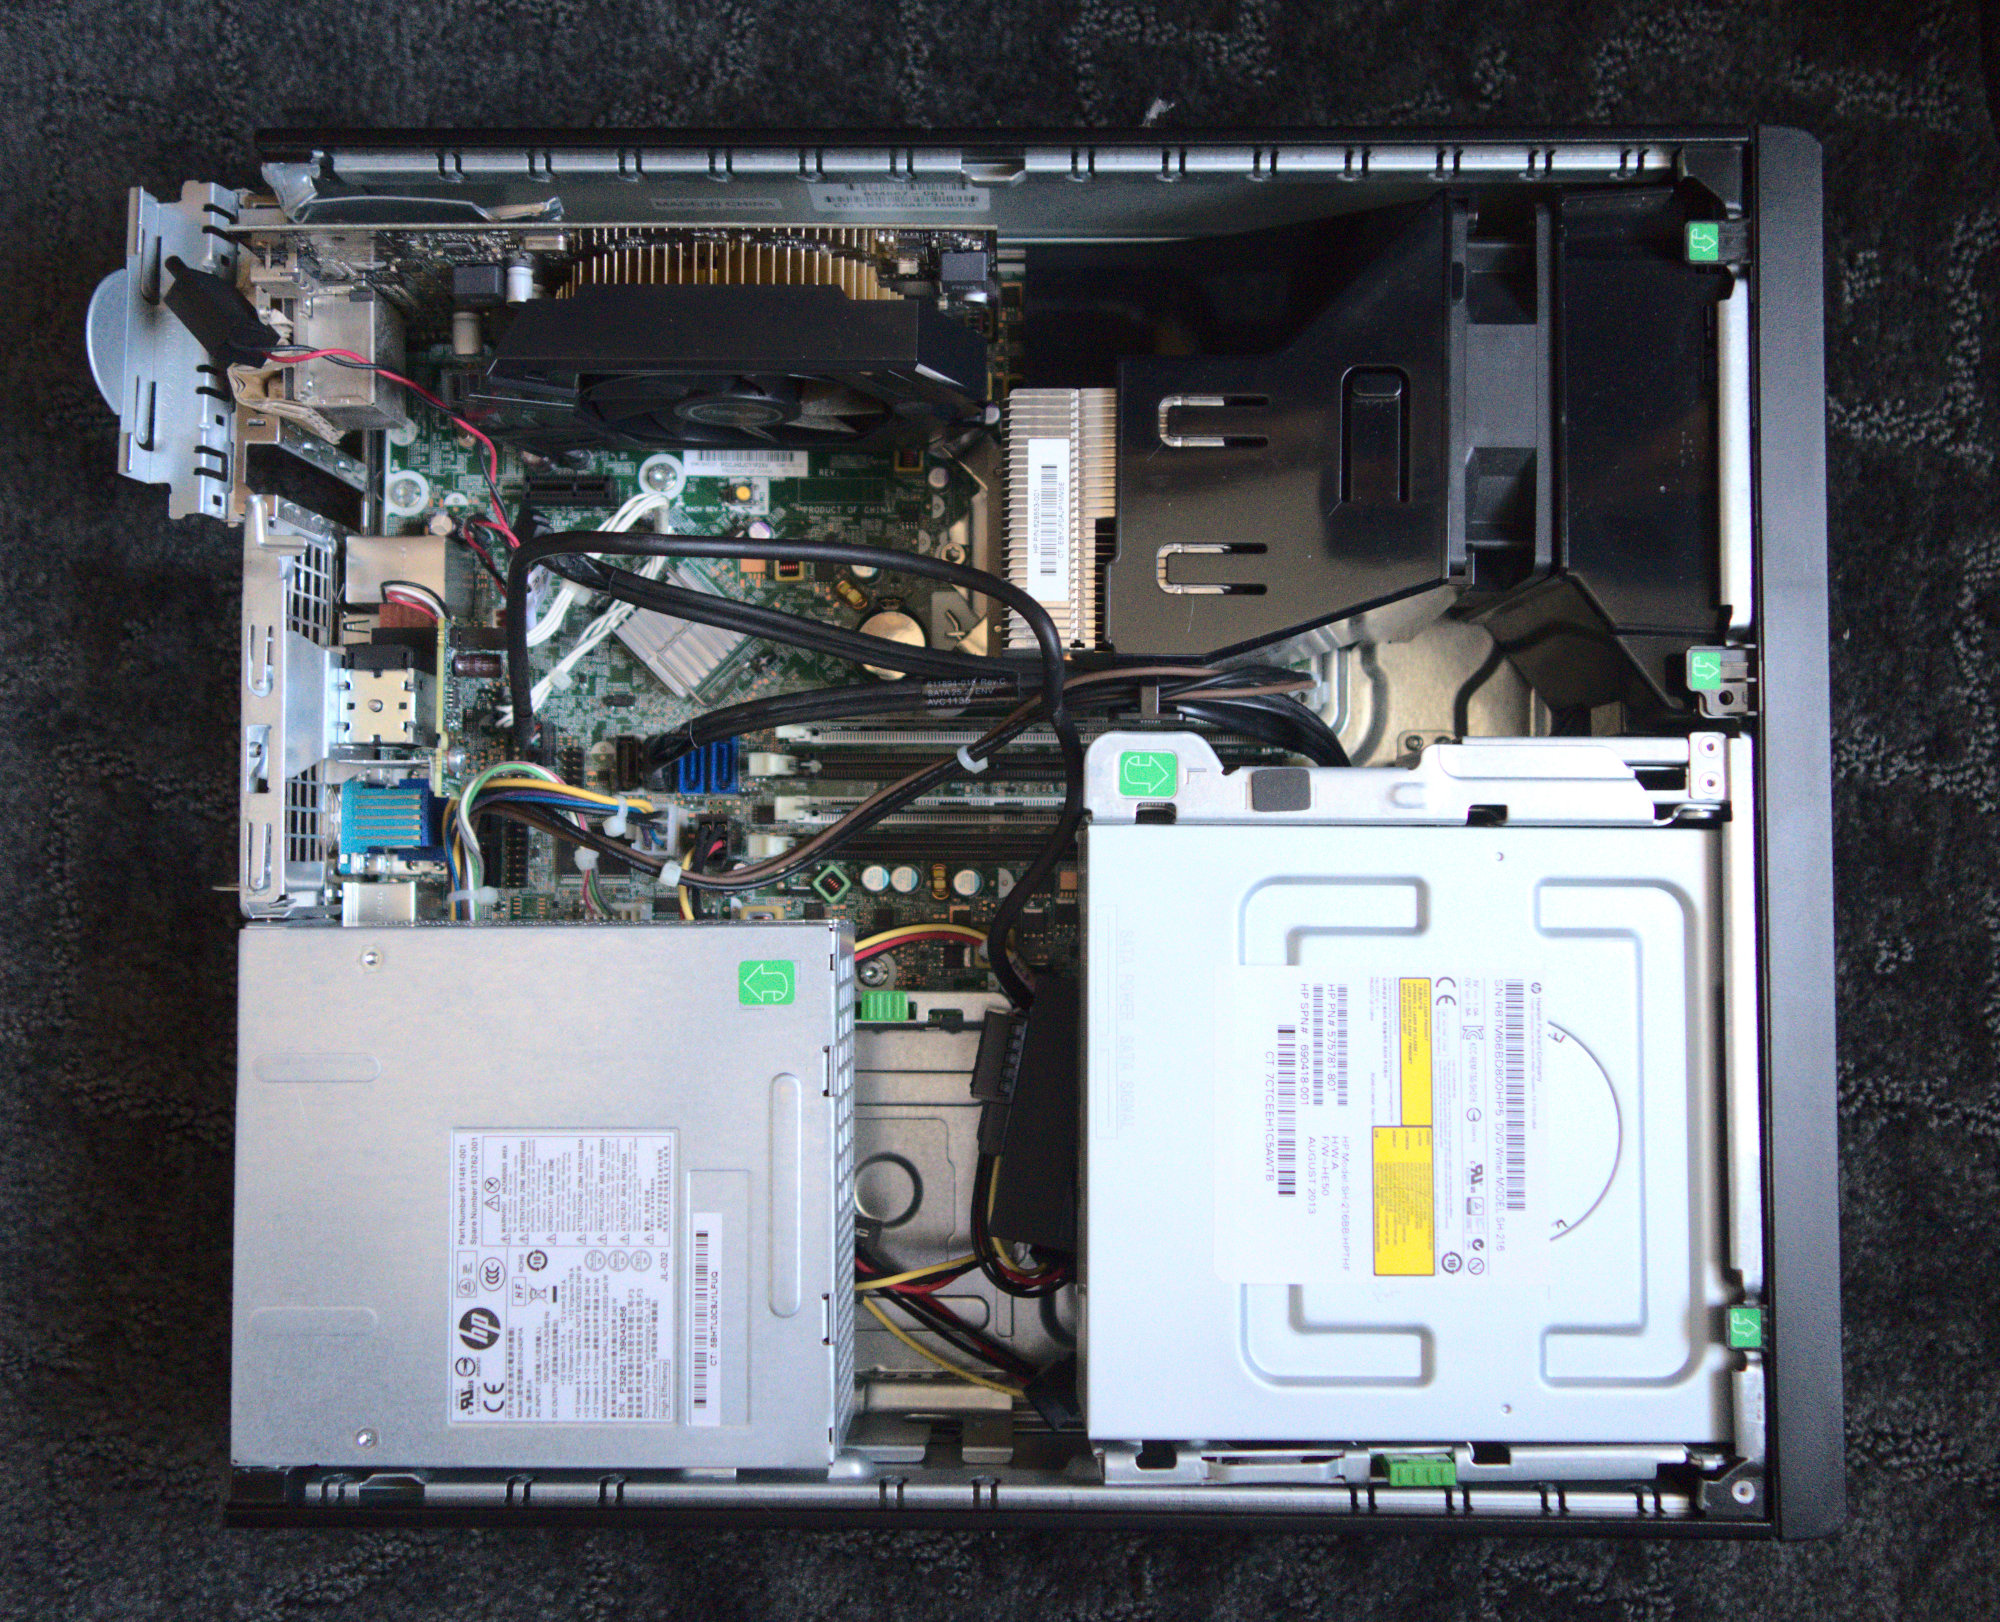
And this is what we ended up with, all assembled.
All proud of my setup, I was already picturing myself running Steam like a 1337 hacker on my (old) new hardware. Not so fast. That would have been too smooth.
Something you need to understand when dealing with hardware: assume the worst, and if everything works out of the box it just happens to be a goddamn miracle from heavens.
Needless to say, we were short of a miracle.
Booting the unit worked fine without GPU (using the Intel video output). Connecting the GPU and the output on the HDMI port resulted in zip. Nothing. Black screen. Was the GPU card defective? Unfortunately, I had no other hardware to test it on. The fans did start when powered on - should I interpret this as a sign of life?
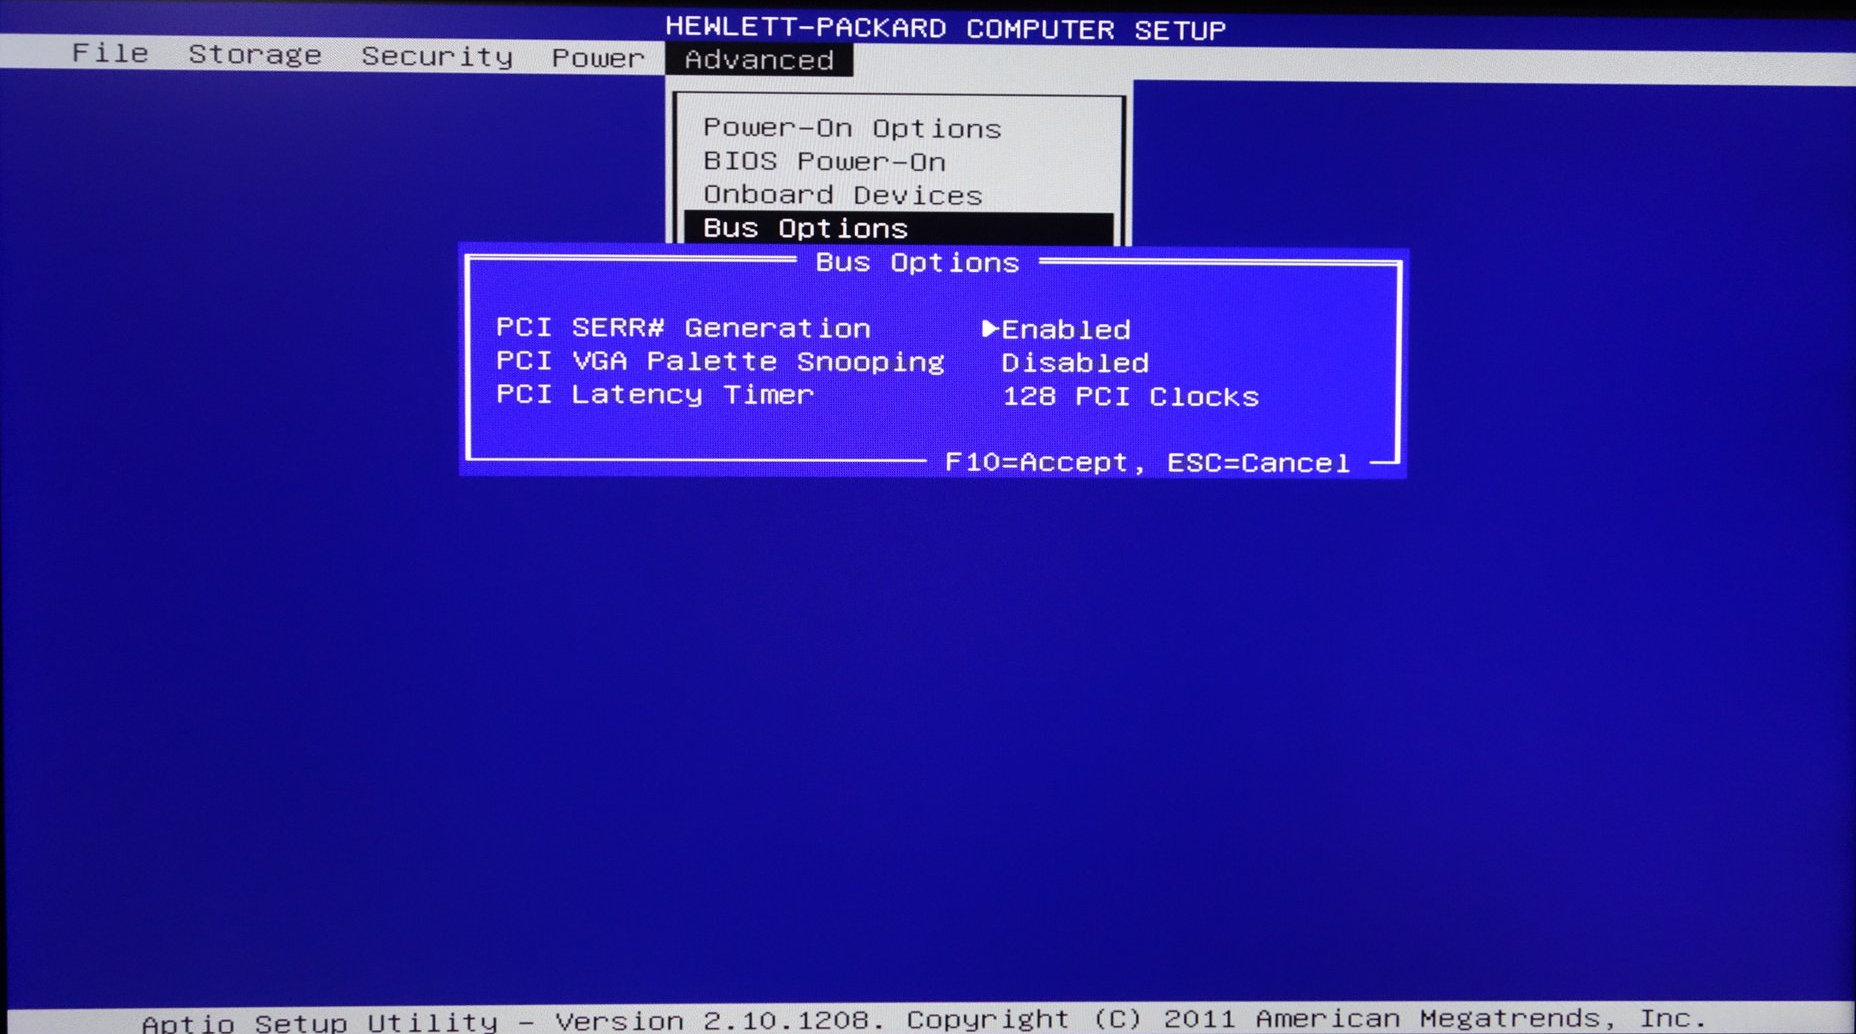
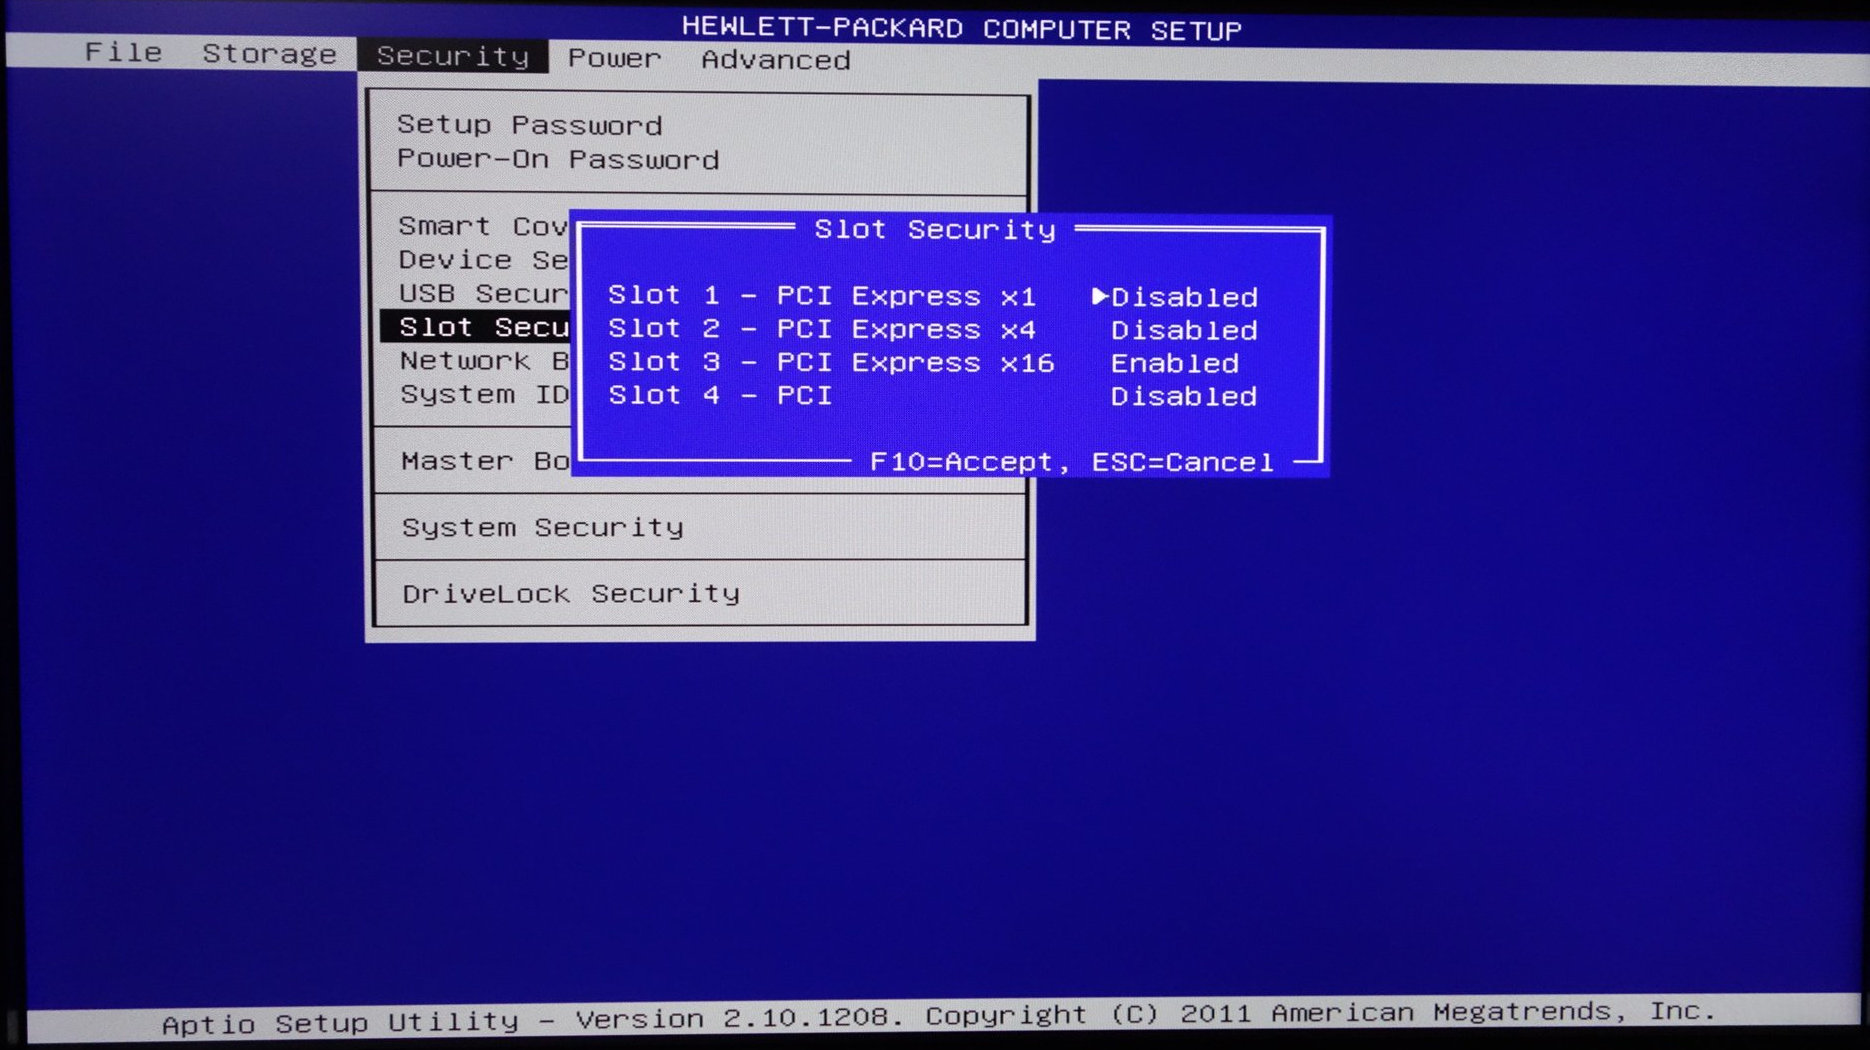
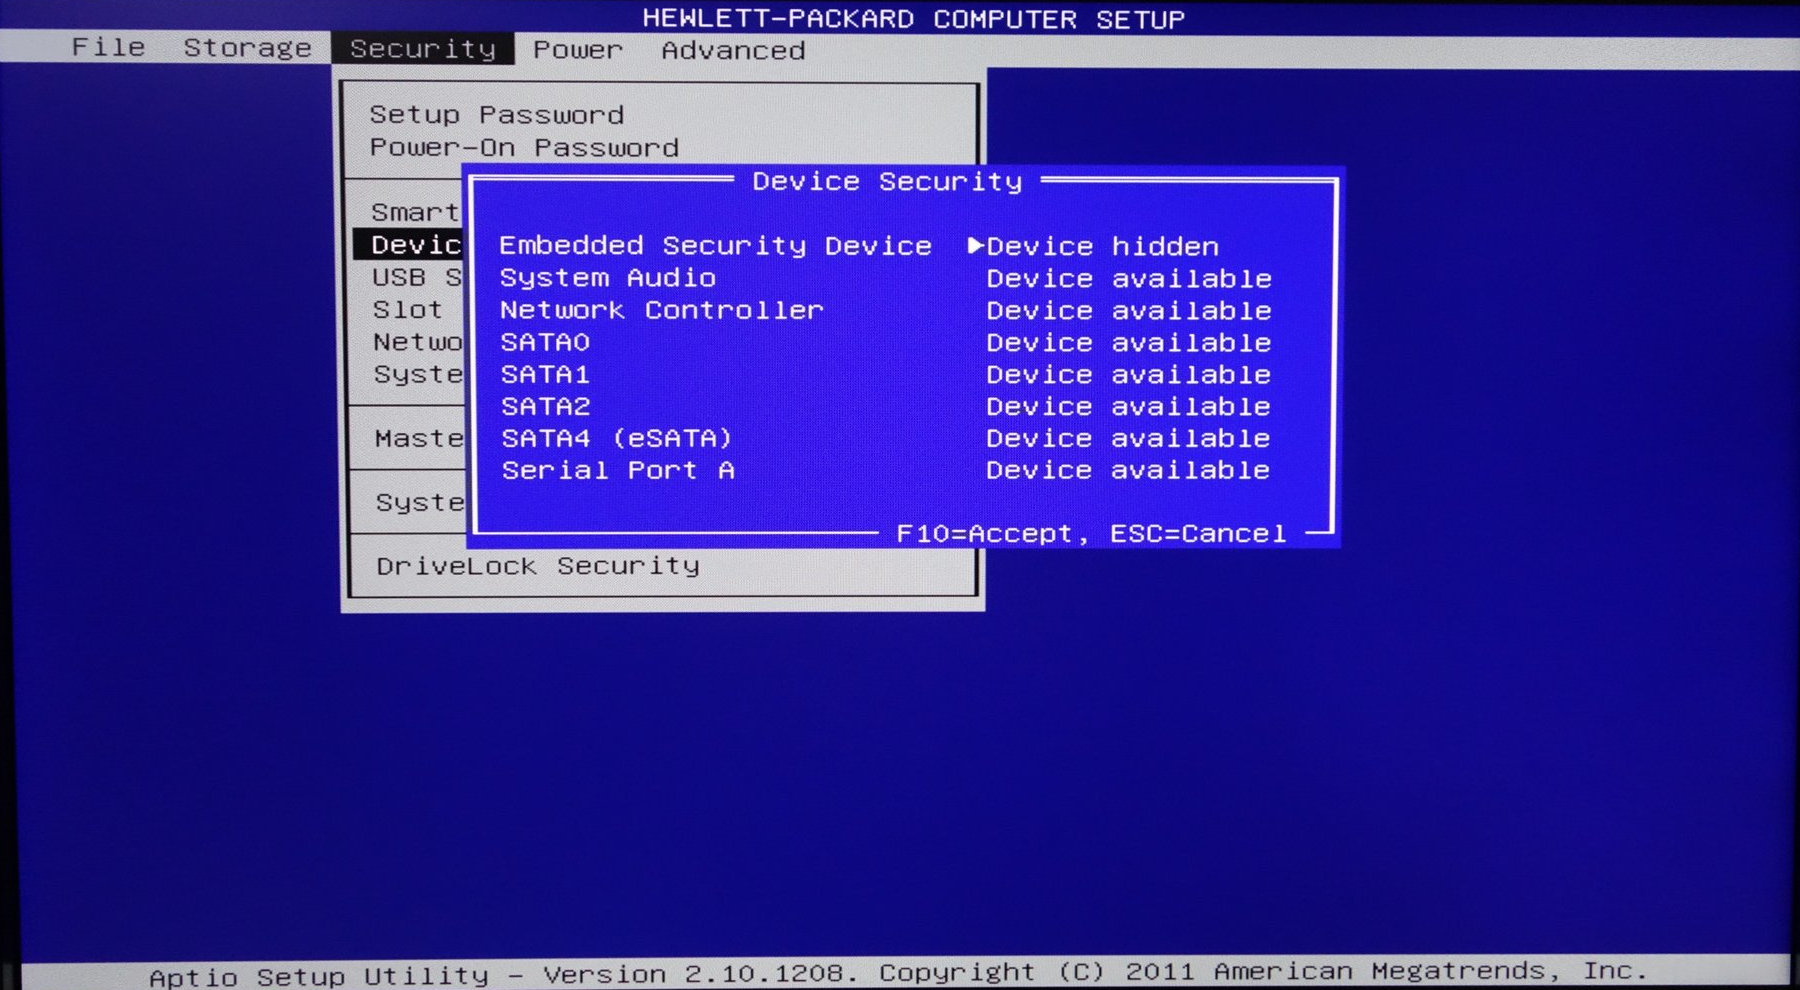
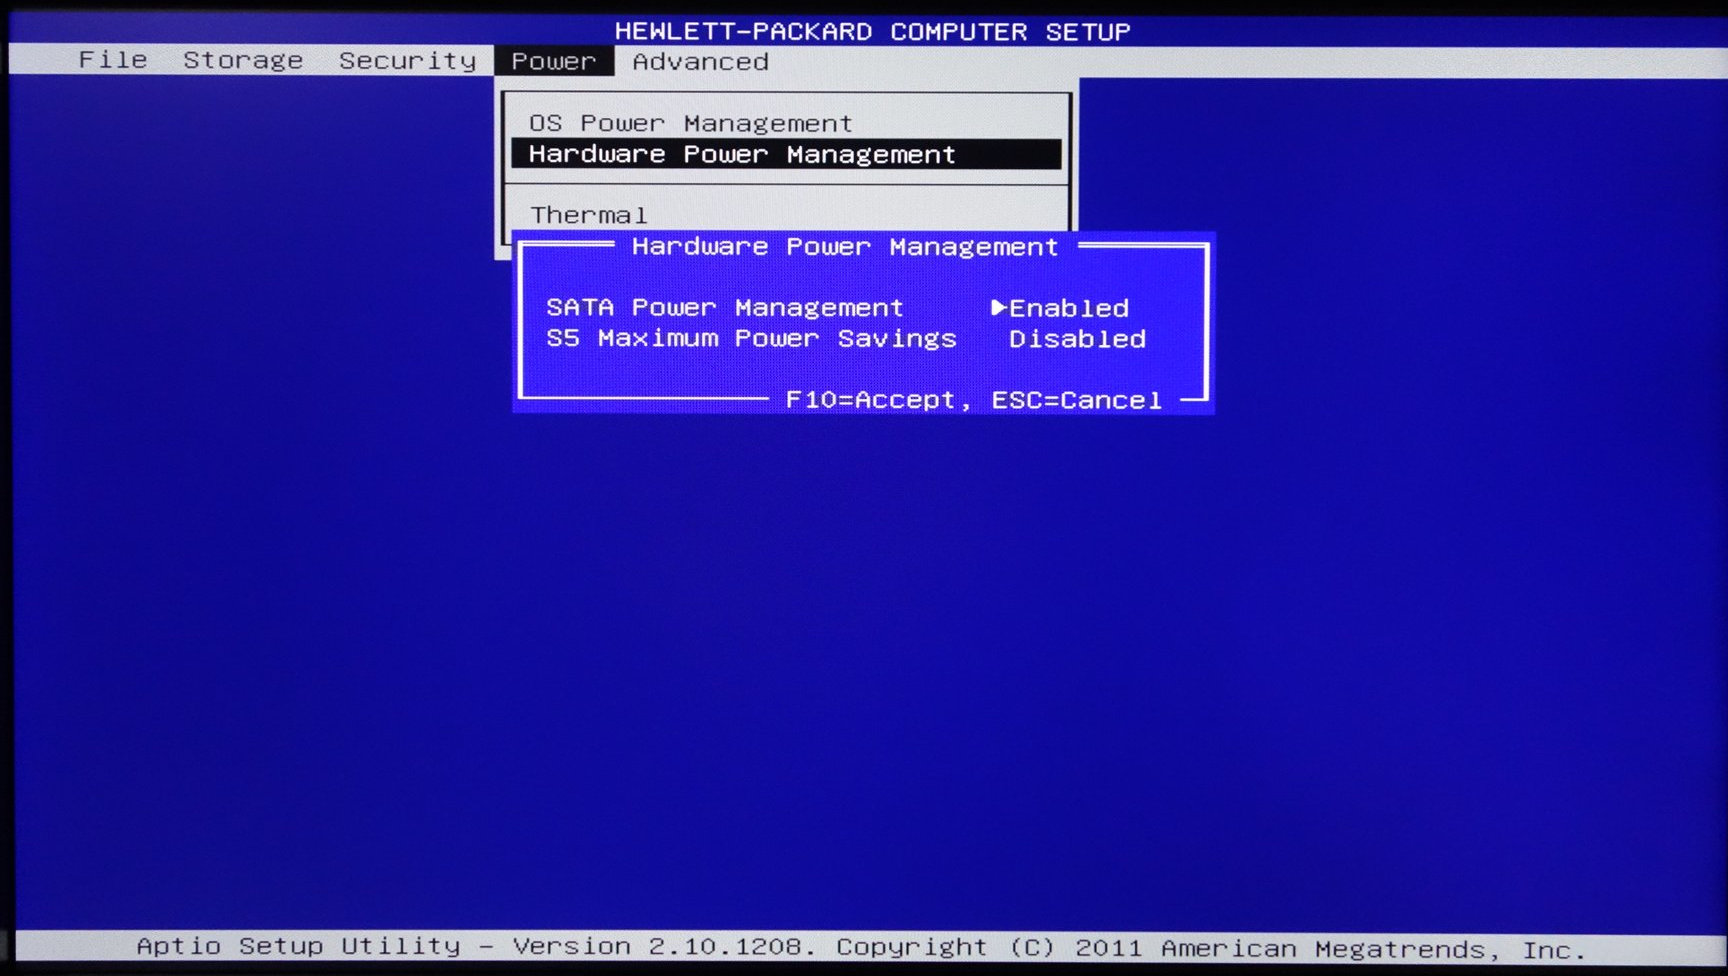
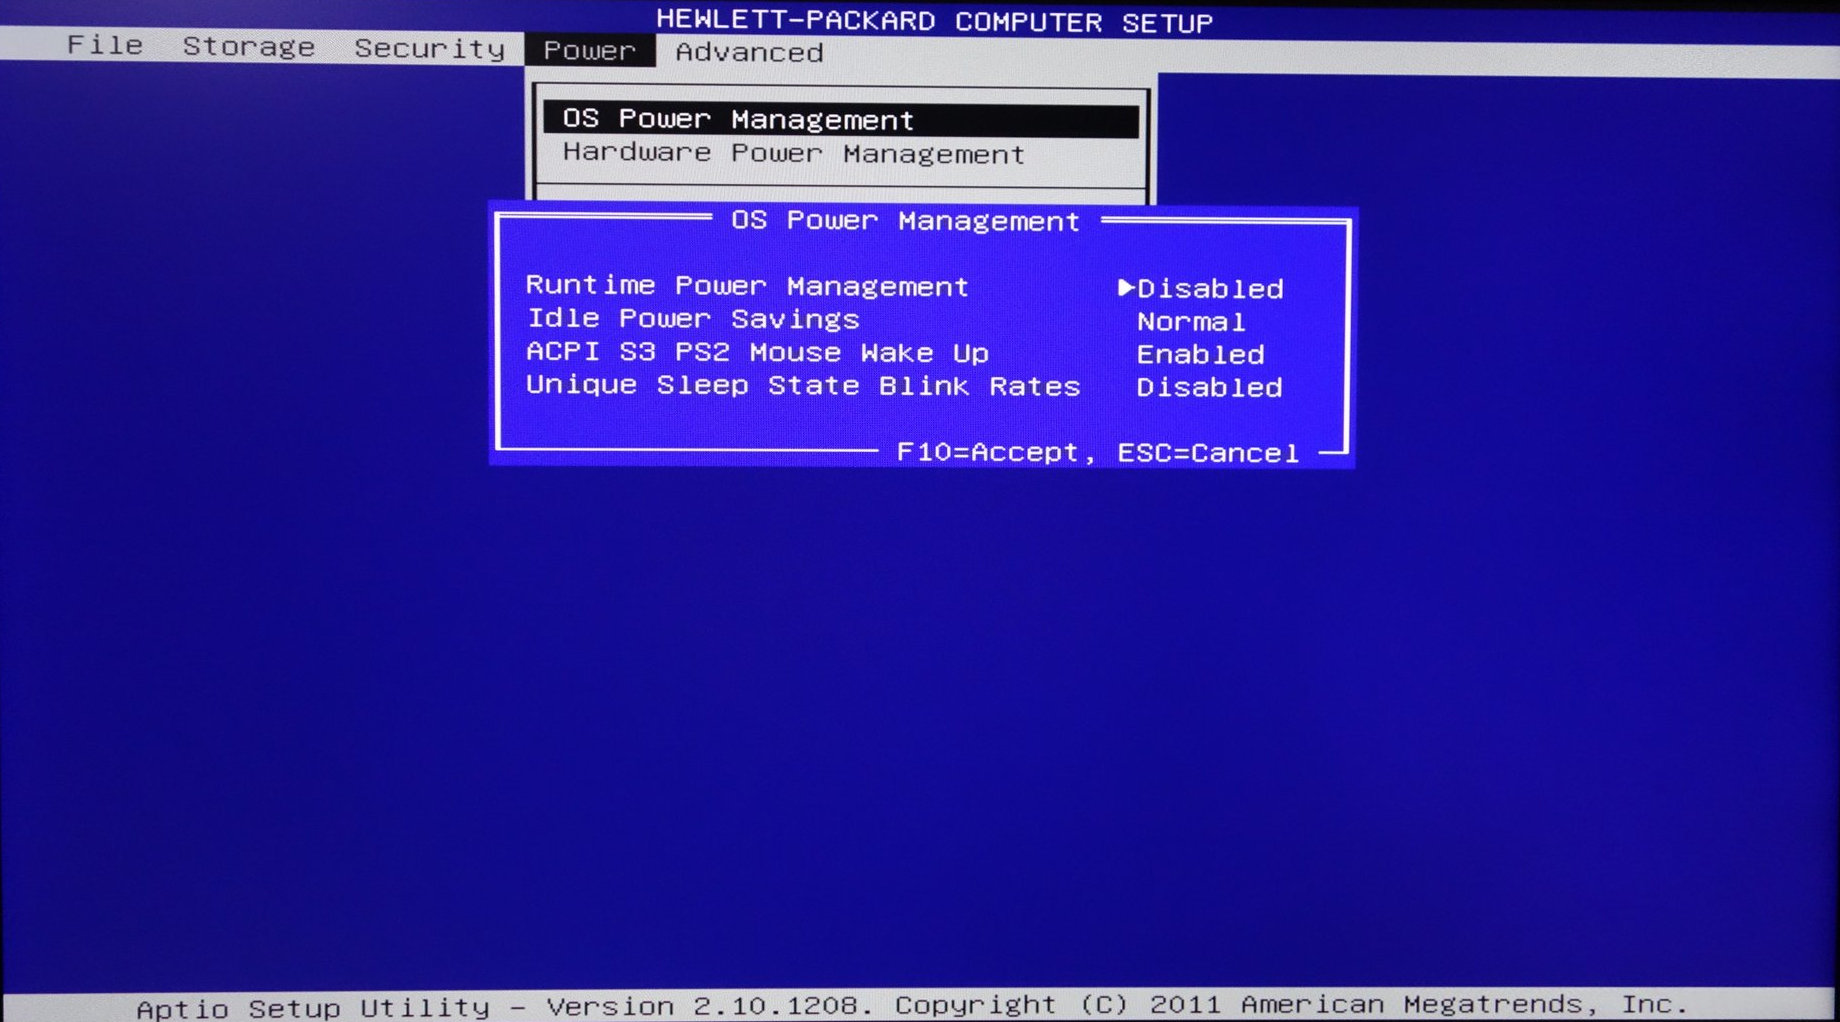
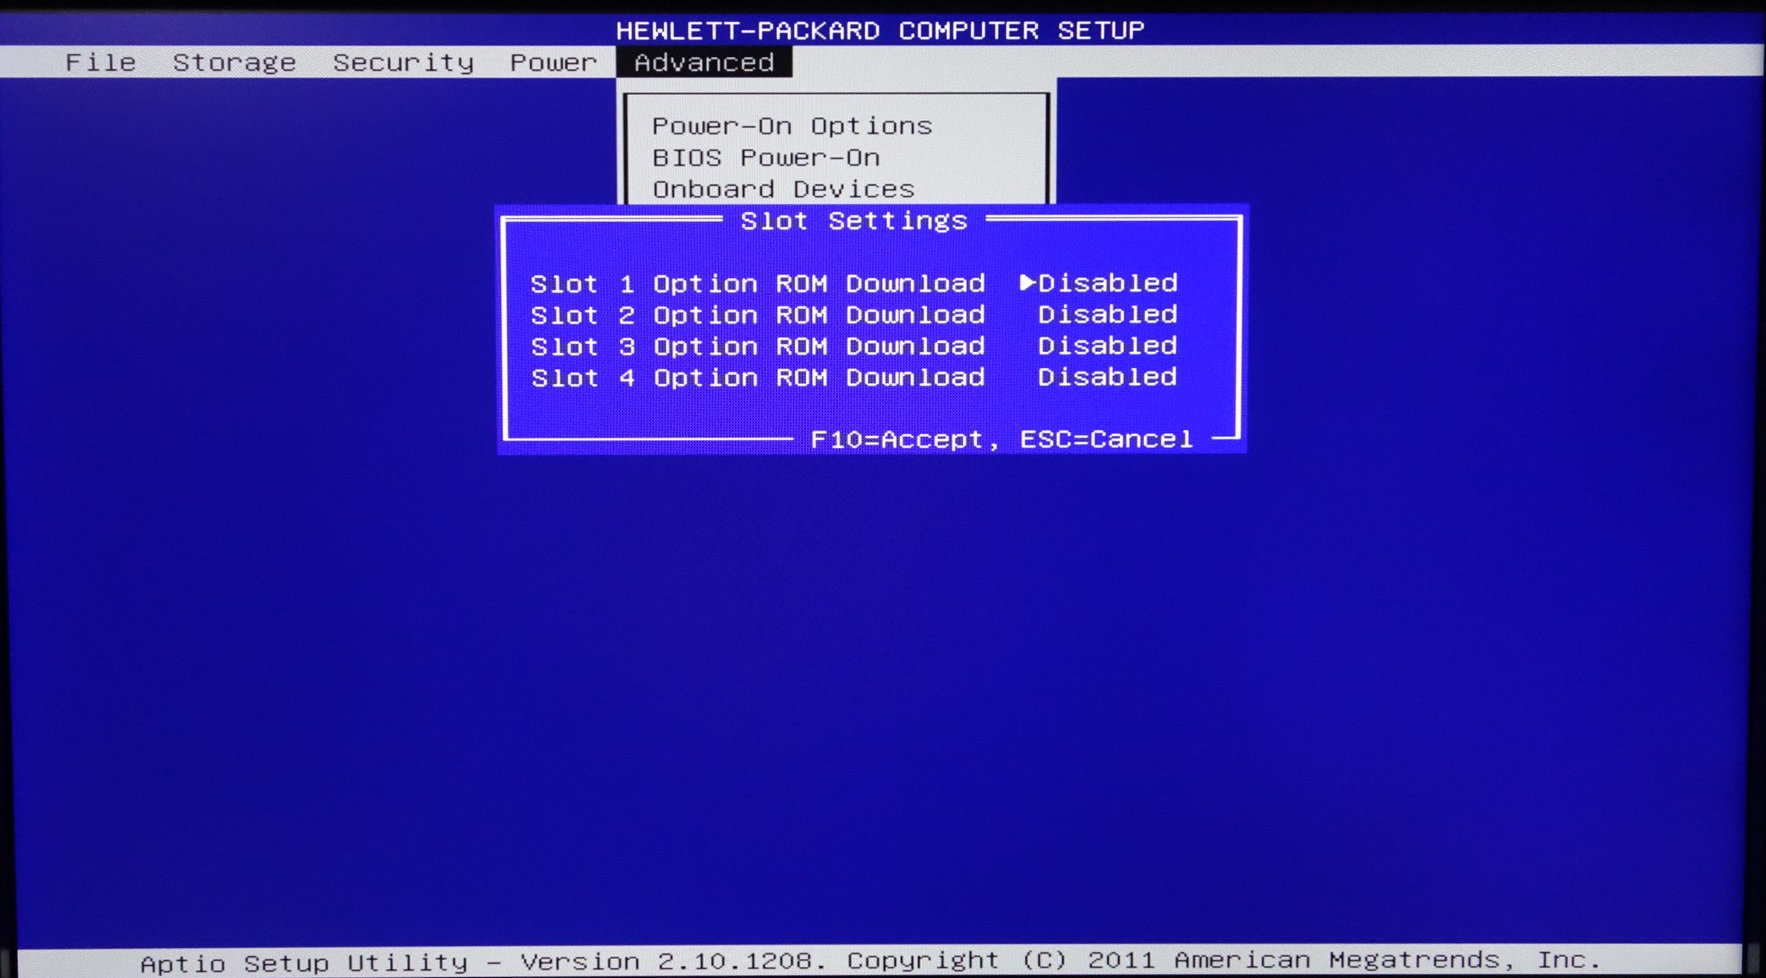
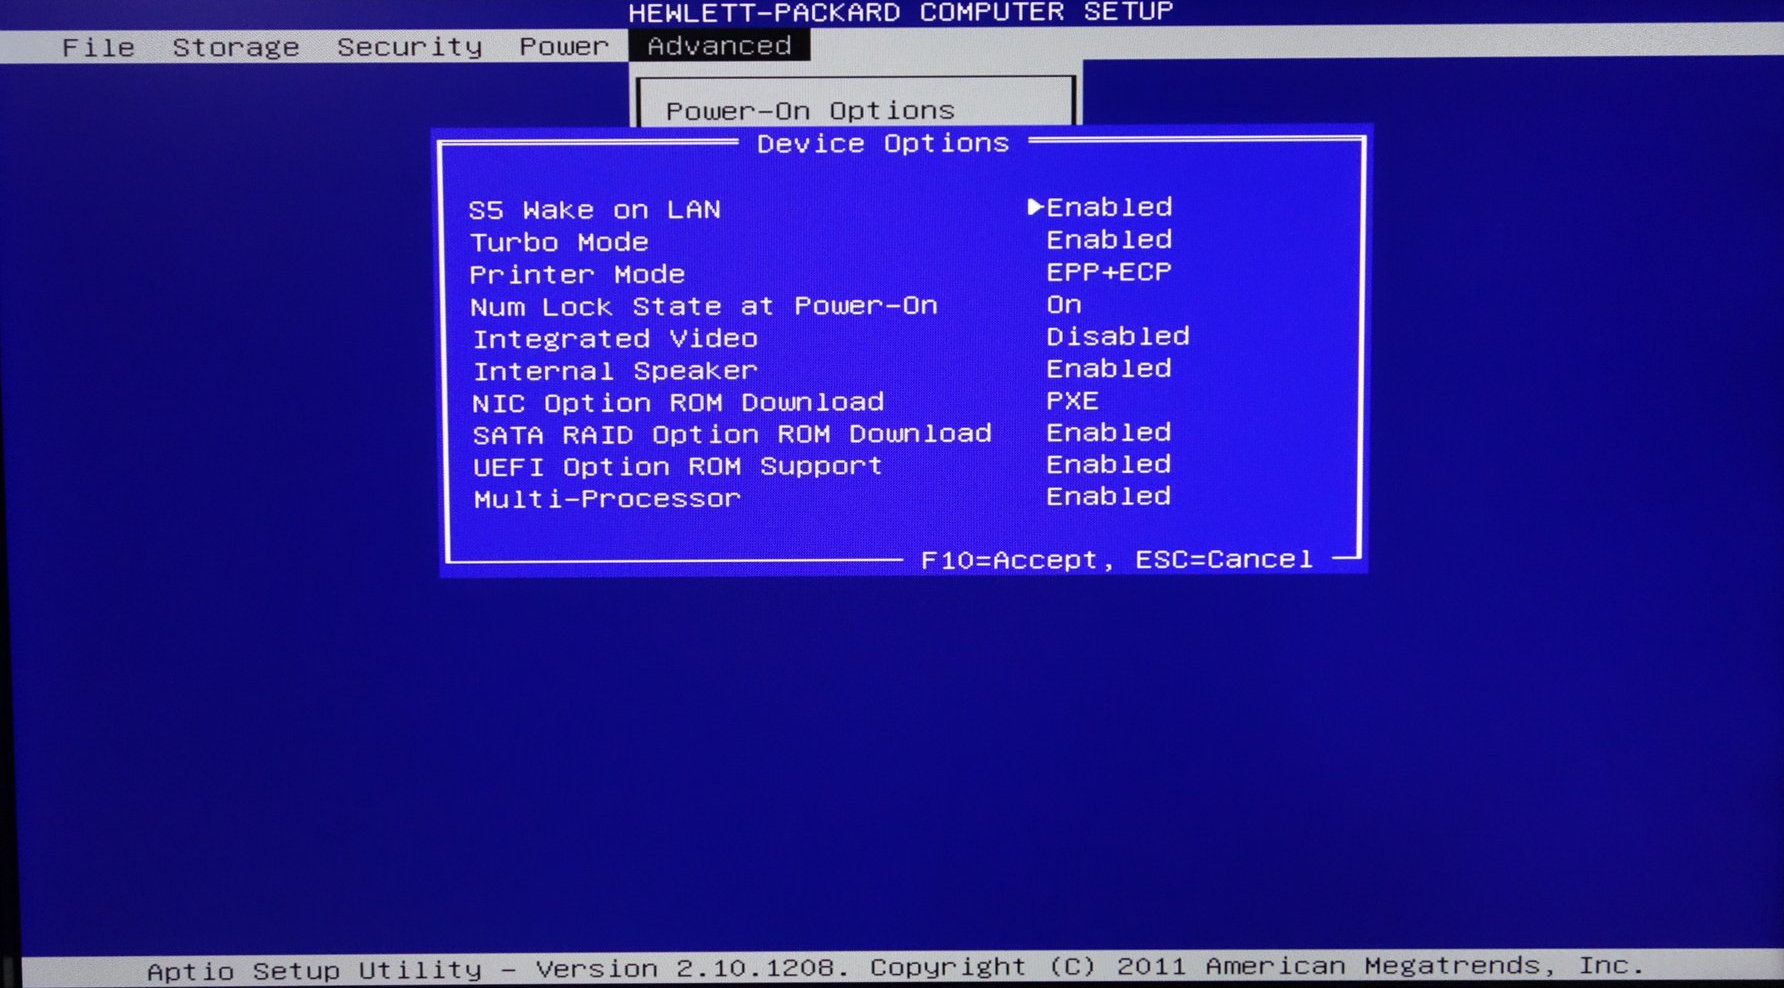
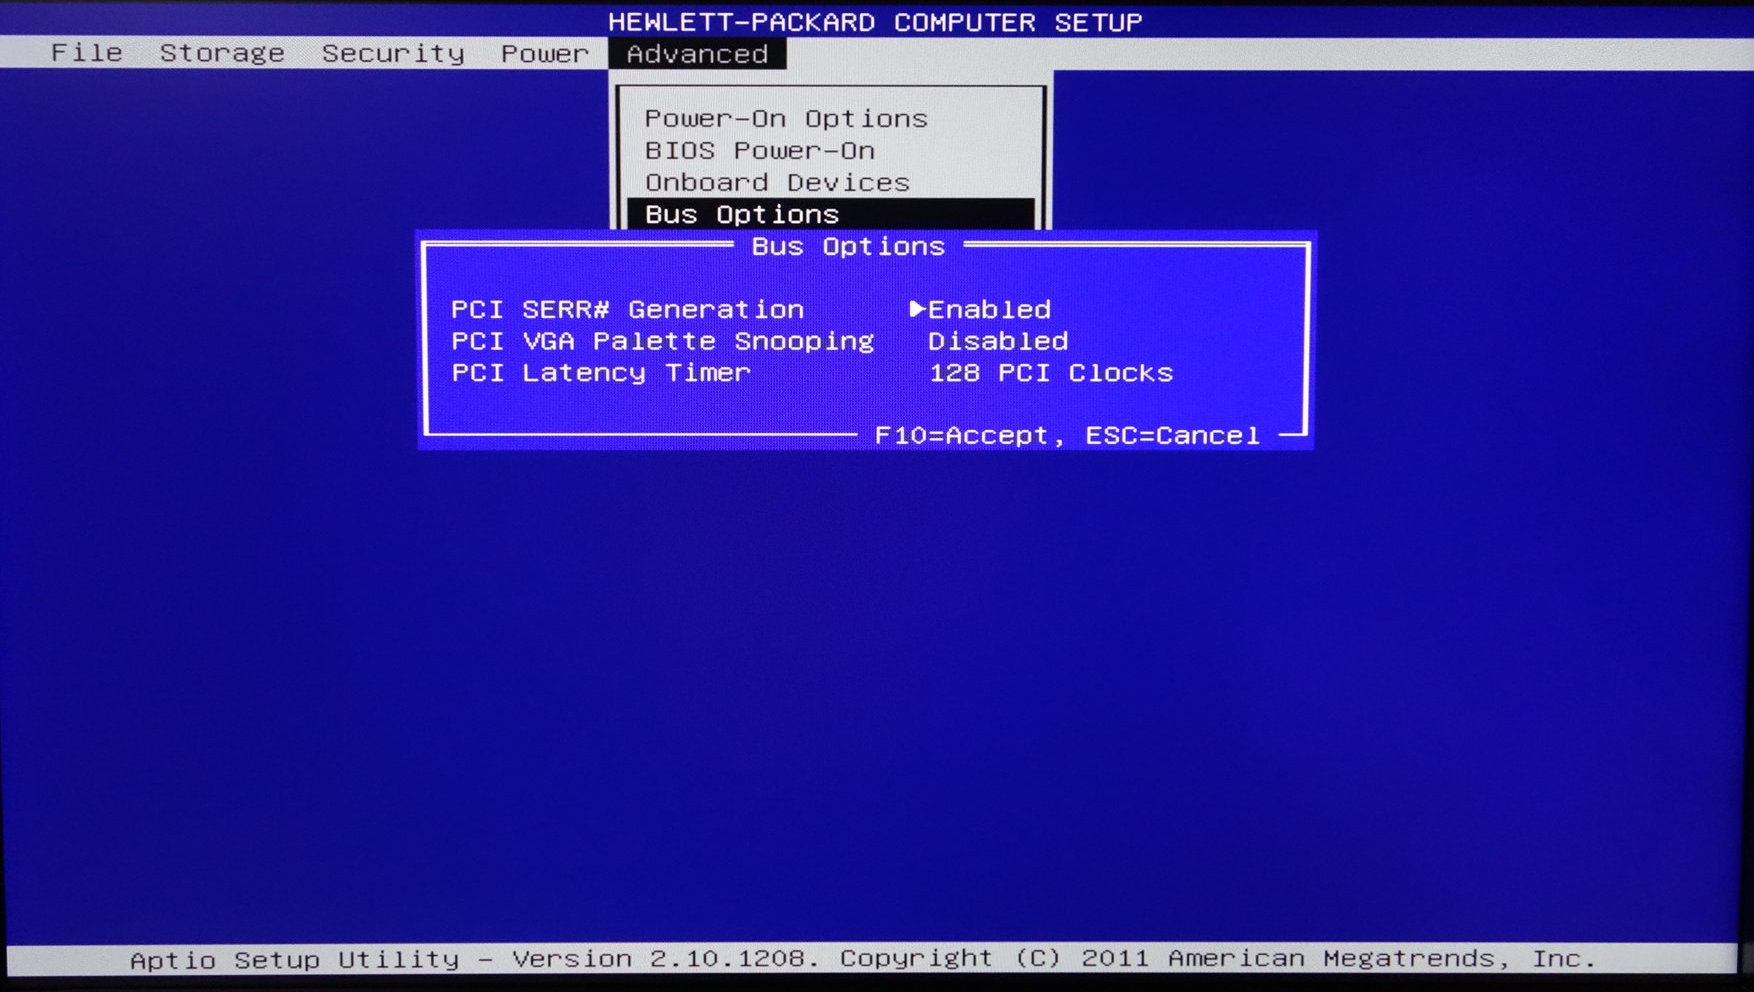
Puzzled, I first updated the BIOS to the latest available version on HP’s site. Still no luck. I ended up playing with the BIOS settings. I’m not sure which one exactly did the trick - but that finally worked! Here’s some screenshots in case anyone ever tries to build their own Frankenstein gaming PC based on that same model.

At this stage, I consider myself very lucky: everything worked out, while it was definitely more work than expected. The dimensions were just right, the power supply could handle the load, and the BIOS was compatible with a video card that was never made to fit in this thing. You gotta love standards.
So we are half way there. The unit works, but how good is it to game anyway? I have just installed Ubuntu 20.04 (Nvidia drivers 440.x by default) and a few games from my Steam Library, and here’s a quick report in video. (and the YouTube backup link if the below one does not show up)
https://peertube.linuxrocks.online/w/fgWwTLgkkz1MkRshf7vewQ
By the way I installed MangoHud to do proper benchmarks for each game mentioned below so that you have actual evidence for the claimed results.
- A Hat in Time (Proton): 30 fps, somewhere between medium and high settings
- Dragon’s Dogma: Dark Arisen(Proton): 30 fps with peaks at 60 fps in less busy scenes in high settings.
- Streets of Rage 4 (Proton): no surprise here but 60 fps.
- Rocket League(Proton): 60 fps with settings maxed out but texture size reduced a bit.
- Doom 2016 (Proton): 40~50 fps in medium settings, resulting in a solid 30 fps with Vsync enabled.
- Dirt 4 (Linux client): 30-60 fps depending on the type of the race and the POV at medium settings.
- Ni no Kuni II(Proton): 30 fps at custom settings in between low and medium. Still looks great.
Not bad for 100 USD piece of junk glued together! You can actually play a lot of games and get 30 fps performance, without having games looking like complete garbage either - we don’t have to use the lowest of the low settings.
I have to say, I am actually very impressed by the low end. I had very low expectations before trying this experiment, and I am now convinced that even the low end hardware on PC is a very good choice even if you don’t have much cash to spare, as used parts will be very affordable.
The best part of this whole experiment was the journey: checking all sorts of hardware at different price points, staying on budget, and working through the difficulties of making the unit boot and run as expected. That was probably just as fun as playing games at the very end.