
How-To: Stream Your PS4 Games To Your Linux PC
Finally brushed the dust off your PS4 after a year or two of putting it on the back shelf just so you could play the Final Fantasy VII Remake?
So did I.
If you wanted to remotely control your PS4 via Linux, Mac, Windows, or even Android, that’s possible thanks to the open-source Chiaki. This can save some time for those of us who don’t want to have to constantly switch connections between the console and our PC, or have our console put in a room other than the one our PC is in. Here’s a guide to getting it all set up. It won’t be that difficult.
Download and Configure Chiaki
Chiaki for Linux is available as an AppImage, so getting it to run across multiple distributions is easy. Download the AppImage from the releases section, put the file in a convenient location, open bash, then navigate to the directory containing the file. Mark it as executable with:
chmod +x Chiaki-v<version_number>-Linux-x86_64.AppImageReplace <version_number> with the version you downloaded. At the time of writing this guide, 1.1.3 is the latest. Then run it by simply entering:
./Chiaki-v<version_number>-Linux-x86_64.AppImageOr double-click the file with your file manager. Chiaki now shows up:
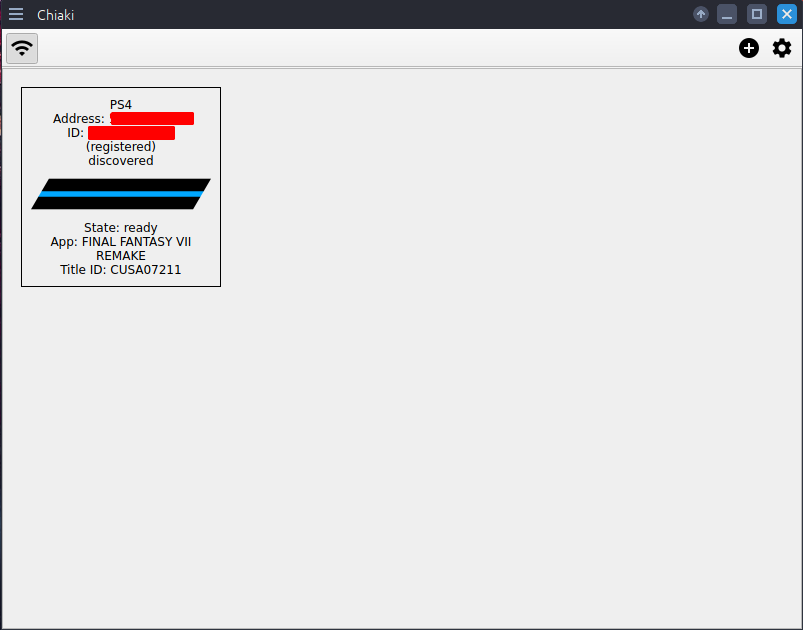
If your PS4 is set as discoverable, it will automatically show up in the list. If not, we’ll have to add the PS4 manually. Click the gear icon on the top-right corner.
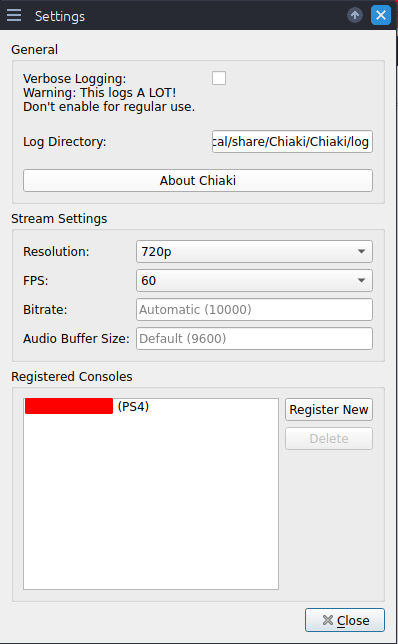
From here, we can configure a few of our streaming settings, including the resolution and framerate. Unfortunately, the resolution can only be set to 720p max on the standard PS4 model; the PS4 Pro can output 1080p. To add and register a new console, select “Register New”.
Registering Your Console

You’ll need the IP address and PIN of your PlayStation 4, but don’t switch to it just yet; we can get the PSN Account-ID with our computer in the meantime.
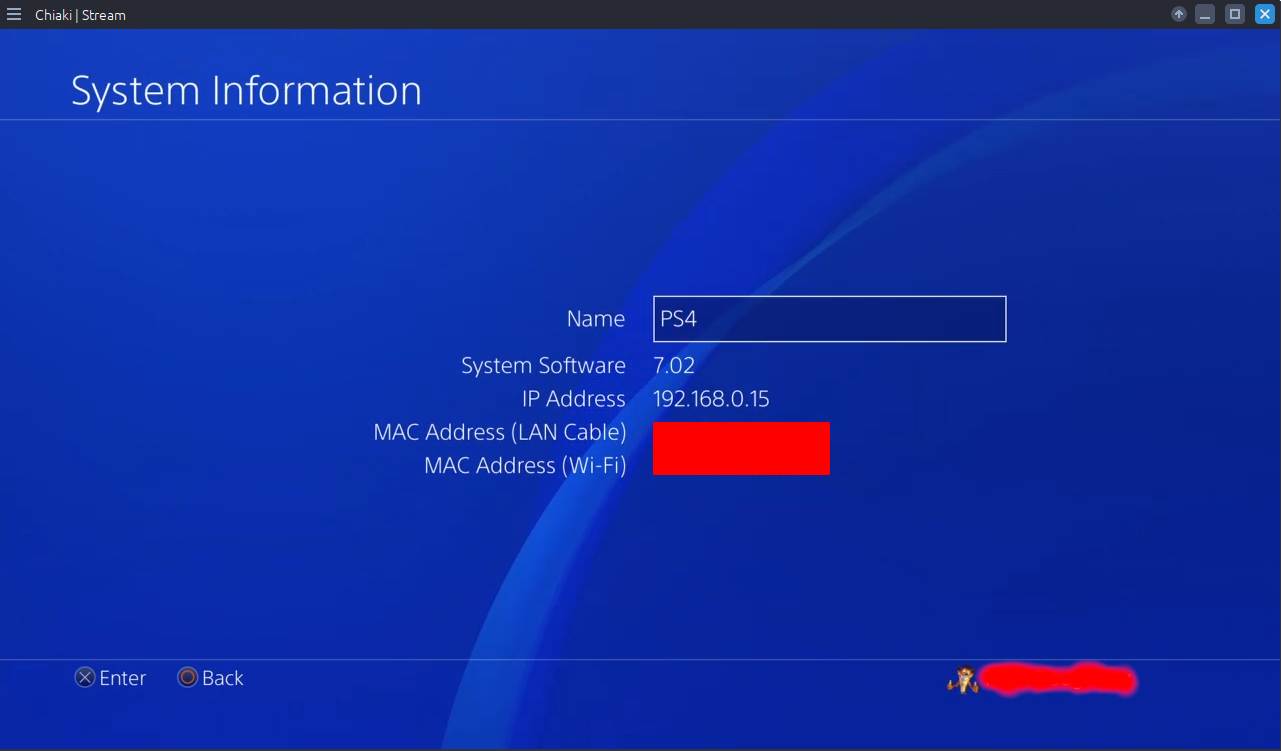
At the time of writing this, your PS4 is likely running firmware 7.0 or higher. If you’re not sure, you can check on the PS4 by going to Settings > System > System Information.
If the console is 7.0 or higher, we’ll need to get the account ID for your PSN account. Otherwise, you can simply enter the username of your PSN in the “PSN Online-ID” field.
To get the account ID, we’ll need to make use of a Python script. Download it with wget:
wget https://raw.githubusercontent.com/thestr4ng3r/chiaki/master/scripts/psn-account-id.pyOr simply save the page from your web browser as a Python file. Navigate to the directory containing this script with the terminal, then run it:
python psn-account-id.pyYou should now be getting a URL:
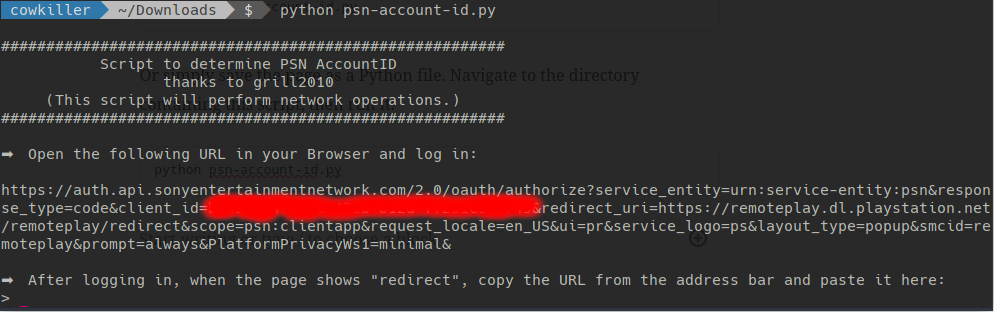
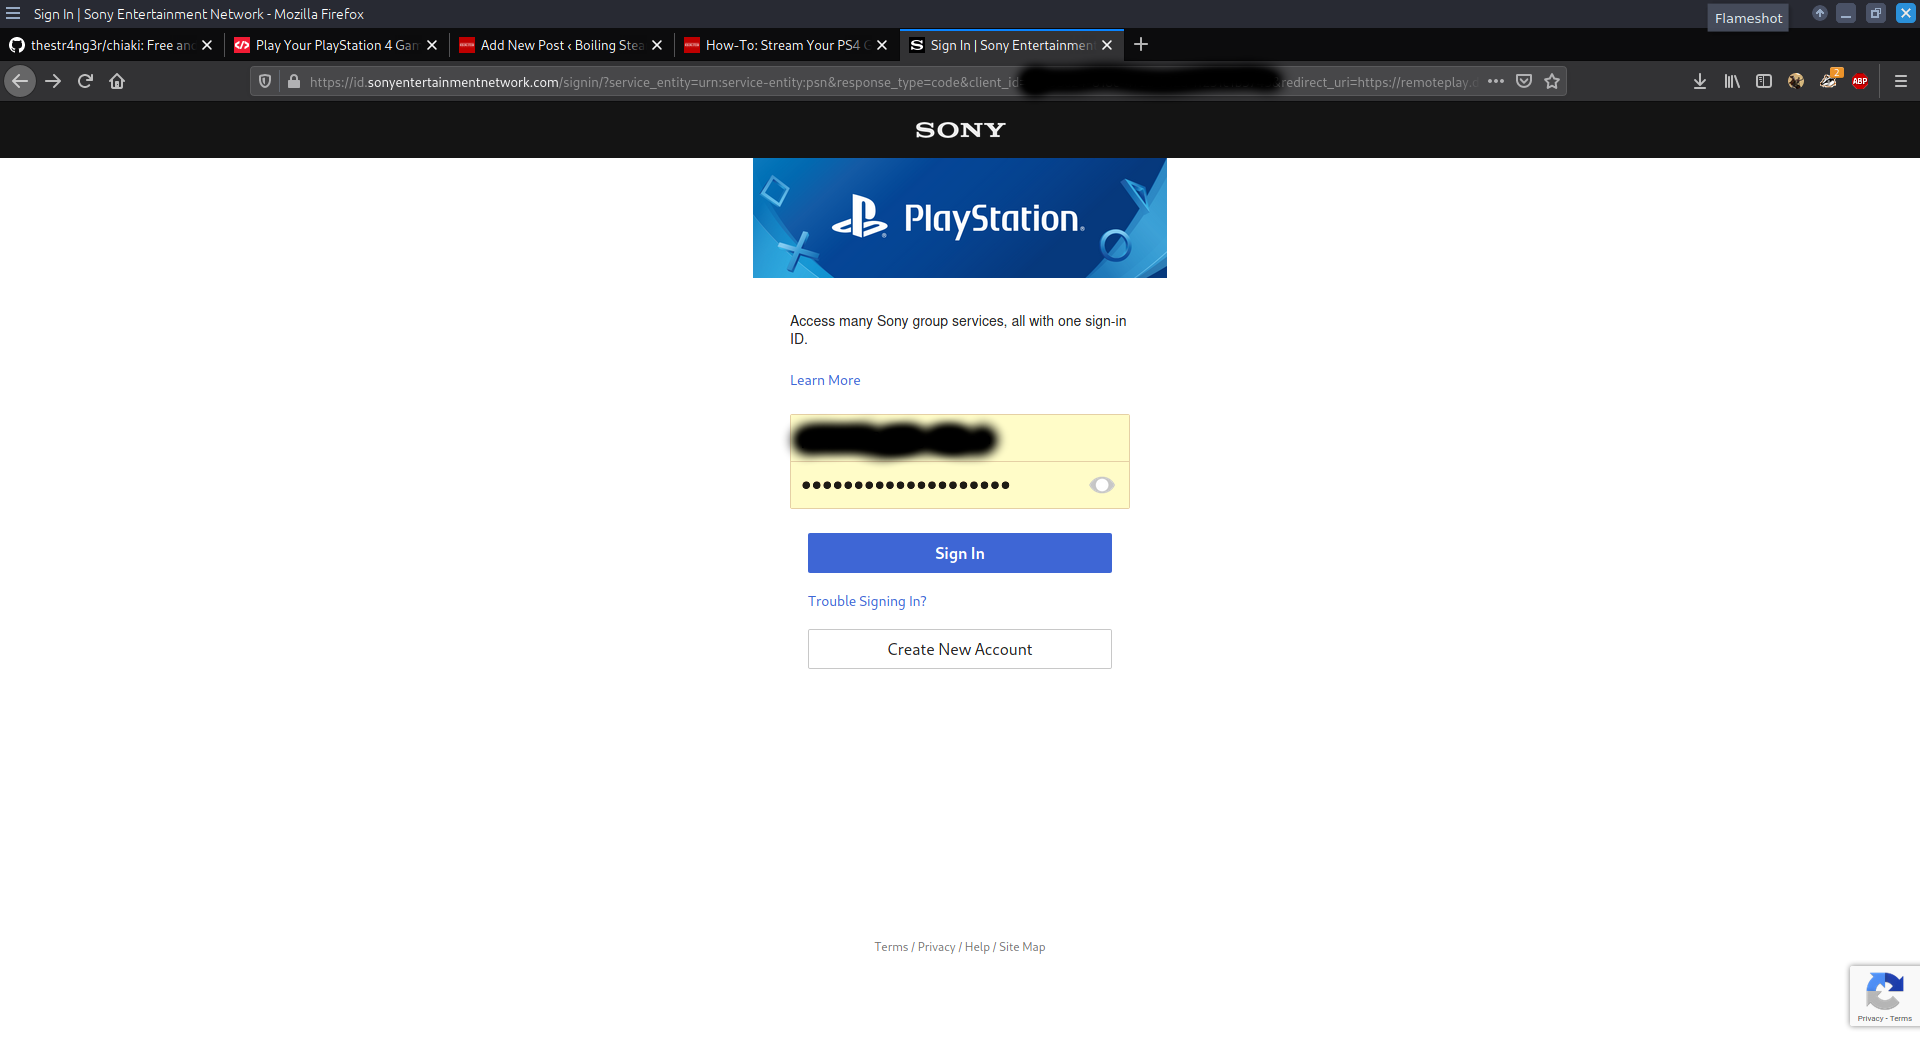
Copy that URL and paste it into your favorite web browser. This URL will direct you to the sign-in page for PSN. Enter your PSN credentials (bear in mind, this cannot be a child account; you’ll get an error trying to stream your PS4 later on) and then log in.
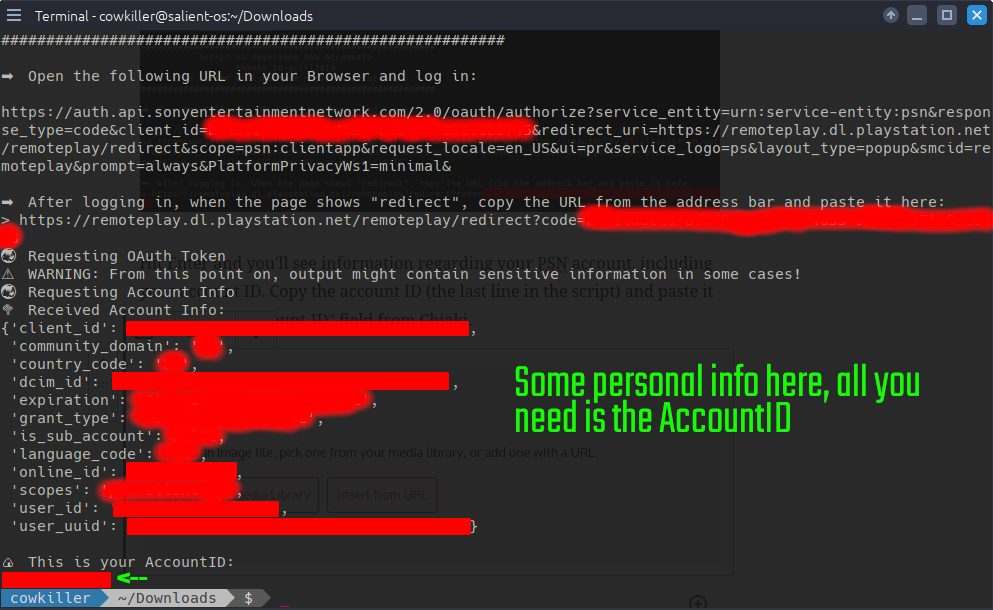
The web page will now simply say “redirect”. Copy the new URL from your browser and paste it back into the Python script:


Hit Enter and you’ll see information regarding your PSN account, including your account ID. Copy the account ID (the last line in the script) and paste it into the “PSN Account-ID” field from Chiaki.
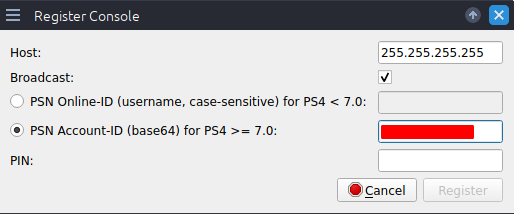
Now to get the IP address and PIN of our PS4. This will be a lot easier than getting the account ID. The IP address can be found in System Information, just like the firmware number. Typically in a home network, it should be something like 192.168.1.x. To get the PIN, in Settings go to Remote Play Connection Settings > Add Device (this would also be a good time to check the box for “Enable Remote Play” if it isn’t already).
You’ll get an eight-digit PIN number that you’ll need to use in five minutes or less; otherwise, the PIN will expire and the PS4 will generate a new one. Write both this and the IP address down, and, without leaving the PIN screen on the PS4, bring your attention back to Chiaki. Fill in the information in the appropriate fields. When you’re done, click “Register”.
The account ID and name of your console should now be listed under “Registered Consoles” in the Settings menu.
You’re done! Close the Settings menu and simply double-click on the icon to your registered console to start streaming.
The XMB can be navigated via the arrow keys on your keyboard. Enter replicates the Cross button, Backspace replicates Circle, and Escape brings you to the XMB while you’re playing a game. To use your DualShock 4, you’ll have to first disconnect/unpair it from the PS4 and then connect it to your PC with a micro-USB cable. Bluetooth also works; just make sure the DS4 is paired to your PC and not your PS4.
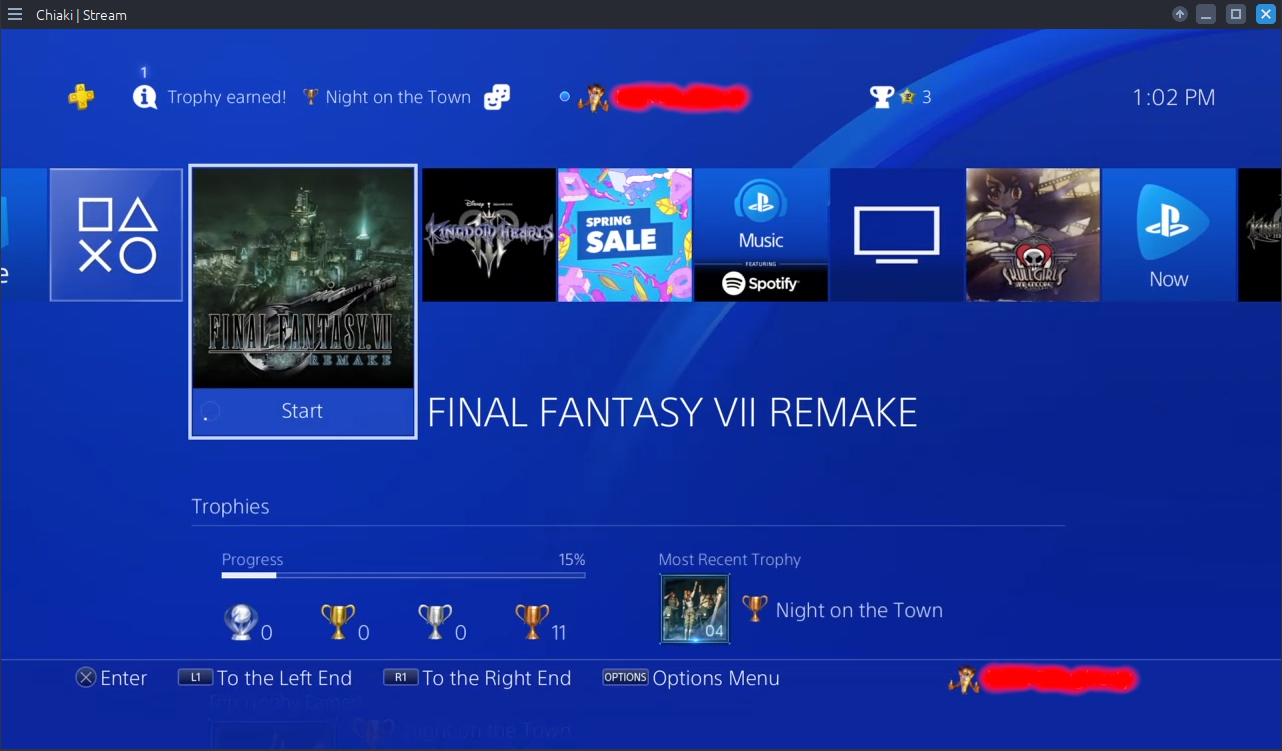
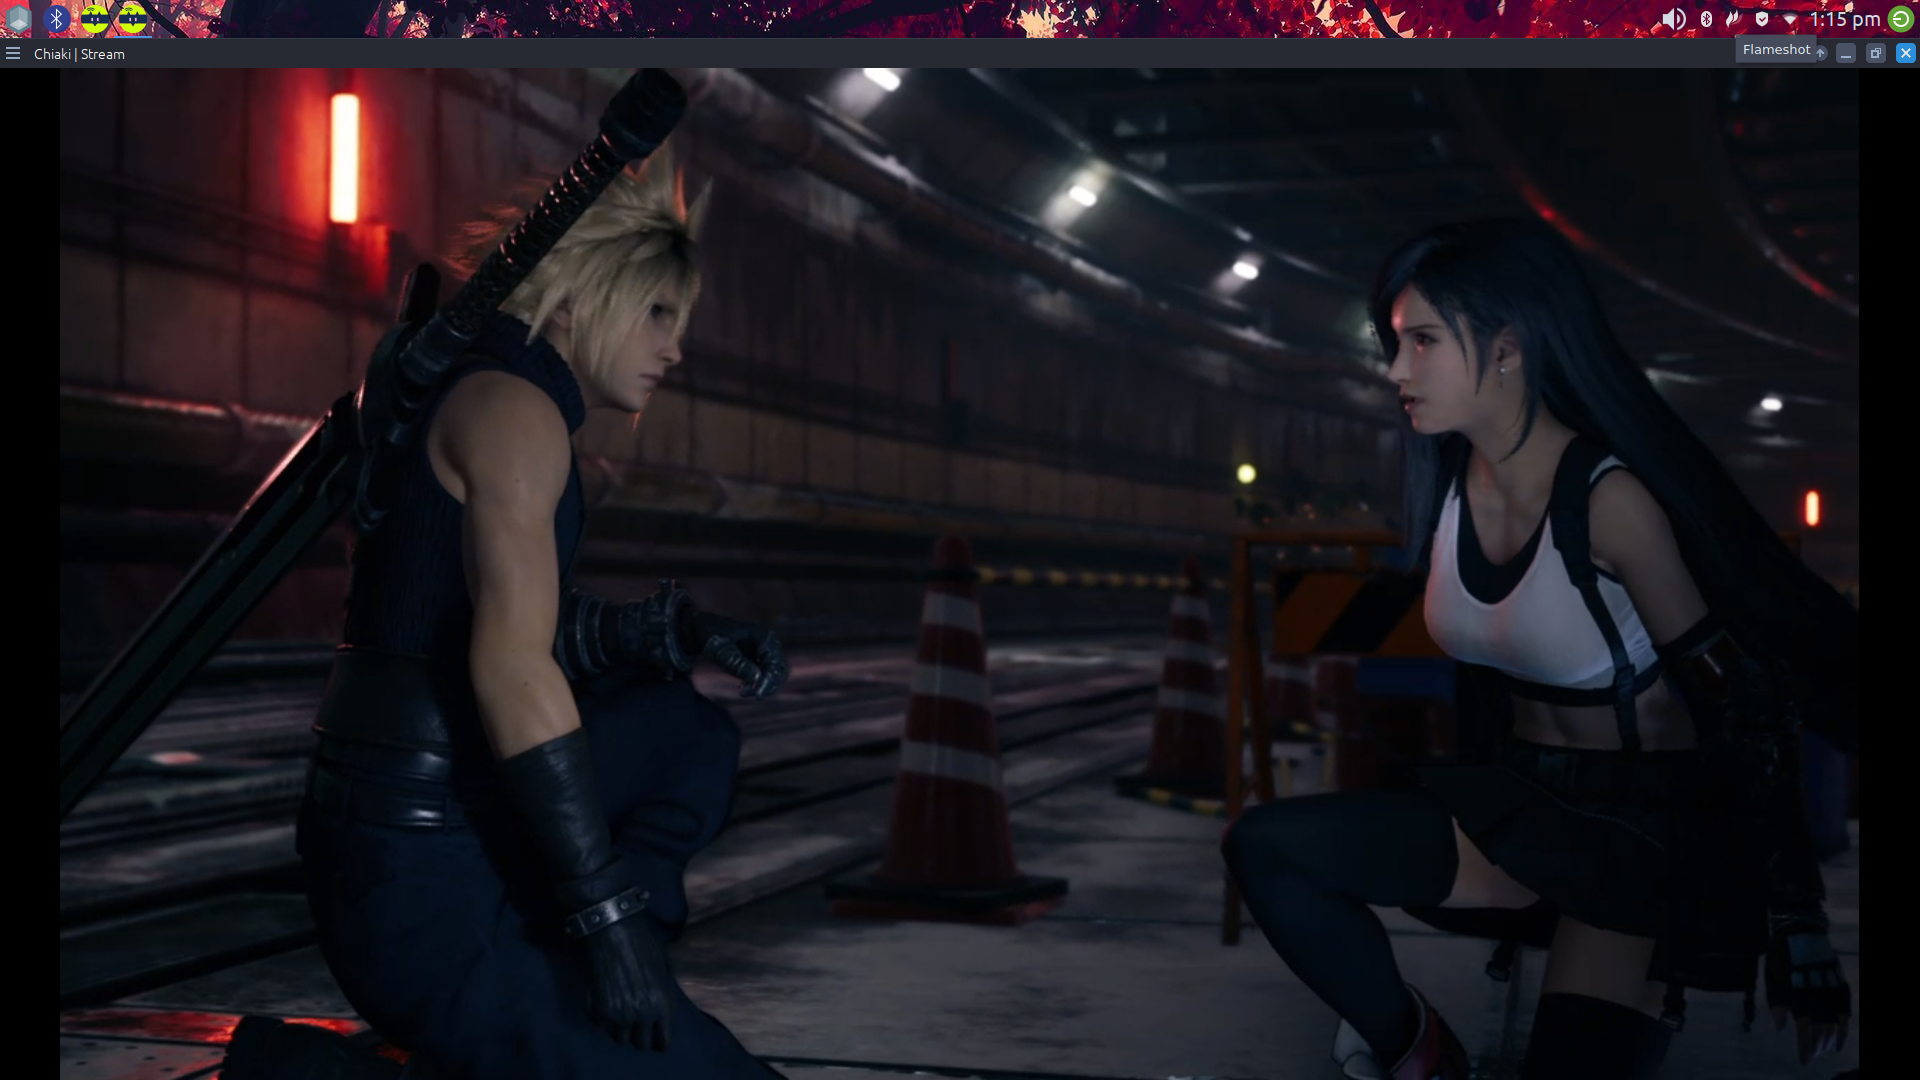
Enjoy! Here’s some screenshots of FFVII Remake to show off:
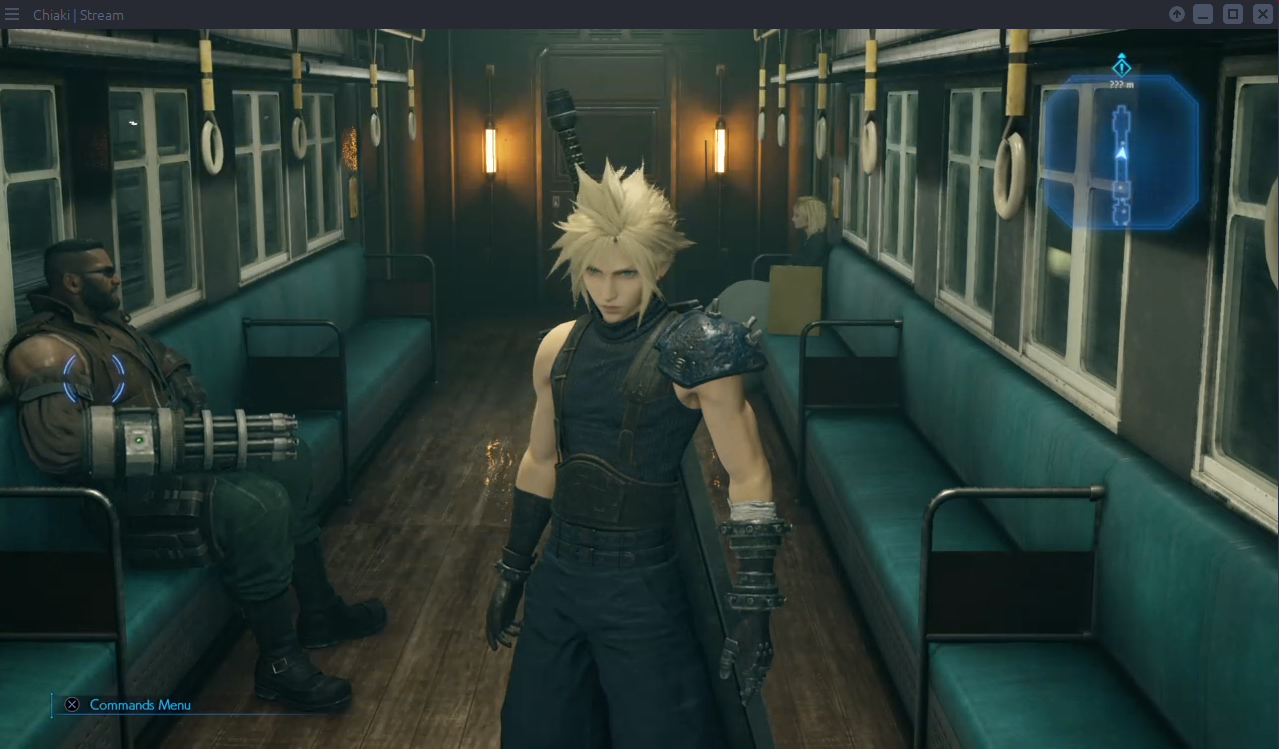
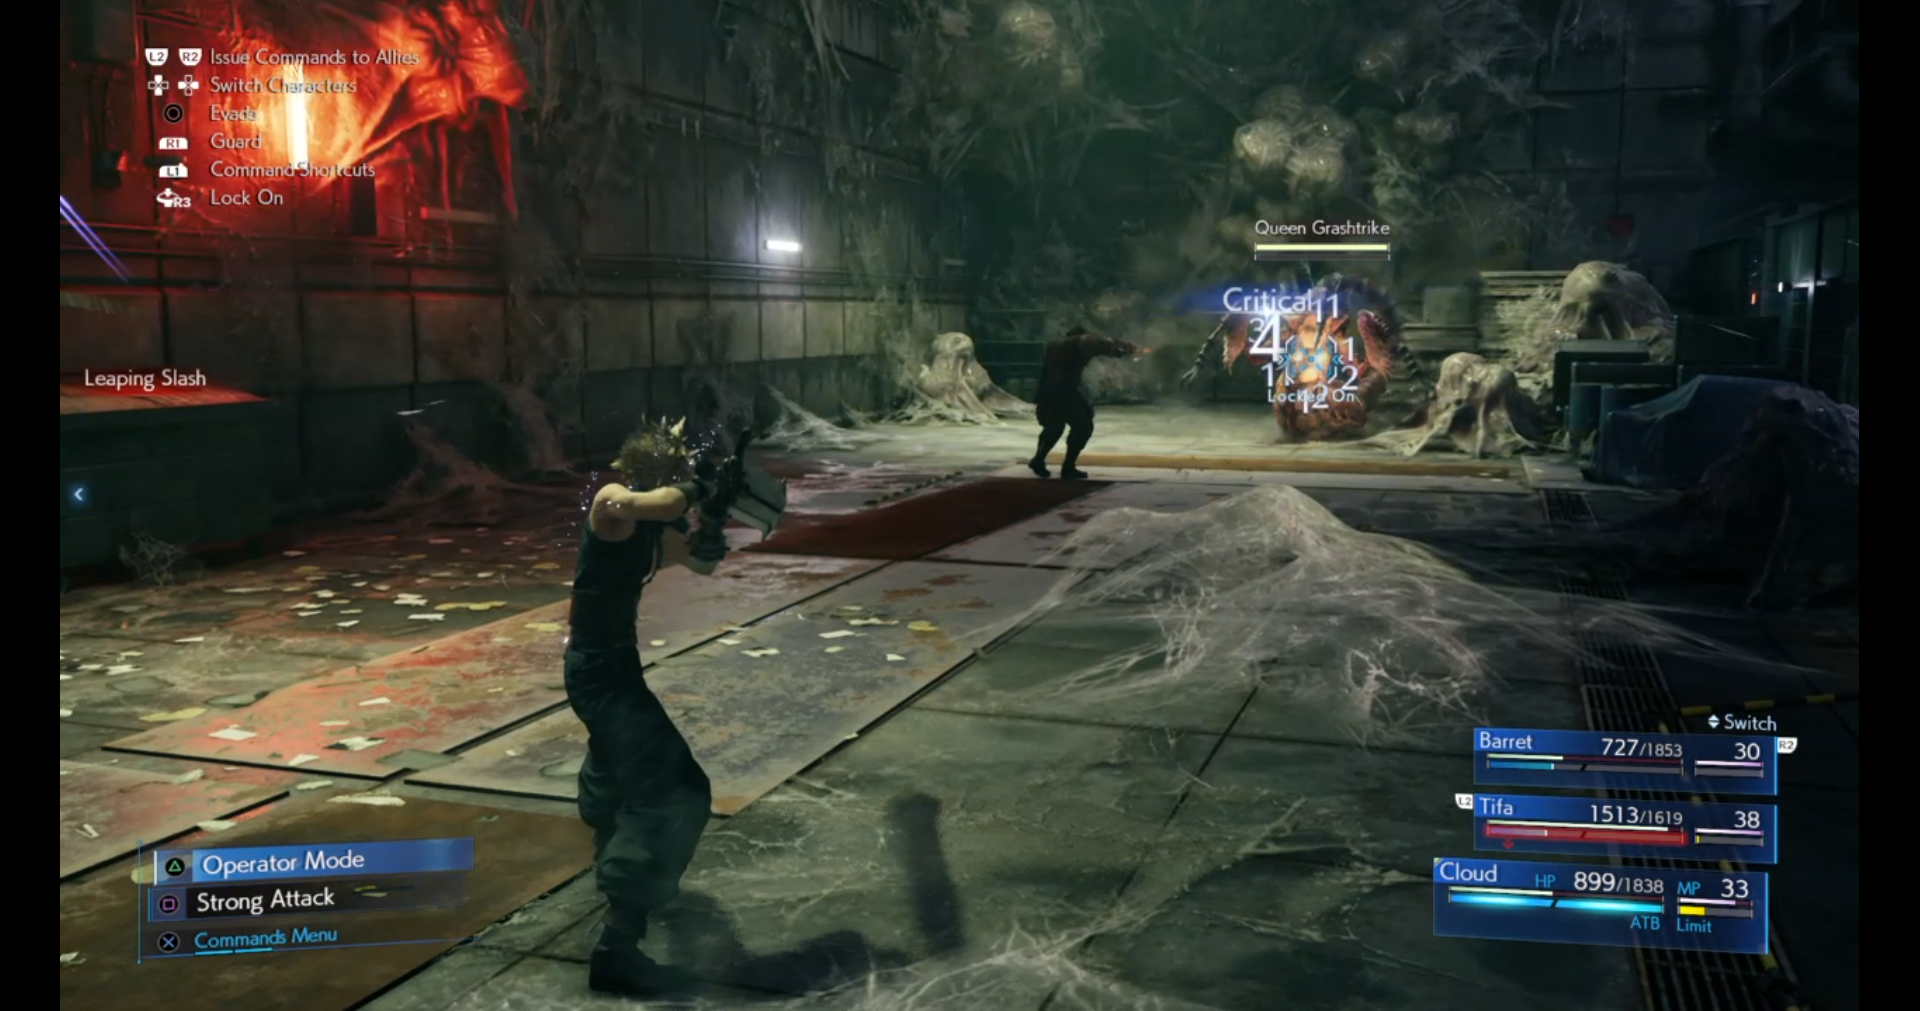 Oh yeah kid!
Some Tips/Things To Keep In Mind
- I have had some serious lag and stuttering when connecting my PS4 to Wi-Fi. The streaming quality was much more stable using an Ethernet connection. If you don’t have easy access to your router, you can connect an Ethernet cable to the PS4 using a powerline Ethernet adapter.
- It might be worth assigning a static IP address to your console, in the event the DHCP lease on it expires and you’ll need to update Chiaki with the new IP.
- I haven’t noticed any drop in latency using the DS4 in Bluetooth mode compared to using a direct USB connection. Go ahead and play wirelessly if you like.
- This is probably an obvious one, but the streaming quality isn’t as good as playing on the PS4 itself
- There’s no trackpad functionality. However, trackpad click can be mimicked by pressing “T” on the keyboard
- No vibration feature
- No fullscreen mode
- Remote Play is possible outside of your LAN; you just need to forward ports 9295 (TCP), 9296 (UDP) and 9297 (UDP) to the IP address of your console. More on this below.
Setting Up WAN Streaming
If you want to stream, say, from your work place during your coffee break using your laptop or Android device, that’s possible with port forwarding. Here’s a brief tutorial on how to set up port forwarding on your router.
Note: as I haven’t tested WAN myself, you may need to look to someone else with more experience if you run into any issues.
Open your web browser and enter the IP address of your router. It’s typically 192.168.1.1 if you haven’t messed with any of your network settings.
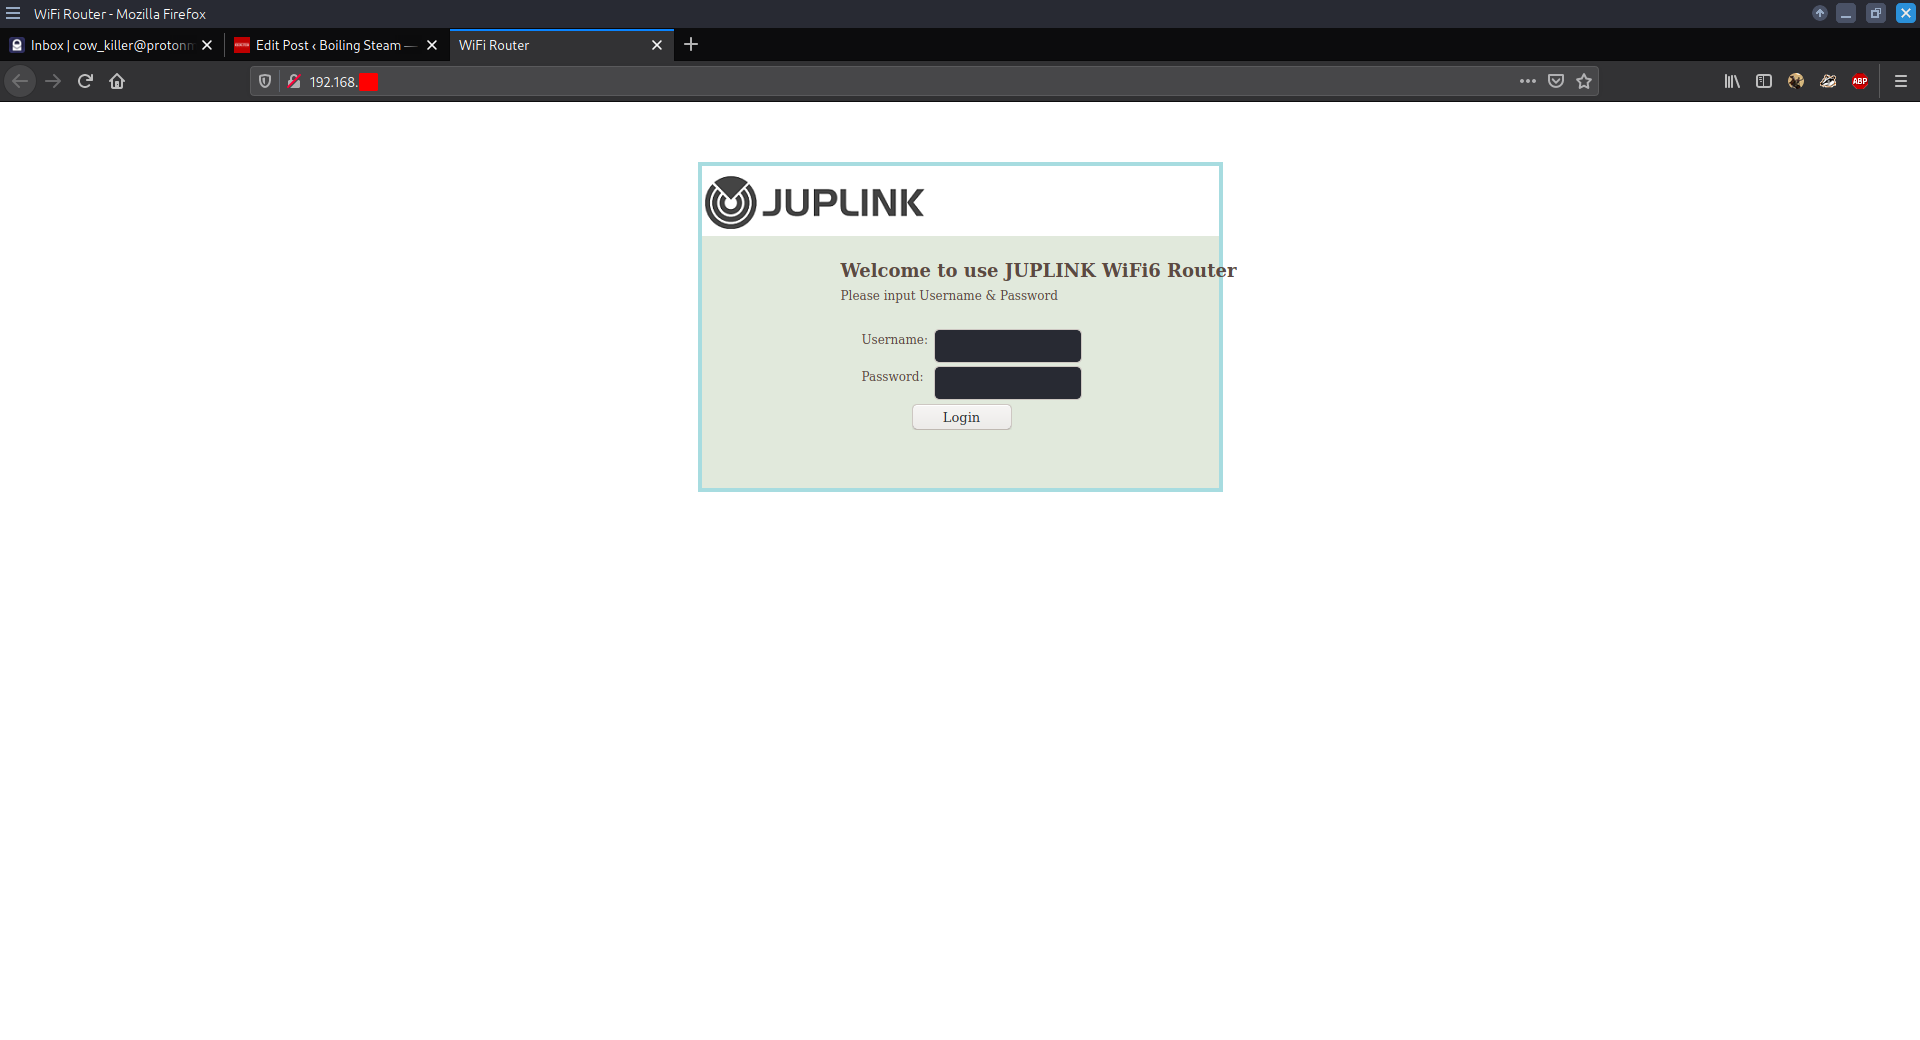
Enter your router login credentials to access router settings. The default login will differ depending on the make of your router – a quick DuckDuckGo search of your make and model will reveal it, if you haven’t changed these already.
Somewhere in the interface, there should be an option to set up port forwarding. With my JUPLINK router, it’s in Application > Port Forwarding.**
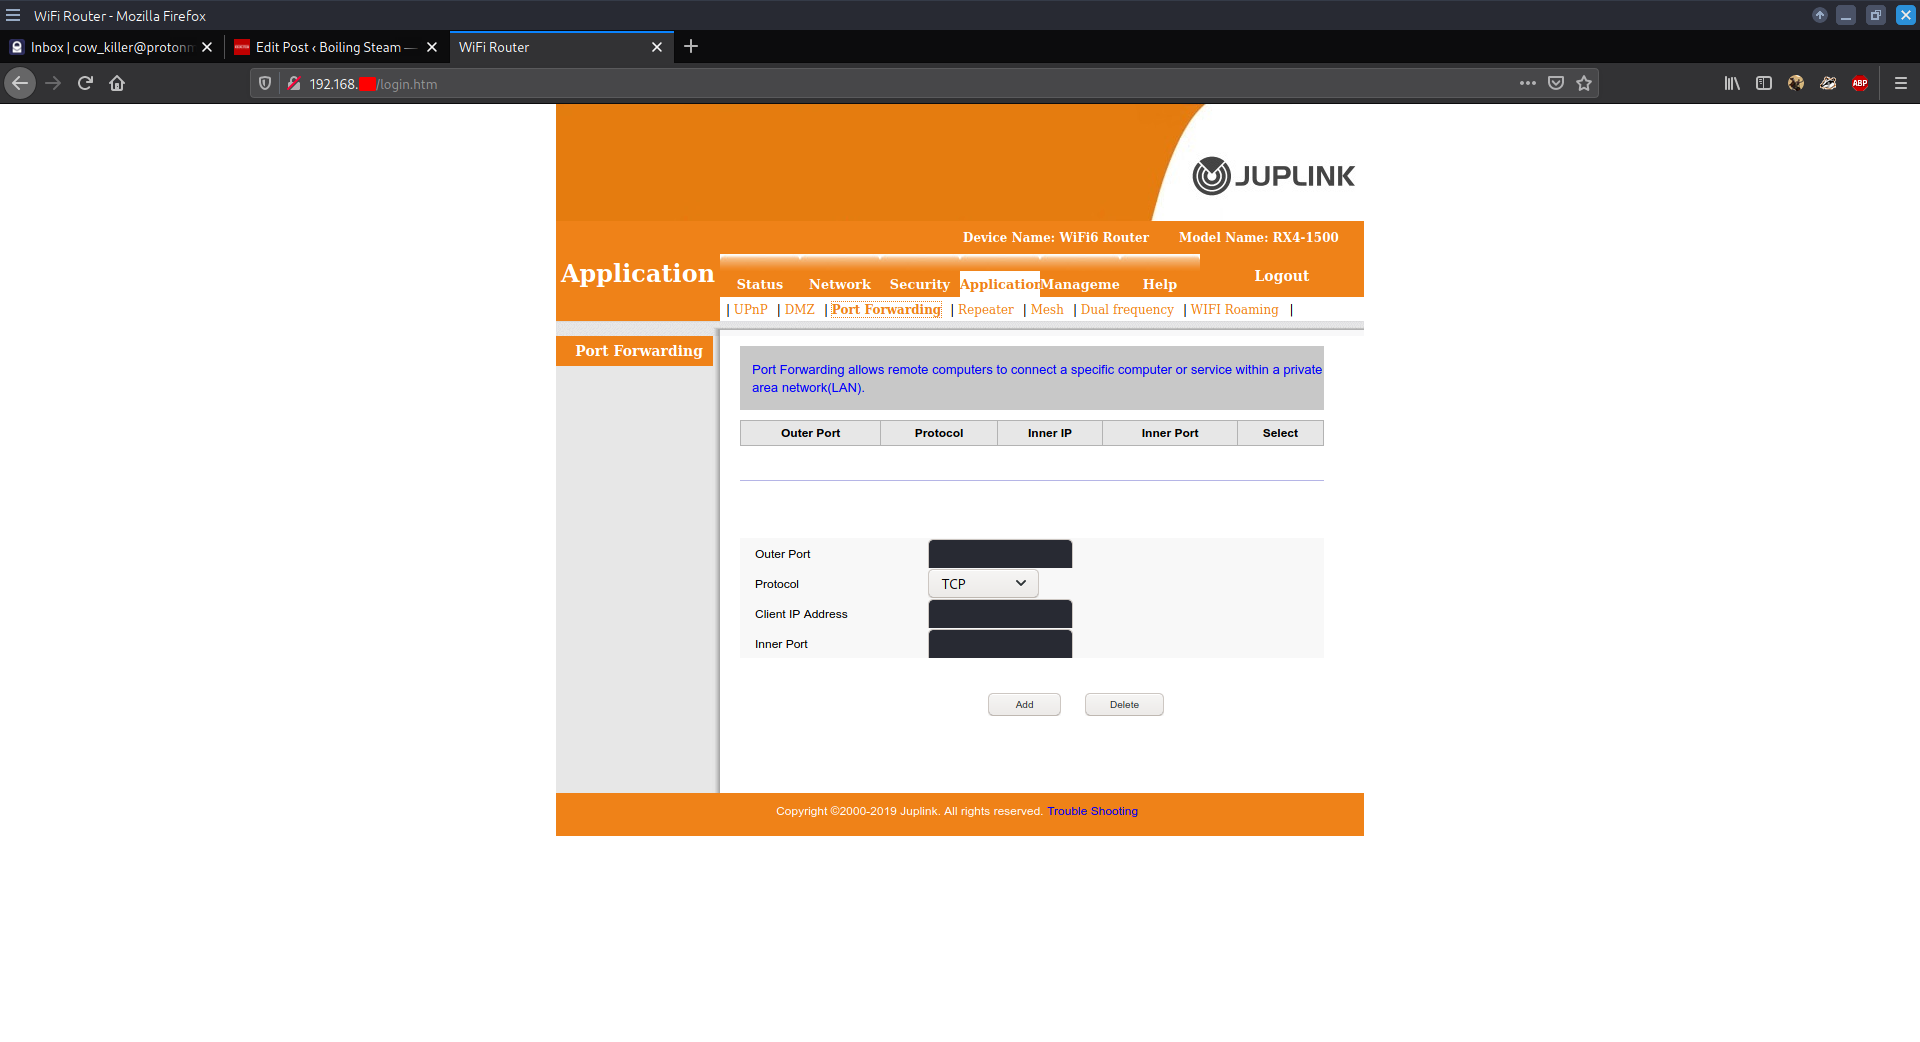
We’ll need three ports to forward to the local IP address of our console:
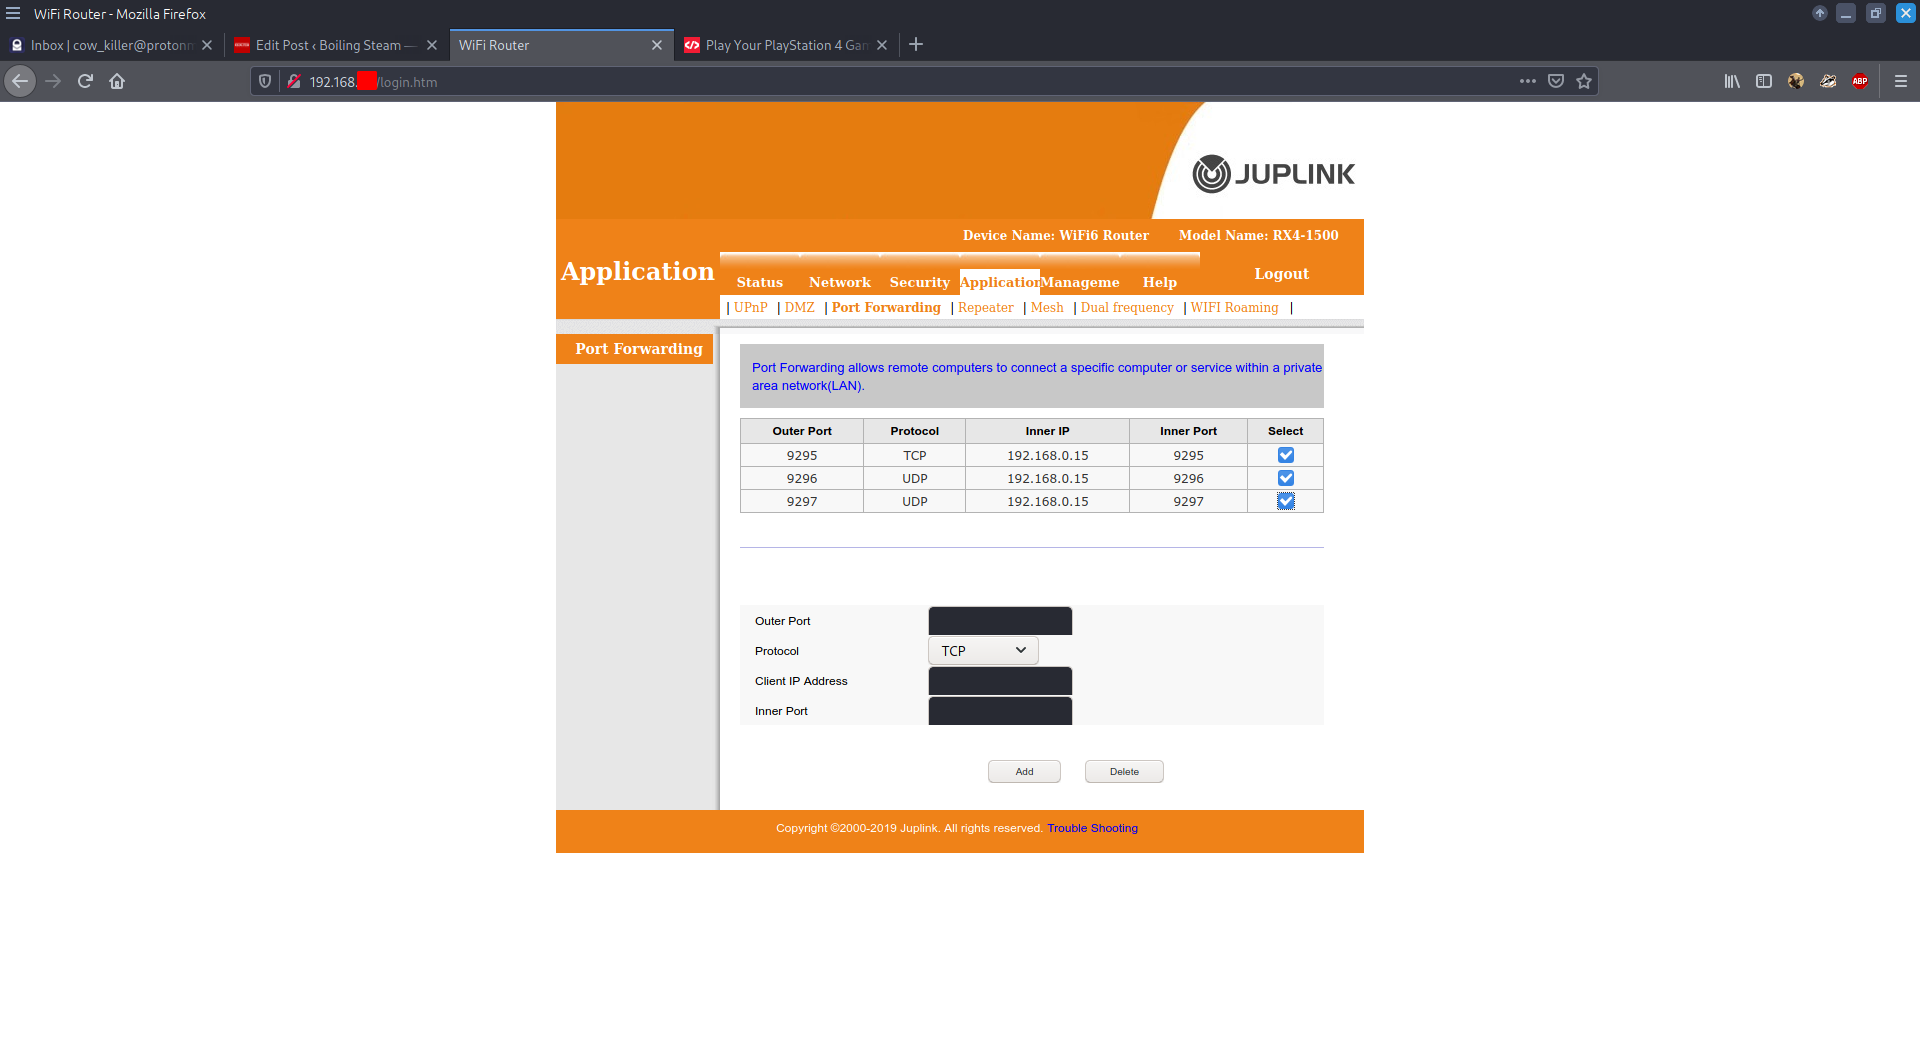
We could also forward port 987 (UDP) to allow Discovery and Wakeup, but this is discouraged “because the way Sony designed it makes trivial replay attacks possible.”
I’ll put the port number in the “Outer Port” and “Inner Port” fields, select TCP for port 9295, and set the “Client IP Address” to the local IP of my PS4. Once you’ve forwarded all the necessary ports it should look something like this:
Save your settings and log out of your router. Now you’ll need to find your public IP address. Simply searching “what is my ip” on DuckDuckGo will tell you in the search results, or you can go to whatismyip.com.
Now all that needs to be done is, when in Chiaki, register your console (on your LAN first) in the same manner as before, but replace the local IP with your public IP address. Get a new PIN from your PS4 and use the same account ID. Done.
Thanks to Chris Titus Tech for the YouTube tutorial, and thanks to thestr4ng3r for making Chiaki!