
How to make your game in 10 minutes - extended version.
Boiling Steam published a 10 minute introductory hands-on guide for Godot, which you can watch here: https://youtu.be/yBel9li2diE
But there is so much I would like to cover that would not fit in a short video, and some might prefer a written guide.
So, here we are! Let’s expand this conversation.
Intro
Godot might be the most functional and user-friendly game engine on Linux currently. Rather than doing a review, I will show it with a hands-on lab. You can follow the extended version here, or with the video above.
By the end of this article, if you want to suggest another tool, would like to know how to do something specific with Godot, need help here or there, or want to share your frustrating experiences, please leave a comment or reach us through or communications channels (Matrix, for example).
Fun Fact
Godot was based on the play Waiting for Godot. Source:
Introduction au moteur Godot at 46 min.
The steps we will follow are part of a workflow we can do every time we try a new engine.
- Visit the place where we can get additional information to understand their capabilities.
- Find the easiest way to get it running on our computer.
- Create a platform game, so we can learn how to:
- Create a scenario (world objects with physics)
- Add a character we can control with user inputs.
At the end of the article I will give you a few suggestions on what to do next.
Installing
First I invite you to visit the Godot website. This is a good place to get inspired by their game showcase, learn how to make your game with their docs, keep up with the new releases, or just figure out how to download the engine.
On the download page, you will be presented with several options. Leave the Server out for now, but it is worth revisiting later if you start thinking about having a game server or scaling your development environment. You will have to decide between Mono and Standard. Use the standard, unless you really love C#, .Net SDK and Mono SDK. The Standard version will make your life easier in the beginning, as most of the documentation and tutorials online use the Standard version.
 Human Diaspora by Leocesar3D made with Godot
Next, use your preferred installation method. Besides the downloads page, most Linux distributions offer Godot in their package manager, for example:
- Arch.
- Void.
- Flathub.
- For this tutorial, I am using the steam version.
glibc
Using non-official Godot builds might lead to issues when running your game on older Linux OS versions, because of glibc version not being retrocompatible.
Please follow the proper Godot documentation when building from source. And if facing problems, reach them on their issues page on Github.
Thanks to our reader sylware, from ycombinator, for bringing this issue to our attention.
Once you finish the installation, open Godot.
Info
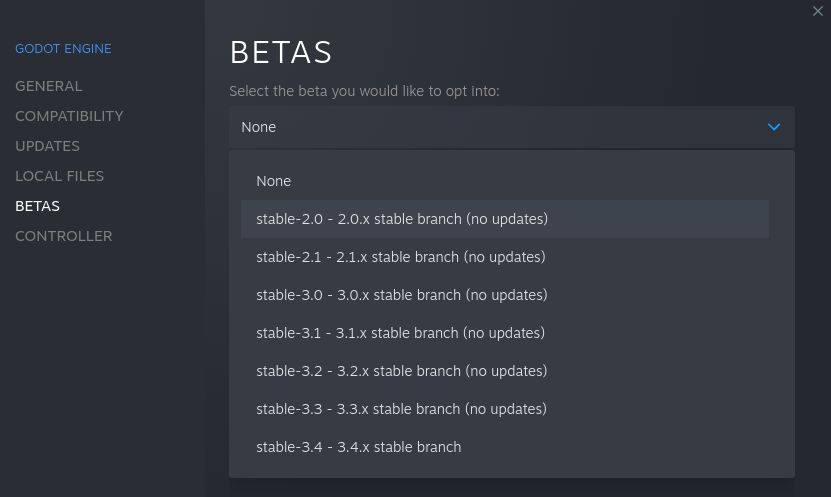 On Steam, Right-click Godot > Preferences > Beta
Getting familiar with Godot
When you first open Godot, you will be presented with the Project Manager window.
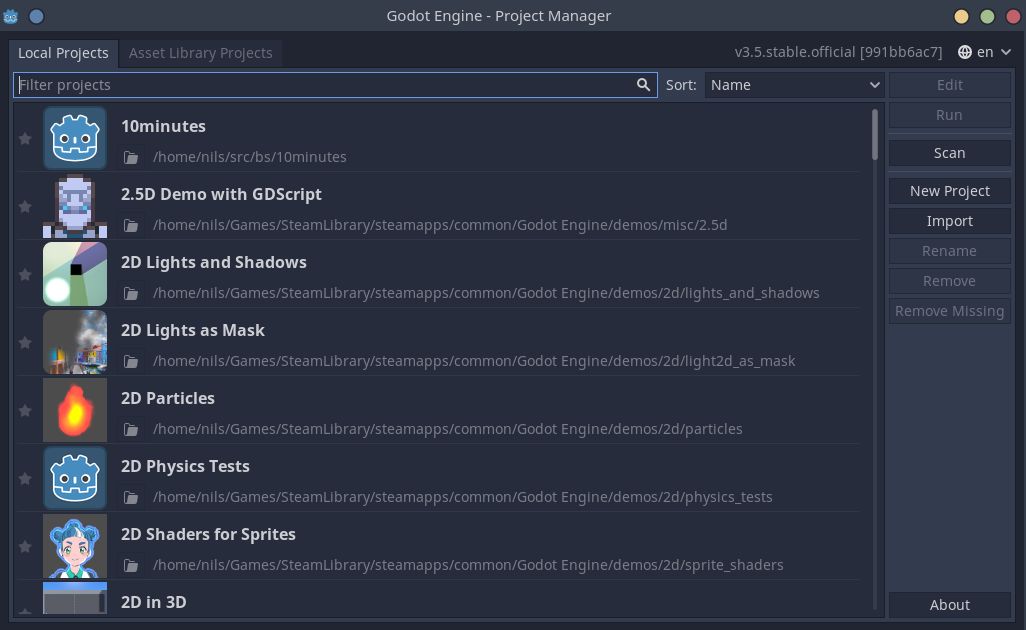 Local Project list all projects you have
Do not worry if you do not have those demos, you can get them from the Asset Library Projects. You can also get the demo projects from GitHub
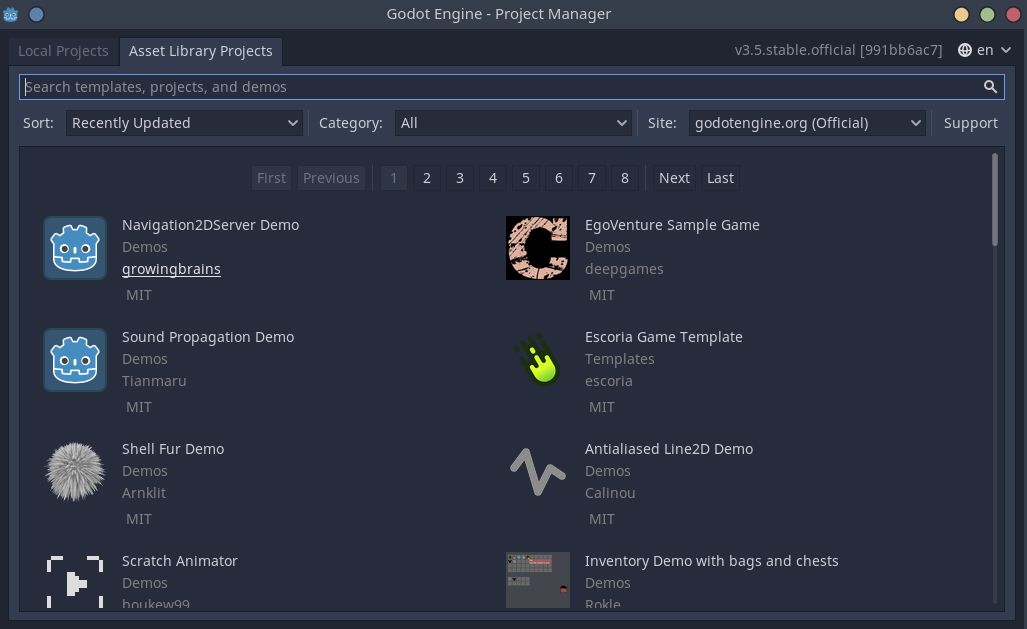 Asset Library Projects lists demos and templates for Godot
On the Asset Library, type Third Person Shooter Demo on the search bar, click on it and select Download. Once the download is done, you will be prompted to select a path. Take note of this path for later usage.
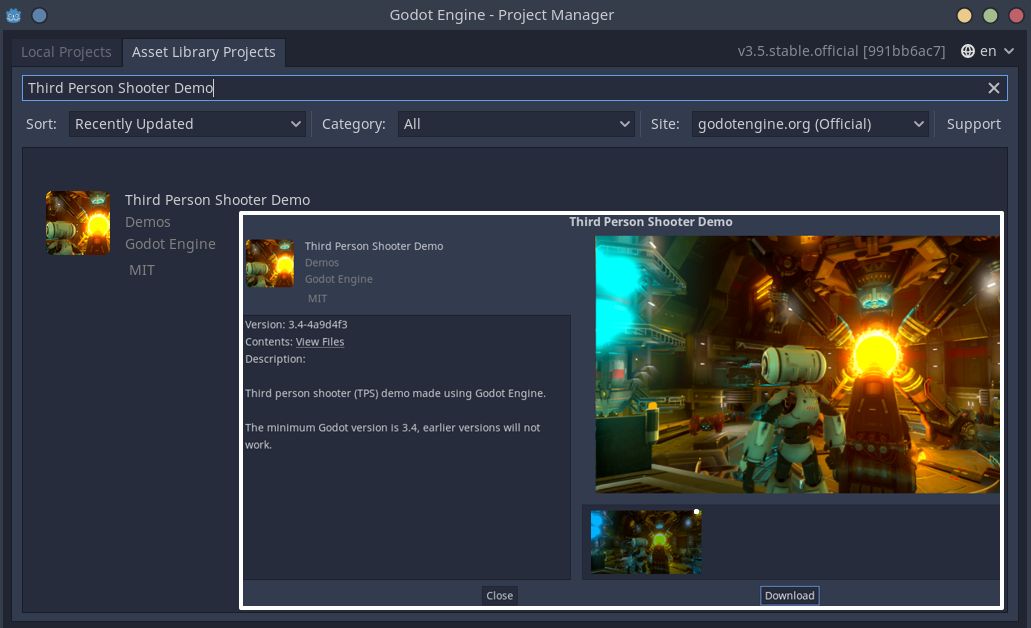 Search + Download
It will appear on your Local Projects list. Before we proceed, open that project, and play it for a while.
Open the project by double-clicking it. Then click on the play button in the top-right corner. Alternatively, press F5. Once you are done with your play session, close the game window or press F8.
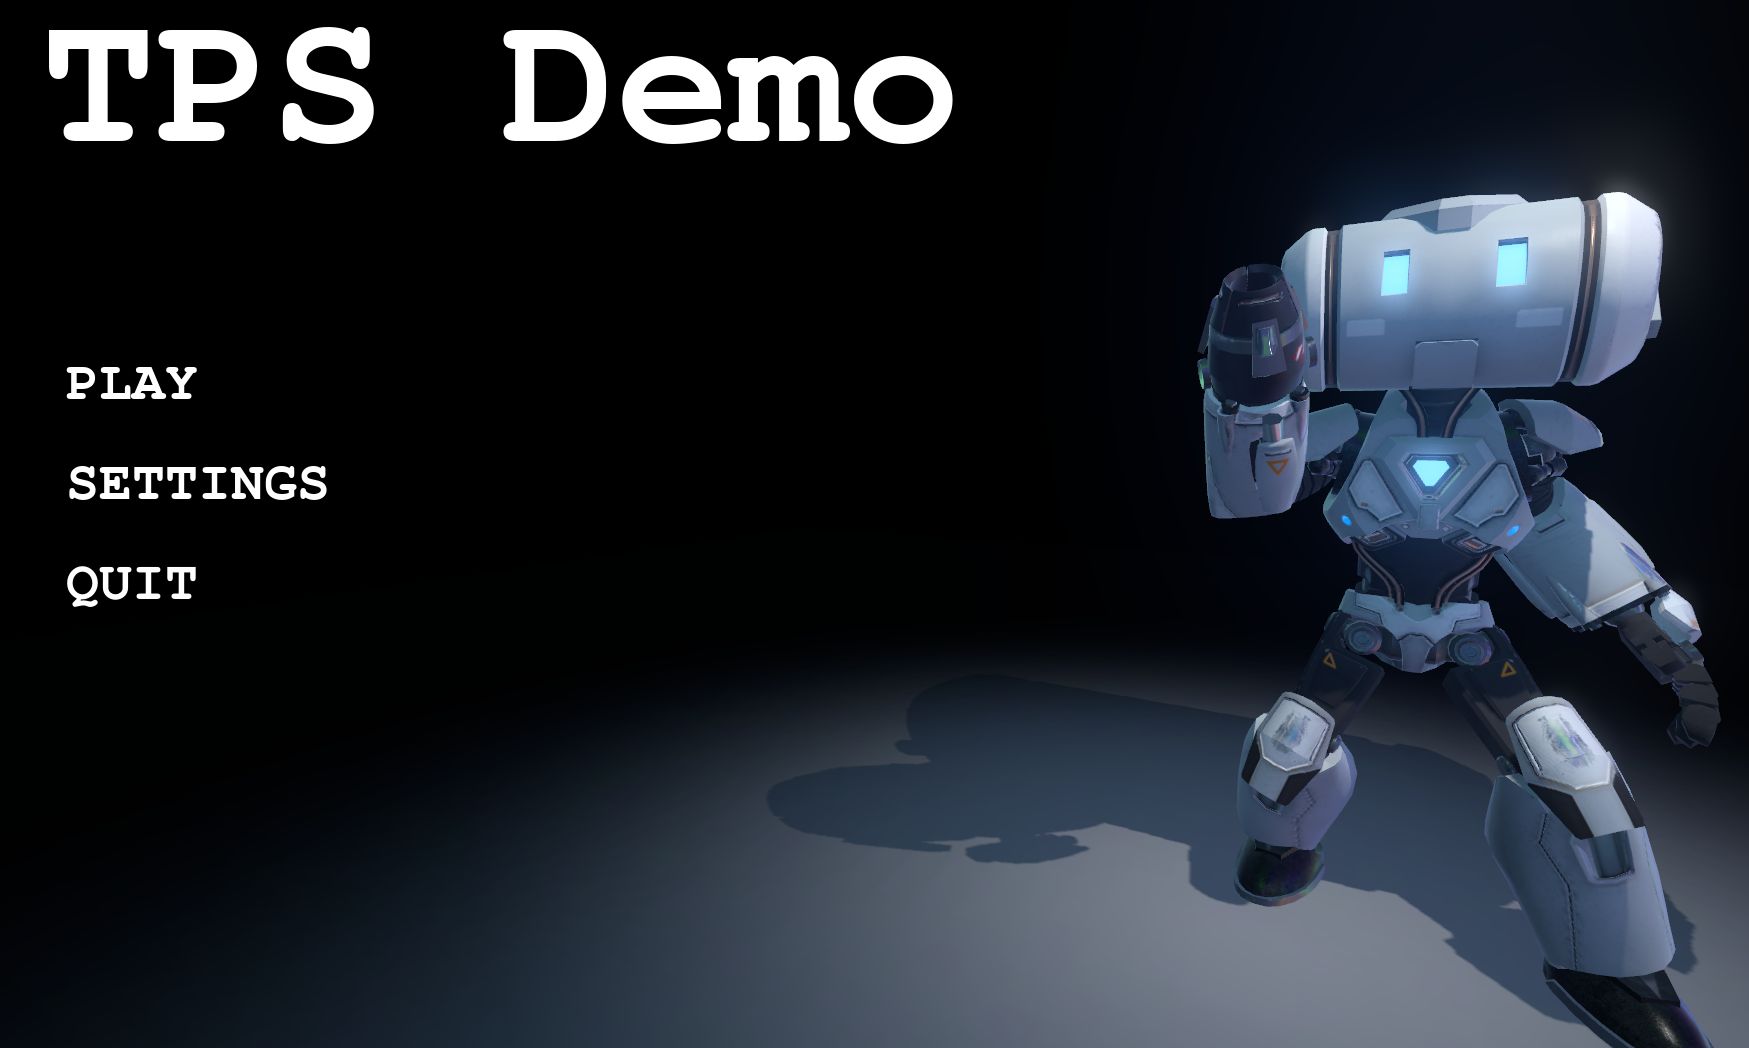 Third Person Shooter Demo intro
Do not close the editor yet; let’s do some exploring. Do not worry about messing with things, we can always get the demo again. Try to move your mouse over things to get a brief description. We will go over some of these things soon, so just try to get familiar where things are.
Click on icons to see what they do
![]() Some Godot Icons
Some Godot Icons
Find the FileSystem and explore a little bit. Tip: If you find a file with the extension .tscn double click it and see what happens.
When you are done with exploring, quit the editor. If it asks you to save, say no.
Hands-On
Now the article will be shaped like a workshop/hands-on to make it easier to follow.
Before we proceed, make sure you have downloaded the Third Person Shooter Demo from the Asset Library Projects as described in the Getting familiar with Godot, and note the path to the project directory, as we will need it later.
Creating your project
You will learn how to create a blank Godot project.
- Launch the Godot Engine.
- In the Project Manager, Local Project screen, select New Project.
- On Project Name, give a Name to your project, for example 10minutes.
- On Project Path, select the path to where the project will be saved.
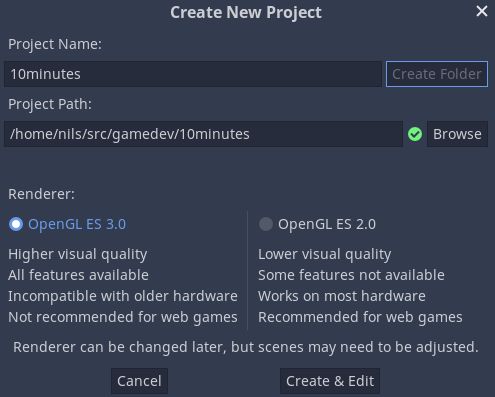 Creating a New Project
Now you will be back in the Editor to start your project. All necessary files will be created and saved at the path you selected.
Create your first nodes
Godot basic building blocks are called Nodes. We hang nodes together to build things.
On the Scene panel, top-left corner, you will find a few starting points: 2D Scene, 3D Scene, User Interface and Other Node. Note that they are color coded. For example, 3D Scene is red. That is to make it easier to find the node you need, as all nodes related to the 3D scene will be red.
Let’s build a Floor view, to grow our understanding.
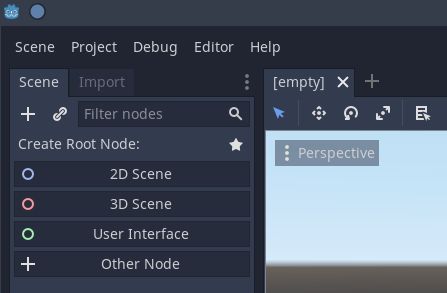 Scene panel with starting points
- Click on 3D Scene to start.
- Rename our first Node to Main.
- Right-click the Main node and select Add Child Node
- Select Spatial[^1]. Read the description. Then click create.
- Rename it to Floor.
- Right-click on Floor node and select Add Child Node
- On the search bar, type Mesh
- Click on Mesh Instance, read the description. Then click on create.
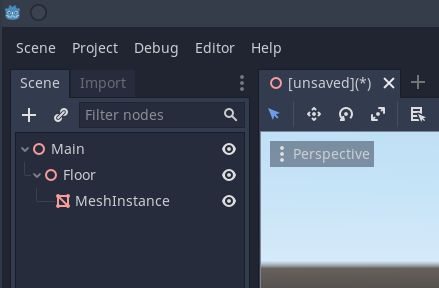 Scene panel with Mesh Instance
Still, nothing to see here, we need to configure MeshInstance to see something.
- Click on the recently created MeshInstance.
- On the right side, you have the Inspector[^3],
- Under MeshInstance, find Mesh, click on the dropdown button, select New plane mesh.
- On the same Inspector, go under Spatial and find Scale.
- Set
- X as 10.
- Y as 1.
- Z as 10.
This will give us a view of a Floor, remember that.
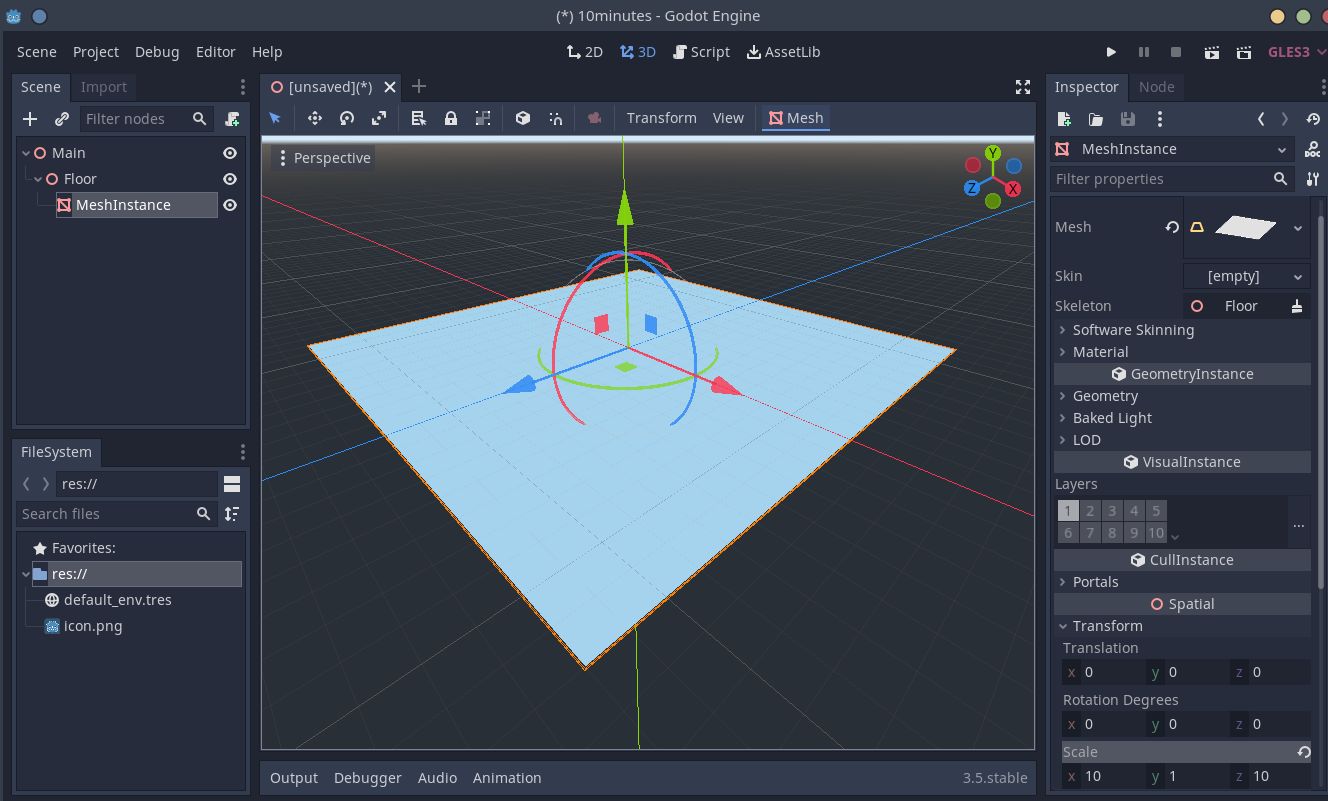 Inspector with proper parameters
Glossary
[^1]Spatial node is the parent node of a 3D tree, every 3D object you want in your 3D world will be composed starting from it.
[^2]MeshInstance used to get 3D geometry in your scene (instantiate vertex array-based geometry with at least 1 surface into your scene).
[^3]Inspector shows the configuration options of the nodes you are working on.
Importing our Player Scene
Before you proceed here, make sure you have downloaded the project Third Person Shooter Demo (TPSD) from the asset library.
Here we will be importing the controllable character from TPSD, it will save us some time in this prototype because it already comes with a 3D Robot model with all the necessary code for walking, camera tracking, shooting, jumping and some extra functions.
Importing in Godot is simple, we just need to copy any asset we need into the project folder. For this task, you can either use the terminal or the file explorer from your OS.
- Find the location where you download TPSD,
- Copy the directories player and effects_shared.
- Paste them inside your game directory, in my case 10minutes.
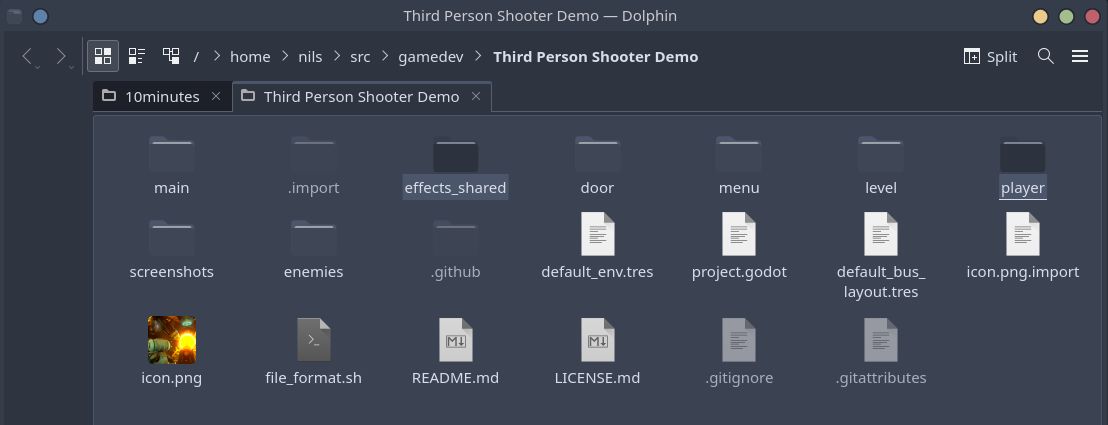 Copy the directories player and effects_shared
Godot will take care of importing it, so you just need to wait a bit. Everything will be accessible from the FileSystem panel.
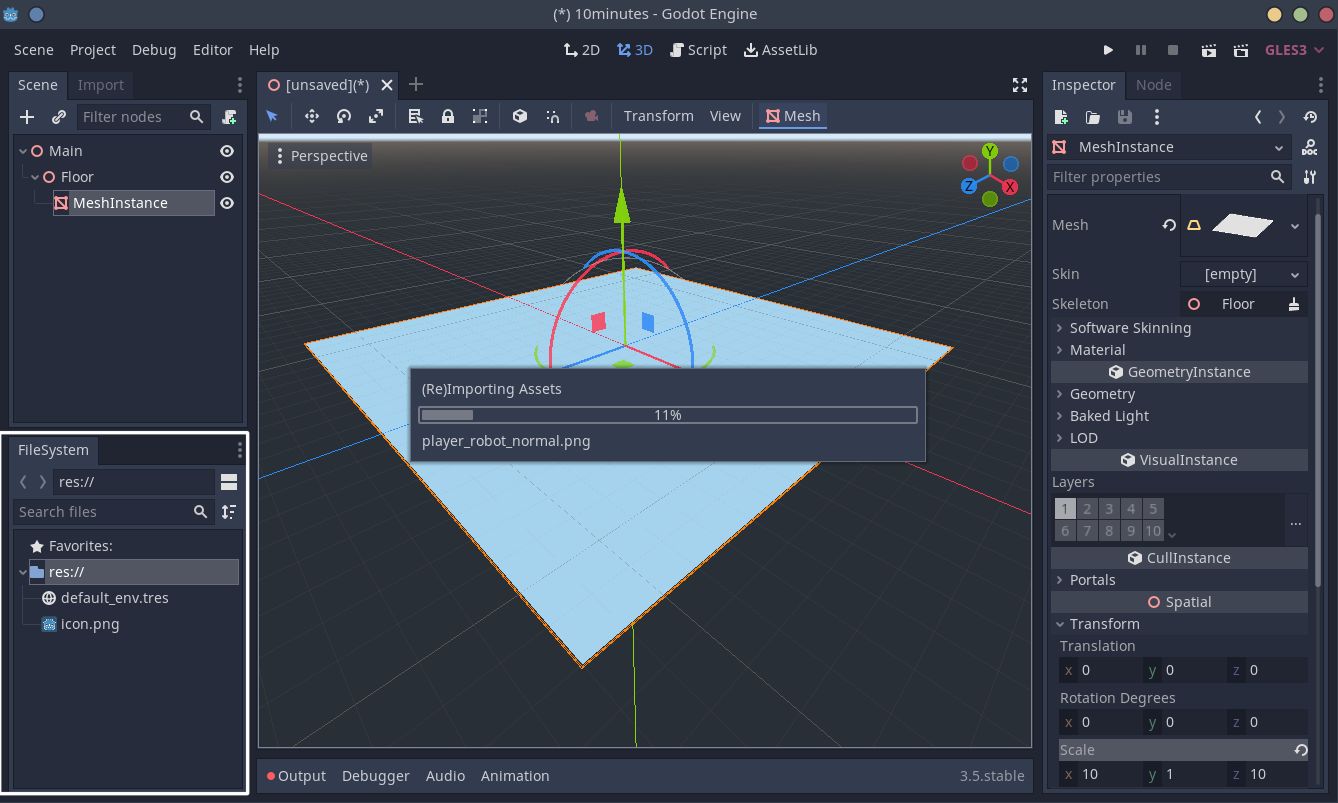 Importing with FileSystem highlighted
On Godot, when we build nodes in a tree, it is called a scene. Once you save this scene, it can be used as a new node type. We just imported the Player Scene and everything it uses into our project. Let’s add the player scene to our main scene.
- On the FileSystem expand the player directory and look for a file called player.tscn, this represents the player scene.
- Click and drag it to your Main node.
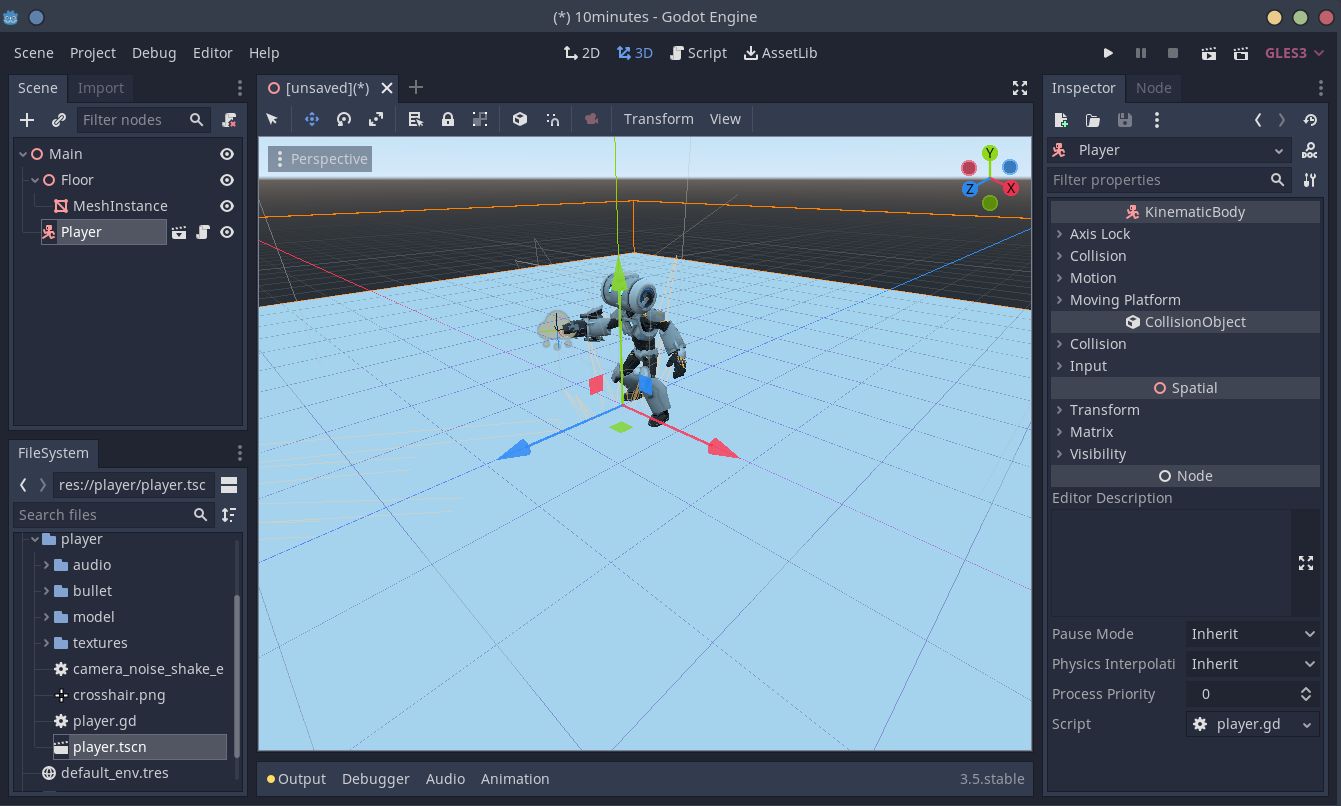 Main node with Player Scene
3D View and Playing your game.
To move in the 3D view, you can hold right-click on your mouse, and use the QWEASD keys.
You can also press Shift+f and then QWEASD. Use Shift + f to unlock.
On the top corner you can find the play button. You can always hover things on Godot to read the description and learn about shortcuts.
Before we can play, we need to save a scene, and select the scene we want to play.
- In the top-left corner, click on Scene, then Save scene.
- Name it Main.tscn and Save.
- Now, click on the Play button, or press F5
- Select to play the current scene (Main)
- Press F8 to stop.
Collision
Our player is falling through the world! Since we used a known good player scene, the problem must be with our main scene.
Our Floor has no collision associated with it. So let’s add an element to support physics. Because we want the floor to stay in place, we are going to add a StaticBody to our mesh.
- On the Scene panel, right-click on MeshInstance, then select add child node
- On the Search bar, type StaticBody.
- Select StaticBody from Matches, read the Description.
- Click on create.
StaticBody requires a Collision Shape for the physics work.
- On the Scene panel, right-click on StaticBody, then select add child node
- On the Search bar, type CollisionShape.
- Select CollisionShape from Matches, read the Description.
- Click on create.
Now we need to define a shape for the collision.
- Select the CollisionShape node, and check the Inspector panel.
- Click on the Shape dropdown list.
- Select New Box Shape
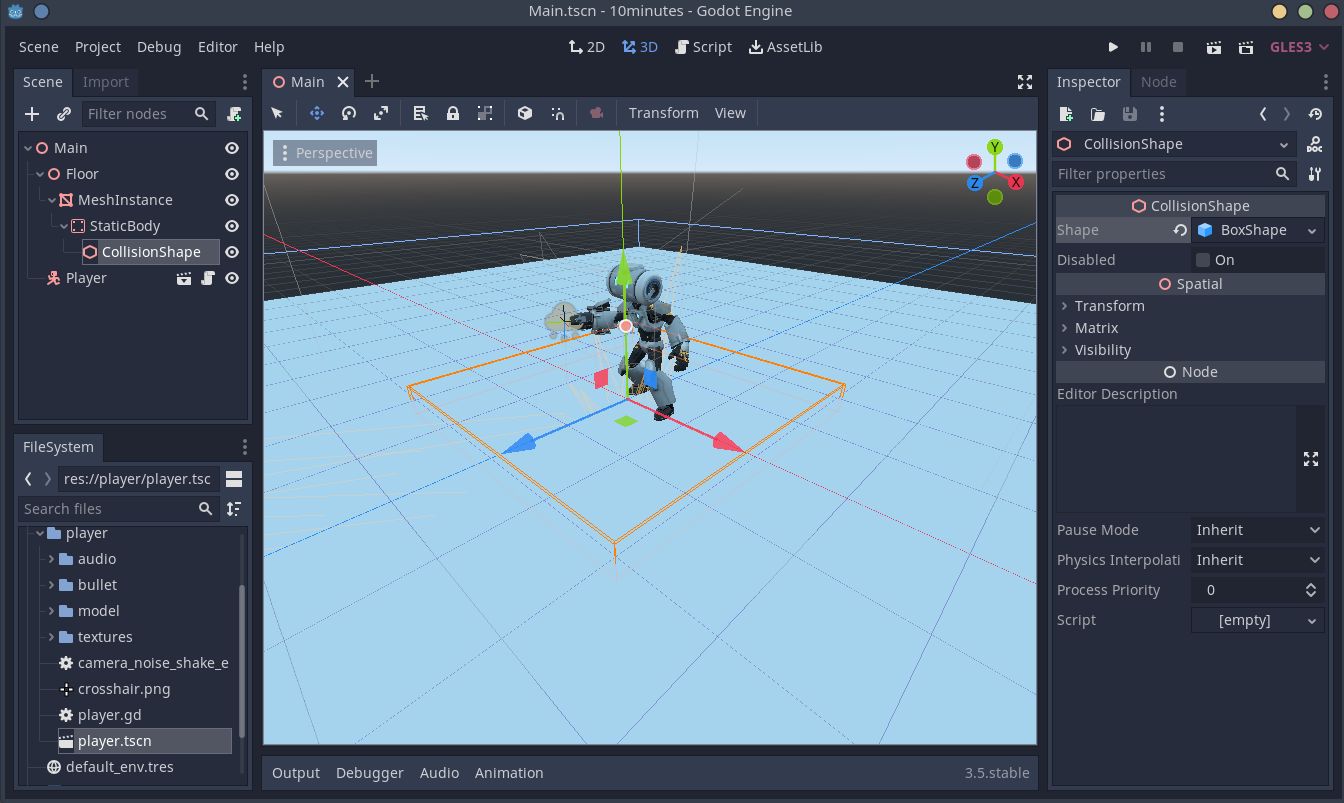 Box Collision Shape
Save your Scene and press play to test.
Input Map
Our robot doesn’t fall, but it seems that is also not moving. You can see a few errors here in the debugger.
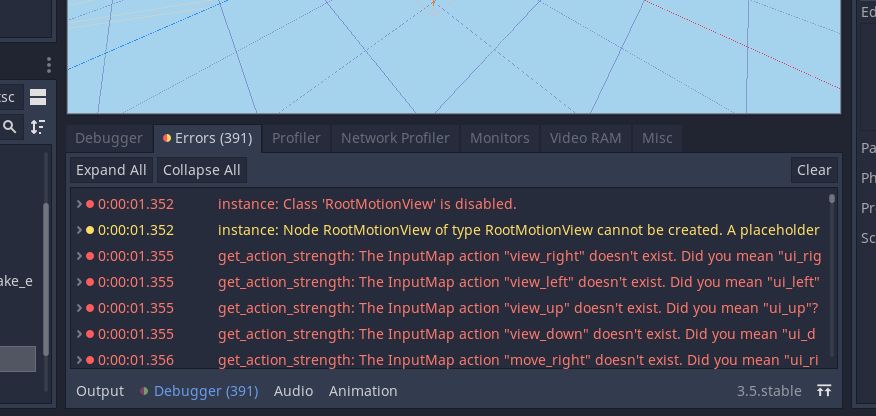 Debugger Errors
View right, view_up, move and so on so forth. So let’s fix that.
On Godot, the way to control things is through scripts. We can see here that the Player Scene has a script associated with it.
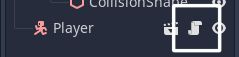 Scroll Symbol represents scripts on Godot
Click on the symbol to investigate. It is defining everything about the player, the camera, how it moves, how it shoots.
Find the method physics process, line 70 in this version. We can find some of the names we saw in the errors list.
Input is a way to process player’s input from an input map.
To open the input map:
- On the top left, click on Project
- Select Project Settings.
- Change to the tab Input Map.
Those names we saw before are missing here. So we need to add those.
Adding inputs
- On the Action bar, type the name of the input. Example move_left.
- Click on Add
 Example of adding an action
Now we need to associate inputs to that action
- Find the action you just added on the action list.
- Find and click on the + sign at the left.
- Select Physical Key.
- Press a on your keyboard.
- Press the button OK.
- Find and click on the + sign at the left.
- Select Key.
- Press ⬅ on your keyboard.
- Press the button OK.
- Find and click on the + sign at the left.
- Select Joy Button.
- On Device, select Device 0.
- On Joypad Button Index, select 14: D-Pad Left
- Click Add
- Find and click on the + sign at the left.
- Select Joy Axis.
- On Device, select Device 0.
- On Joypad Axis Index, select Axis 0 -
- Click Add
 move_left input example
For a full list of all the inputs, please see the Input Map Cheat Sheet
Alternatively, you can copy the project.godot input session from our GitLab repo, to the project.godot file at the root of your game directory.
Glossary
- Physical Key: position of it on the keyboard. For example, If you map WASD on a QWERTY keyboard, it will remap to ZQSD if you change your keyboard to AZERTY.
- Key: Exact key to be pressed
- Joy Button: Buttons on your Device
- Joy Axis: Device analog input
Walls and Materials
Making walls is similar to making floors. Let’s create them using Box shapes.
If you don’t want everything to be baby blue, you can follow these steps to change the color:
- Click on the node MeshInstance of the object you want to change colors.
- On the Inspector, find and expand Material
- Click on the Material dropdown list
- Select New Spatial Material
- Click on the white ball
- Find and expand Albedo
- Click on the color in Color
- Select the color you want.
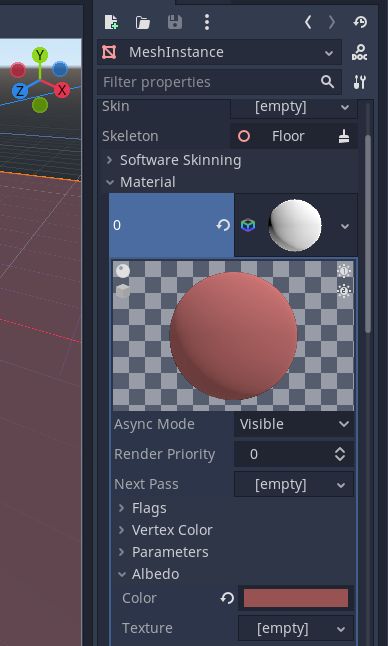 Changing colors of the Mesh Instance
Export your project
Once you are satisfied with your project, you can export it, so others can play.
- On the top-left, click on Project, and select Export….
- Click Add…, and select Linux/X11.
- Click on Export Project….
- Select the path where you want to save your project.
- Click Save
Now you can execute that file to play your game.
Fun Fact
Godot has no official pronunciation. GO-DOUGH feels nice to say, maybe GOD-OH, but my brain usually goes for GO-DOT, and when the Brazilian bursts out, I say GO-DO-Te.
What to do next
Godot has plenty of materials and guides to help you create your game:
- 📼 Make your game in 10 minutes with Godot - Video
- 🤖 Godot Engine
- 💾 Godot Download
- 📜 Godot Documentation / Learn
- 🎮 Godot TPS Demo
- 🕹️ Godot Demos
And you can always reach out to us if you would like to see more content about Godot, suggest other tools, or just to be friendly in general.
Be excellent to each other!
Cheers,
Nils