
Liberating the MacBook Air 2013
Are you tired of not getting security updates? Is your old MacBook getting sluggish and you want to provide a new life to it? Look no further: Liberate it with Linux!
Before we proceed, use this guide is only if you already have an old MacBook lying around or if you found one extremely cheap, as computers like Lenovo or Framework would have better Linux support.
Despite being old, and a bit abused, the notebook still hold some quality. It was slimmer and lighter than anything else I had at home, at 1.35 kg. The screen was great at 1440x900 and responded well when I downscaled the resolution of some games. The speakers sounded better and projects farther than the ASUS ROG Strix(GL502VS) for both games and videos. The keyboard works fine, but I still miss some keys that I had to set up shortcuts later. Lastly, you can still find parts easily on Amazon and AliExpress if something needs to be replaced.
I had to replace the battery, I found it on Amazon, and it was simple to install it with this guide from IFIXT. But I recommend thinking about it a bit more if you need to change more parts to make it usable (screen, SSD, keyboard, trackpad) as the prices will pile up, and that money could be used for a better product. Also, SSD for Apple will not work for other companies.
This is not a guide for newer MacBook. You will need to follow different steps as over time Apple is making harder and harder to fix their hardware. Use this link for T2 chip, or if you have the M1 chip there is a distro focusing on bringing Linux to it, Asahi.
If you are familiar with Linux and just what to fix the Wi-Fi or camera, jump to these steps:
Contents
- Why do all of this?
- What you will need
- Step one - Decide what kind of experience you want to have with your Linux.
- Step two - Creating a live USB
- Flatpak
- Gaming
Why do all of this?
Pros of liberating an old MacBook
- Get your desktop snappier again
- Make it more secure with the most recent updates
- Help reduce electronic waste
- You can still find spare parts, like batteries, on sites like Amazon or AliExpress
- Linux’s installation is simple as in any other hardware
Cons
- The keys and gestures are a bit different from what you were used with the MacBook. But you can adjust to your preferences
- Newer versions might need extra steps to configure the hardware
- Broadcom Wi-Fi is a nightmare, and we might need USB Tethering to configure it properly if the distro does not support it and your MacBook does not have Ethernet
- Getting the camera working is a hit or miss
What you will need
- Old MacBook: I will be using a MacBook Air 2013
- USB storage device: >=4GB
- (optional) Mobile Phone that supports USB tethering. If Linux does not recognize your Wi-Fi out of the box, and your MacBook does not have an Ethernet port
- (optional) A cable to connect the Phone to the MacBook
Step one - Decide what kind of experience you want to have with your Linux.
TL;DR: Try EndeavourOS - Snappier, lighter and more flexible of the bunch. The only distro I did not have to use USB Tethering and the easiest to get the webcam working. But it is not the most beginner-friendly of the bunch.

Linux has many colours and flavours. When deciding what kind of experience you want to have, in general lines, you need to think about two things:
- Distribution (distro): What packages and philosophies you like. Do not worry too much about that if you are a beginner, as most packages are available across distros.
- Desktop Interface/Environment(DE): it defines how you see your desktop and how you interact with it.
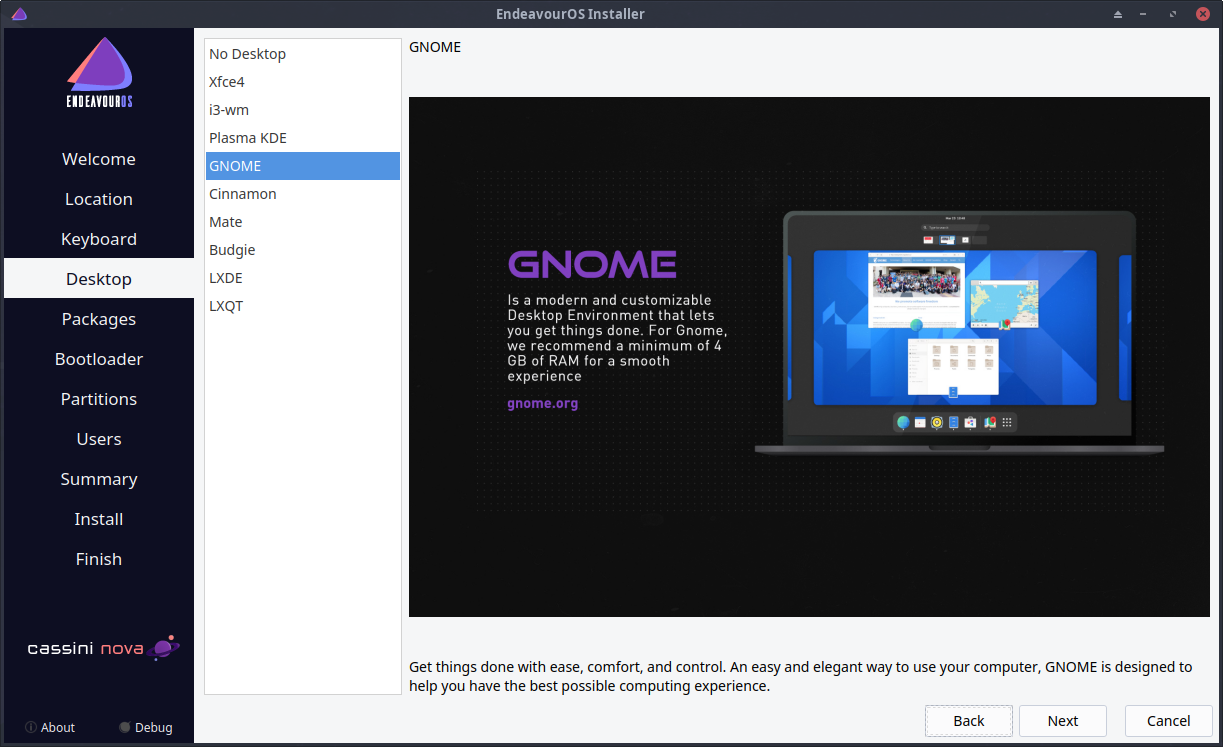
I showed a few DE options to the person that will be using this notebook, and they liked Gnome, for its visuals and trackpad gestures out of the box. But have in mind that KDE Plasma and XFCE are suitable options as well, and with more options to customize than Gnome. If you are tech-savvy and want to make your Linux behave exactly like a macOS, KDE might be the easiest to achieve that.
While writing this guide I tried many distros: Fedora Workstation, Fedora Silverblue, Manjaro, Nobara, Pop-OS, ElementaryOS. They all worked similar, but none recognized the Wi-Fi out of the box and I had to use USB tethering to a mobile phone to get the Wi-Fi working.
I also tried EndeavourOS, it is quite popular and I intended to try it for a while. EndeavourOS detected the Wi-Fi from the Live USB and because it is Arch based, it was the easiest to get the drivers for the FacetimeHD camera from the AUR. If you want to make your life easier during the installation, I suggest using EndeavourOS, but I will cover all the bases in this guide in case you decide to go with a different distro.
Usually, when friends ask me what they should use for their first Linux distribution, I recommend Fedora. It is beginner-friendly, stable, good updates and you can find most of the software you will need. But the installation process for the current version, Fedora 37, is not working for Macs. It worked for Fedora 36, Fedora 37 beta, and Fedora Rawhide. I guess someone messed up when publishing the final version. Alternatively, you can try installing the version 36, then updating it to 37 once you get the Wi-Fi going.
It is easy to try Linux without installing it, from the live USB. So, you can try a few before deciding which one you prefer. Also, while I was writing this guide, it seems that people had better success with other distros in different models of MacBook.
Step two - Creating a live USB
For this step, you will need:
- USB storage device
- Balena Etcher, or
- Fedora Media Writer if you decide to go with the Fedora family.
sudo dd bs=4M if=/path/to/manjaro.iso of=/dev/sd[drive letter] status=progress oflag=syncif you are on Linux, more details
- ISO File of your selected distro.
Downloading the ISO
If you are using Fedora Media Writer, you can skip this step, as it will download and write the image to your USB.
Some distributions offer an ISO per desktop environment, as in the case of Manjaro. For EndeavourOS it is a single ISO and you select your desktop environment during the installation, if you have internet; otherwise you will install XFCE as your DE.
Besides the ISO file, they offer a checksum file(sha512sum) and a Signature (GPG) used to validate that the ISO you downloaded was not tampered.
Find those files and download them. The EndeavourOS can be found here
Scroll to “You can download it here:” and download from the location closer to you. You can also use Torrent, I found it faster for my region.
Writing the image
Plug your USB storage on your computer - it could be your old MacBook if it is functional.
for most distros
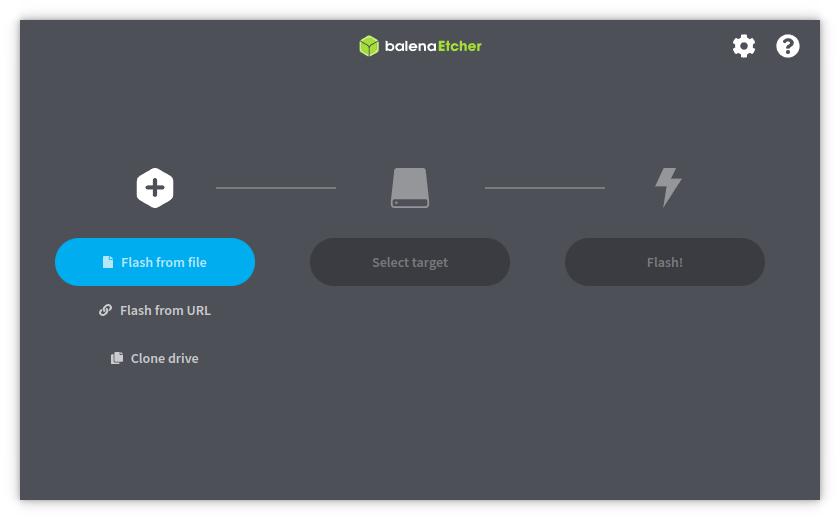
- Open Balena Etcher
- Flash from file - select the ISO you downloaded
- Select target - select the USB storage device you plugged in
- Flash
for fedora
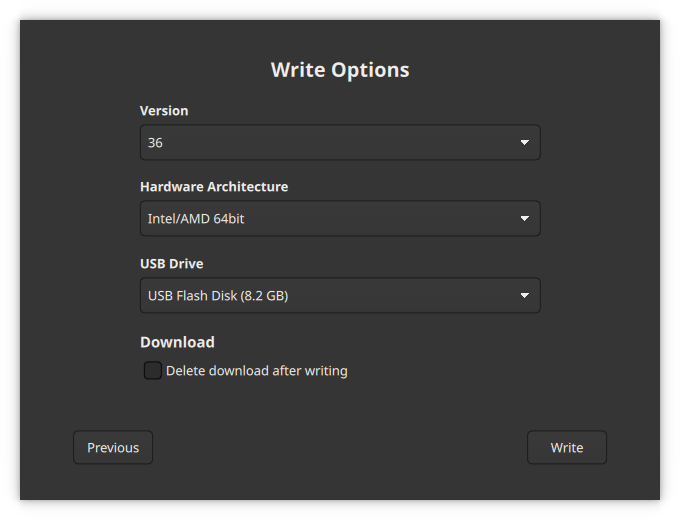
- Open Fedora Media Writer, select Download Automatically then click next
- Select Official Editions, and on the dropdown, make sure that Workstation is selected. Then click Next.
The other options: Labs - Fedora offers a few versions packed with software for different areas. Spins - If you don’t want to try Gnome, you can use one of these versions. Emerging Editions - Silverblue (Gnome) and Kinoite(KDE) might be the future of Desktop, but because of their novelty you might struggle a bit more to find the things you need.
- Select Version, Hardware Architecture Intel/AMD 64bit, USB Drive select your USB storage you just plugged. Then click write.
Note: At the moment I write this, there is a problem with the Fedora 37 installer and MacBook. But it is working for Fedora 36, 37 beta and fedora Rawhide. One way to get the 37 is to select the version 36, and then after the installation, you update it to 37.
Step Three - Installation
You don’t need to fully commit to Linux before trying. The installation media allows you to use most of its resources once you plug and boot
Before processing with a full installation, backup your data on the macOS if needed.
-
Turn off the MacBook
-
Plug in the USB storage with the Linux image into the MacBook
-
Find and hold the “Alt key” (or Option) then power it on.
If it does not work, confirm on this link the right key combination for your hardware.
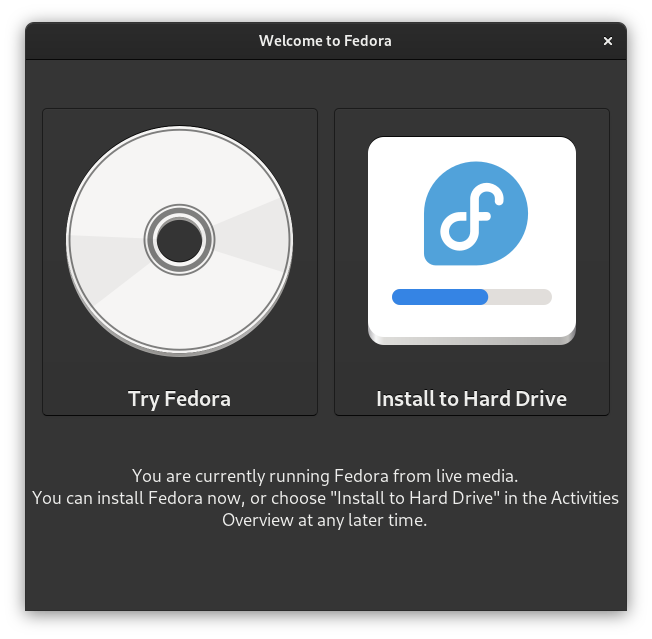
You are supposed to see an image like this
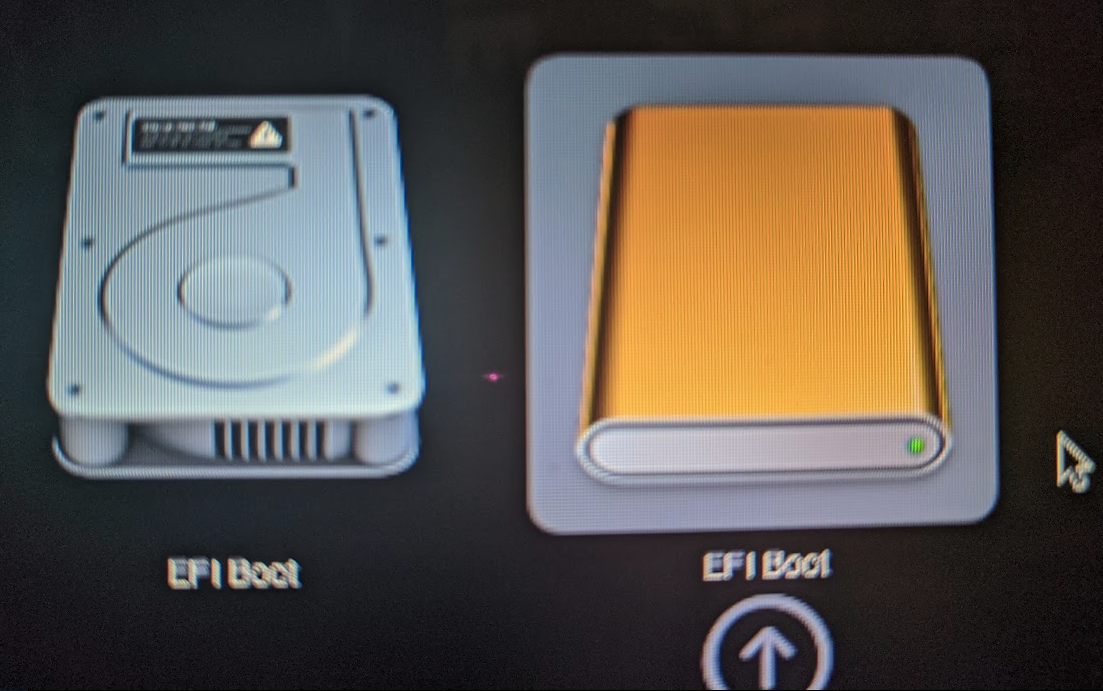
- Select EFI Boot with the Orange device, like the image above.
The live USB will take a while to boot, and you will be presented with the desktop environment of your choice. At this point, you can play around with it, if you are not satisfied, try a different distribution.
If you want to use the internet, but there is no Wi-Fi, you might want to use the USB Tethering with your phone, as explained in Wi-Fi.
- Once you are satisfied with a distribution. Select Install, Start the installer or similar.
Fedora
EndeavourOS
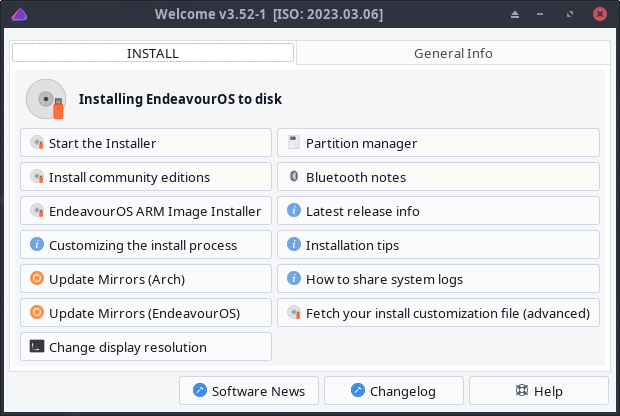
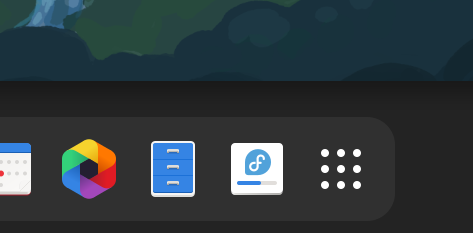
If the installation panel is gone, you can find it on the dock or on the list of available applications.
All Linux installations are similar, with a few changes between then. You will be asked to choose:
- keyboard layout
- location / time zone
- username and password
- installation destination (where to install)
For EndeavourOS, you might be able to use Wi-Fi, and also select what Desktop Environment to use if you choose the Online
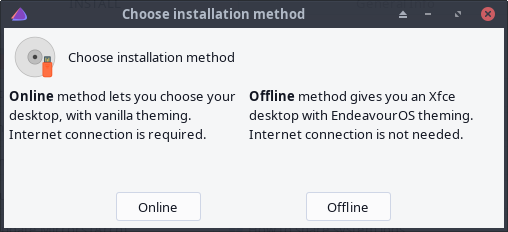
Then
The part where you might have trouble installing is on each distro is the installation destination (where to install). My recommendation is to select the storage and to overwrite/erase everything. I will show 2 examples here
Fedora
- On Installation Destination, make sure that your ATA Apple SSD is selected and storage configuration is Automatic. Click Done.
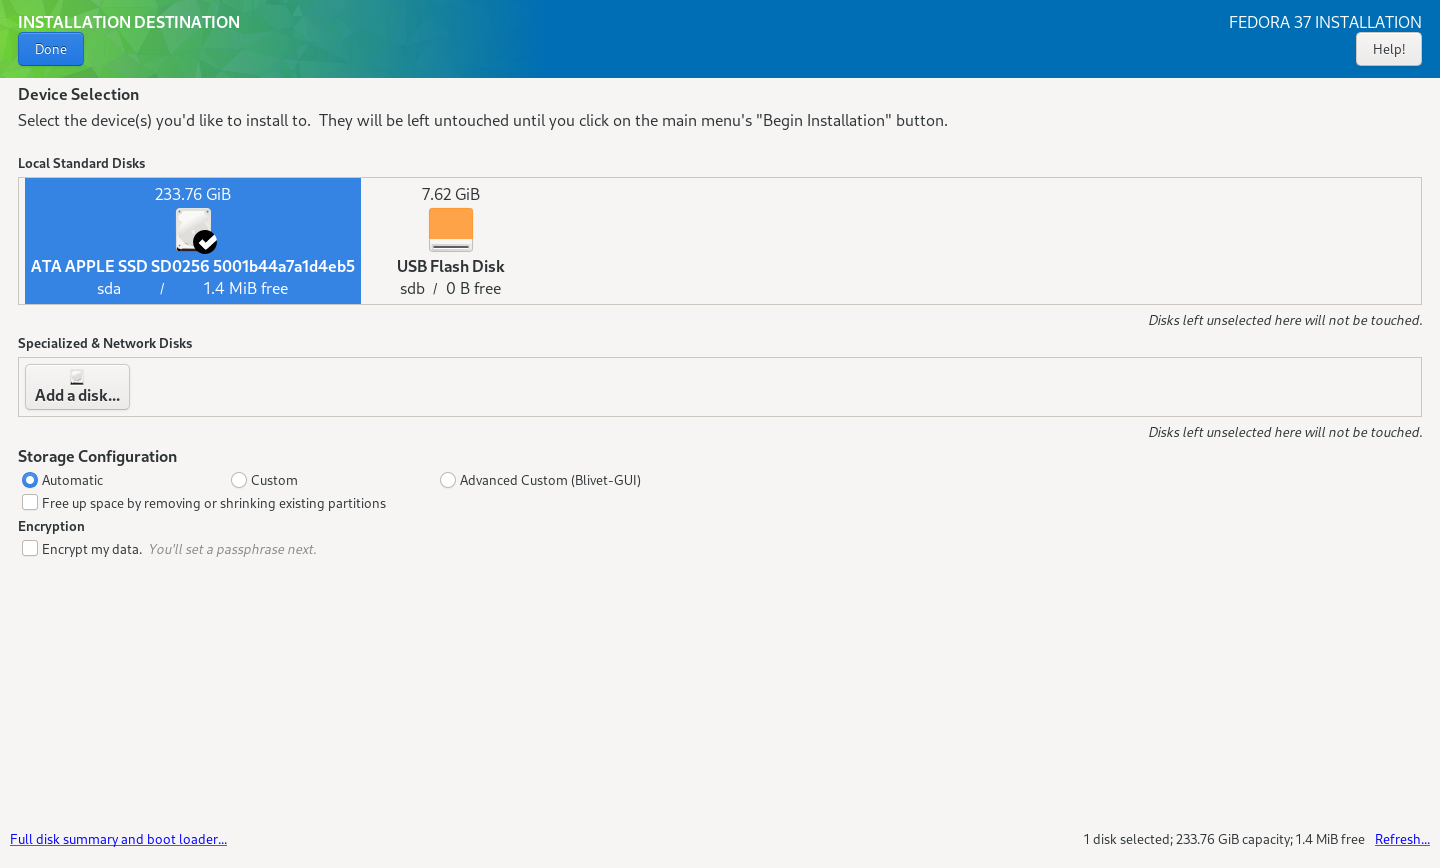
If you are a more advanced user, you can use custom to tweak your storage a bit.
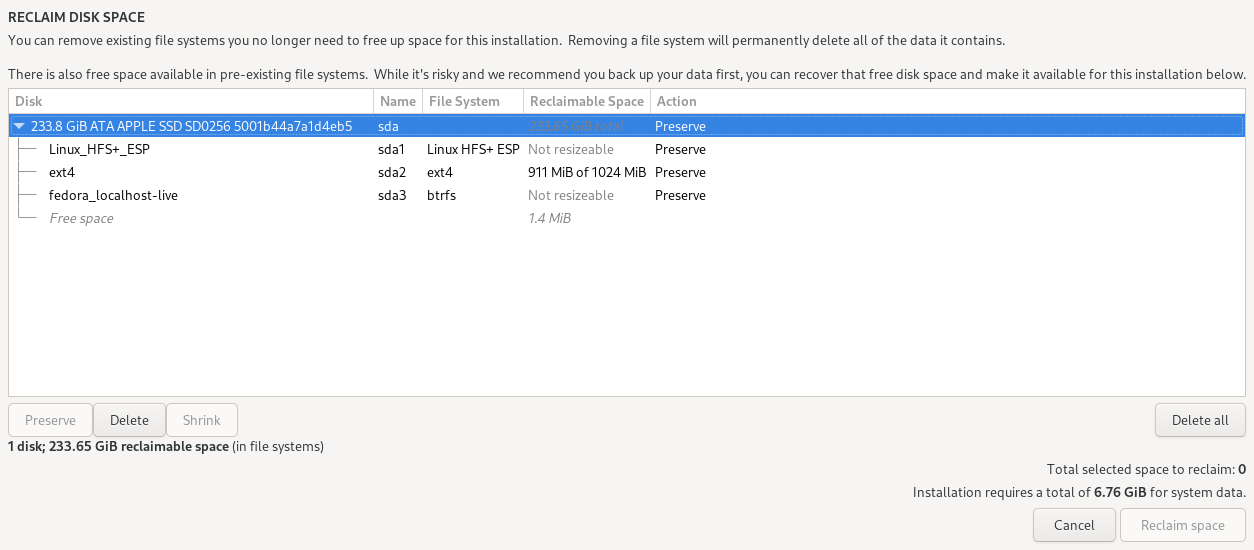
- A warning about space will appear, click Reclaim Space
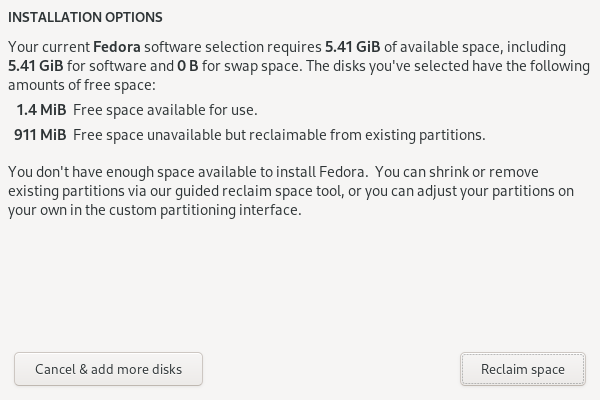
- Click Delete All, then Reclaim Space.
Endeavour
- At Partitions, select the storage device
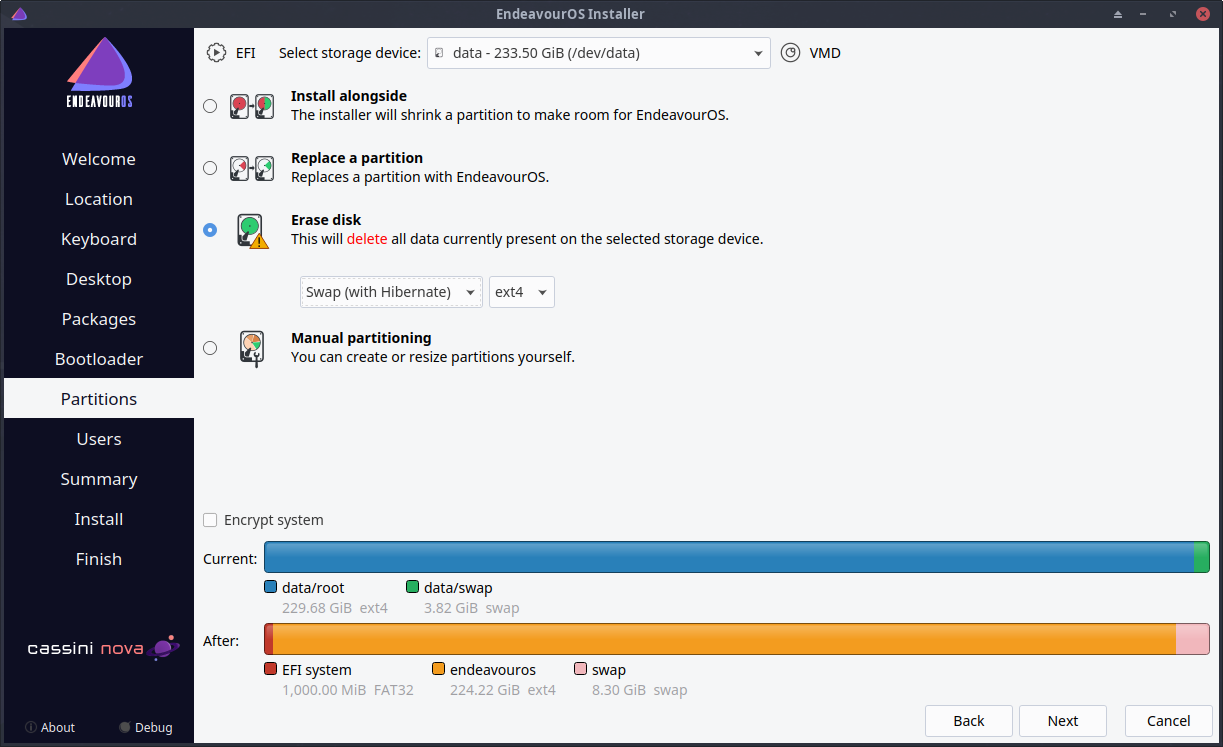
- Choose to Erase Disk
If you are a more advanced user, you can use custom to tweak your storage a bit.
- Click Next
Troubleshoot
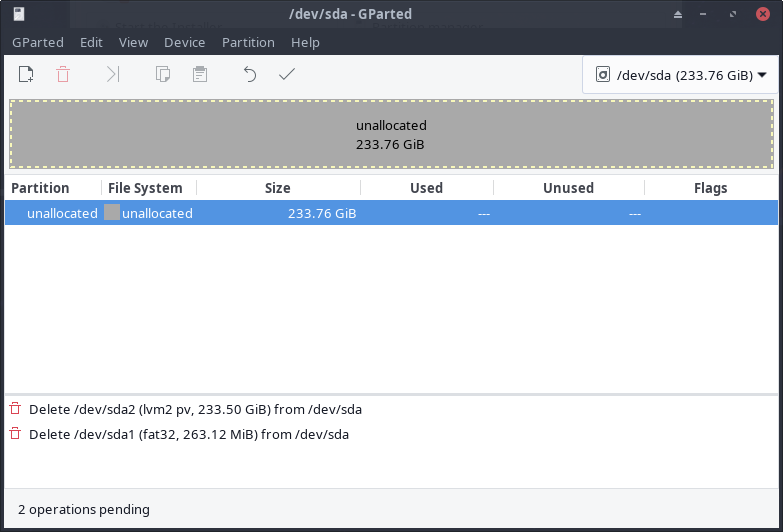
If, for some reason, it complains about the storage, one option is to manually clean the SSD, most distros come with a Partition Manager, like GParted or similar.
You need to select the SSD (sda). Then delete the partitions in there until you see a single unallocated. End by confirming the changes.
Now you can go back to step 6 and select it to install your distro of choice.
Done
- Once everything is set. Begin Installation.
Once the installation is done, you will be prompted to reboot your computer, reboot and remove the USB.
Step Four - Extra packages
Wi-Fi
If the Wi-Fi is not working after installation, probably your Linux is missing the Broadcom wireless driver, broadcom-wl.
And, If your MacBook does not have an Ethernet port, for this step you will need:
- Mobile Phone that supports USB tethering.
- A cable to connect the Phone to the MacBook.
Connect the cable to your phone and MacBook, then enable tethering on your phone. For Android, you can follow these steps. Your phone needs to have access to the internet, either by Wi-Fi or data plan.
On your computer it should show like you are connected by cable and you should be able to navigate the internet.
For Arch based distros (Arch, Manjaro, EndeavourOS):
You can get broadcom-wl from AUR
- Open the terminal
- run
yay -Syu broadcom-wla. instead ofyayyou might need to use whatever is your AUR helper.
More details https://wiki.archlinux.org/title/MacBookPro11,x
For Fedora based distros (Fedora, Nobara):
Using terminal:
- Add RPM Fusion repository (Nobara comes with it by default). Follow these steps.
- Update your system with
sudo dnf up(On Nobara you can run theupdate & syncfrom the application list) - Install with
sudo dnf install broadcom-wl. - Reboot and you will have a working Wi-Fi
Troubleshoot. If the Wi-Fi is still not working, you might try what was suggested but the Reddit user u/allregshere here
- Install kernel-devel package -
sudo dnf -y install kernel-devel-$(uname -r) - Compile drivers -
sudo akmods --force sudo depmod -asudo modprobe wl
For Debian based distros (Pop!_OS, ElementaryOS):
This one was a bit inconsistent for each distro. So, I suggest you to Google your distro name + MacBook version + “wifi”, if this does not work for you.
- sudo apt-get update
- Reinstall the Broadcom drivers
sudo apt-get --reinstall install bcmwl-kernel-source sudo modprobe -r b43 ssb wl brcmfmac brcmsmac bcmasudo modprobe wl
FacetimeHD
This was the most inconsistent device to make it work across distros. Also, Cheese an application that might come by default with some distributions is not working with this camera, so ignore it. You might test the camera with your preferred application like OBS, Zoom, Google Meets, Jitsi. Or using mpv or Gstreamer on the terminal. Example: Run GST_V4L2_USE_LIBV4L2=1 gst-launch-1.0 v4l2src ! xvimagesink using the terminal.
For Arch based distros (Arch, Manjaro, EndeavourOS):
- On terminal and run
yay -Syu bcwc-pcie-git - Instead of
yayyou might need to use whatever is your AUR helper. - If the camera is not working yet, reboot.
For other distros:
Follow the installation guide from this GitHub repository
Flatpak
All distros come with some sort of “Store” for softwares. But Flatpak is a good way to get the App you need without many problems.
- Guide for EndeavourOS
- Or select a guide for your distro from this list
Gaming
This model comes with an onboard GPU, intel HD 5000. So, you cannot expect much from it for games, but I was able to have fun with a few titles. I also tried to play with a DualSense controller. Bluetooth did not pair with the original macOS, and it did not pair with Linux either. But I could use it connected by cable. Lastly, not all games worked Native with all distros. But Proton worked without problems.
Celeste
Works great, no problems.
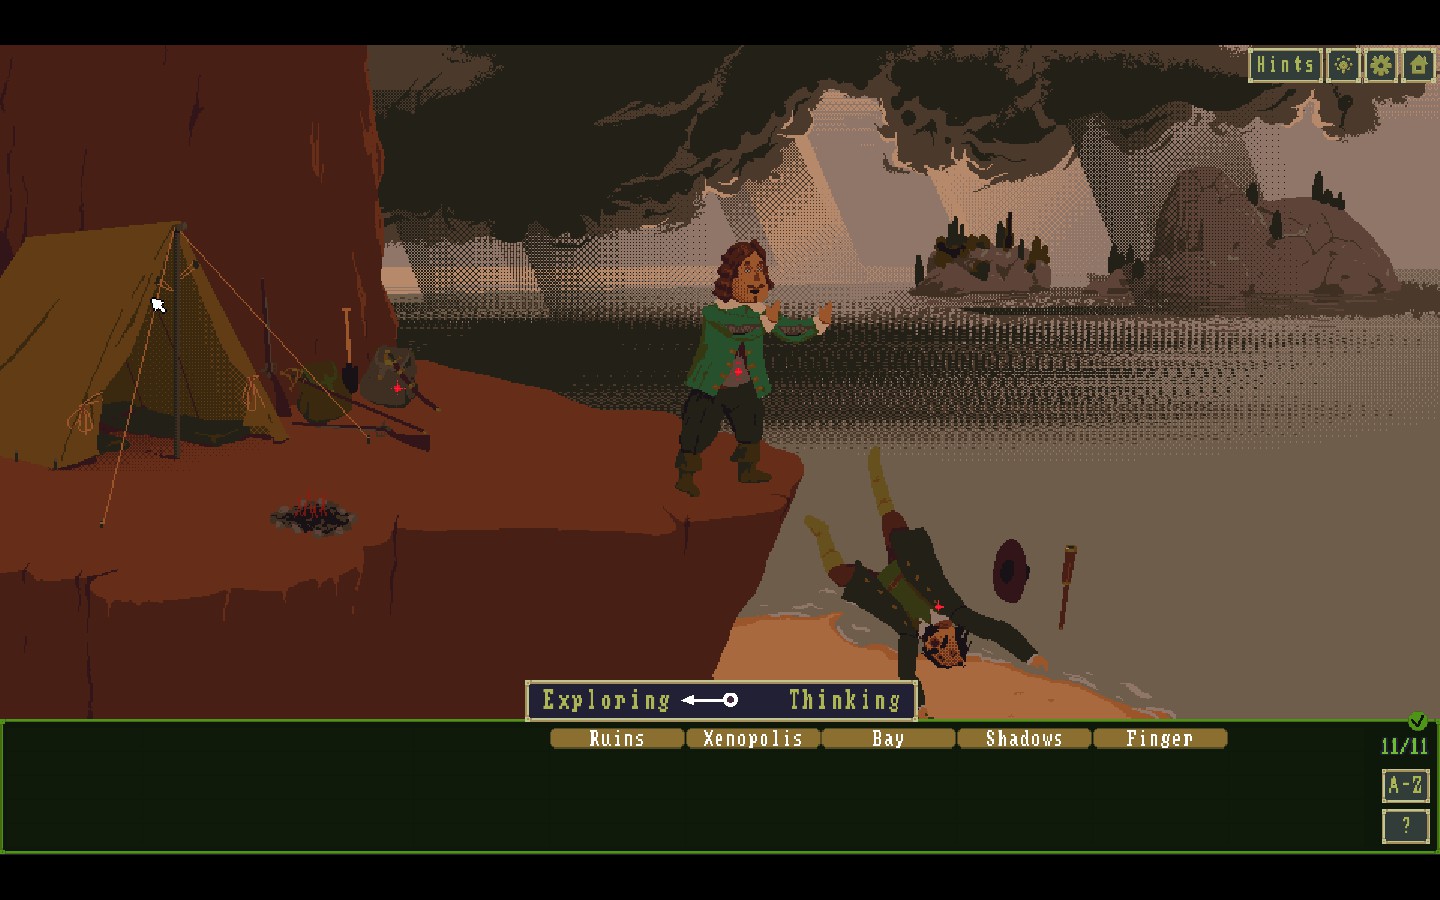
The Case of the Golden Idol
It just works, no need to change anything.
Tomb Raider
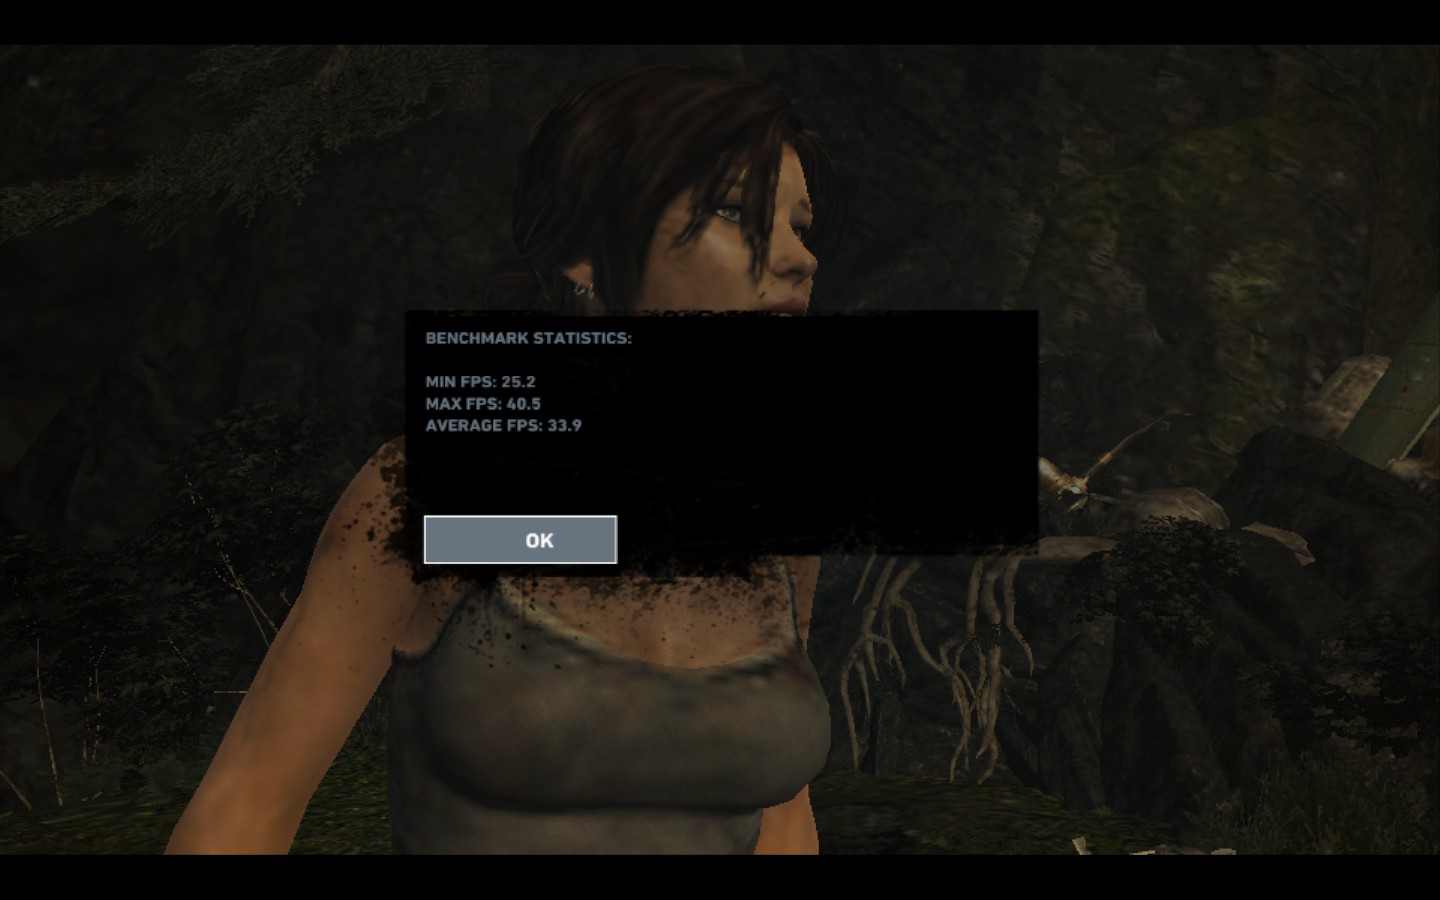
I got quite excited when I saw the post on notebookcheck that they got playable framerates on multiple games, like Tomb Raider (2013), when I tested the benchmark in the game I noticed I missed some important information, they downscaled a lot from the Native Resolution of 1440x900 pixels.
Borderlands 2
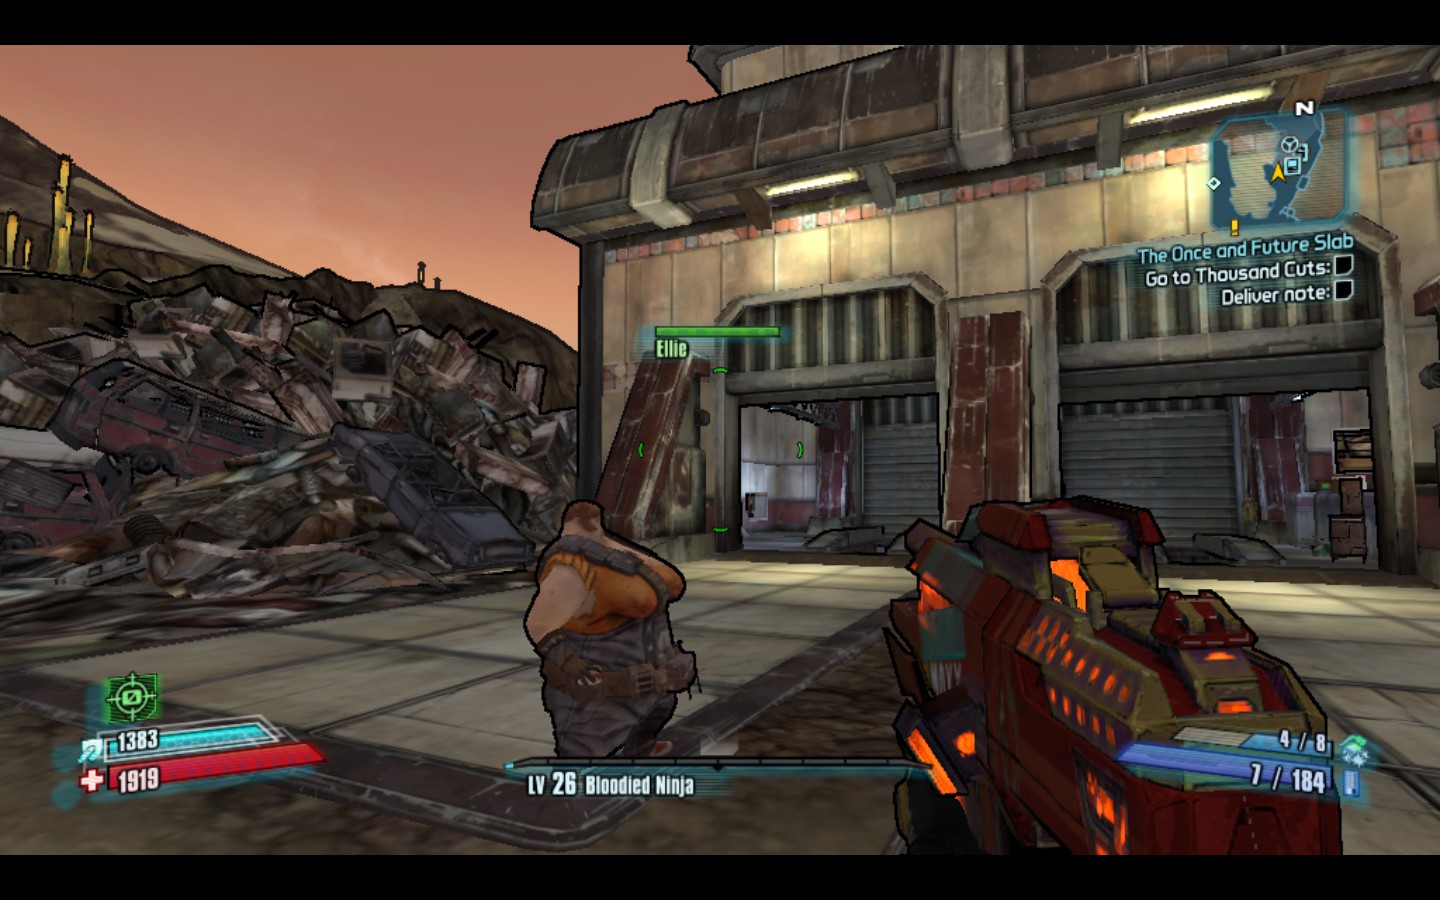
I tried Borderlands just to test a first-person shooter with the DualSense controller. For some reason, the controller input was not working properly. I had the right stick and the gyro, everything else would not work, I tried different controllers’ layout from Steam but nothing. But all started working after I restarted the computer.
Downscaling it helped to keep the framerate playable at around 35 FPS.
Total War: SHOGUN 2
Another title I saw in the notebookcheck review. I could not make this game, or its benchmarks load.
Rocket League
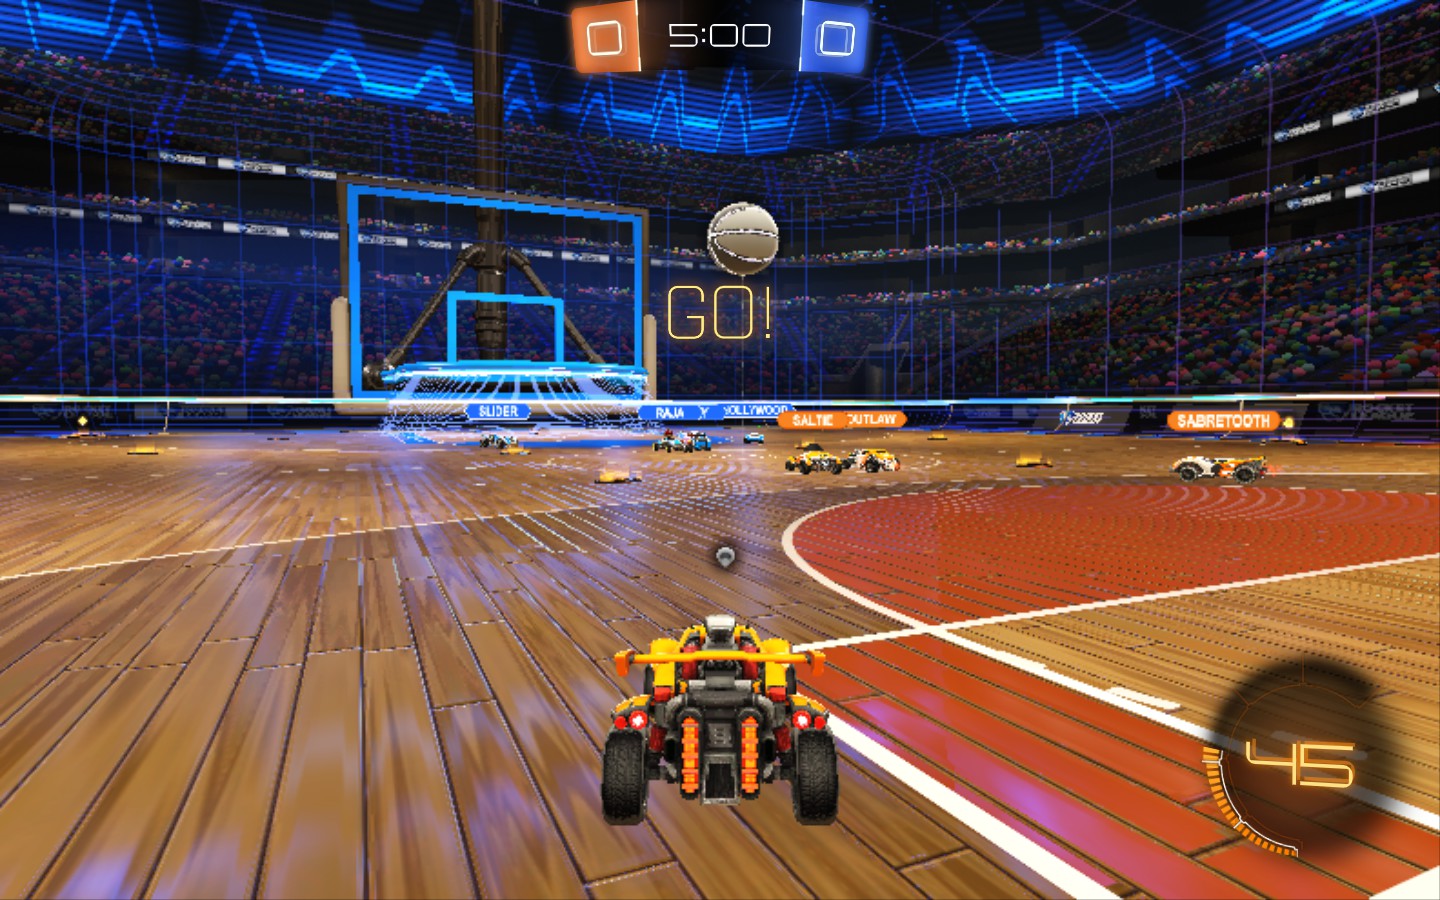
The game works fine, I was playing at 45 FPS without downscaling the resolution, I just disabled all effects and set it to performance mode.