
How To Bridge Discord In Matrix
Discord: the clear winner in easy text and voice chat in the gaming space. But Discord is not private (encrypted or self-hostable), and while they support open source projects, it is not itself open source. It works well and you can have your own (virtual) servers for just your friends, so what’s the problem?
If you are like me, you might be concerned with who has access to your data and messages, as well as being reliant on a third party to not shut down your server, not sell your data, and support the product. And if you are trying (and succeeding!) to live on open source projects, that’s yet another reason to look into other options.
Perhaps the best and most widely used protocol is the Matrix open standard (typically with Synapse, the reference server), paired with a popular client like Element (formerly Riot). As we all know though, herding cats is easier than getting a social group to change platforms. Matrix is an open protocol though and can be combined with APIs or client access to other protocols to bring them to Matrix.
Enter Matrix bridges: a (not difficult) way to bring other platforms into Matrix. In this case, you can have your Discord chats appear on your favorite Matrix client and chat on Discord with your buddies being none the wiser. A stealth approach rather than constant nagging to get them to your Matrix server, like when I changed my Discord server name to “Why not Matrix?”.
This Matrix-Discord bridge allows you to do basically everything you could in Discord from Matrix. You can see who’s in the room, direct message them, reply and react to messages, even manage your friends list. If you message from a Discord client, you’ll see that reflected instantly on the Matrix side as well. Depending on how you set it up (see below) people on Discord won’t see any change, or else you will have a bot label (to freak out your friends).
Unfortunately you can’t jump onto a voice channel or do video chat with Discord (Element pairs nicely with builtin open source Jitsi Meet support), or (yet) import old messages, but otherwise everything works rather seamlessly. The big barrier is having a Matrix server you can allow the bridge to work with (the bridge can be on a separate machine), but is easy to add if you already have, for example, a Raspberry Pi homeserver. Otherwise your options are to ask someone running a Matrix server to allow or set up the bridge, or use an outside hosting option (or perhaps bridge running completely separately, like matterbridge). Of course you are still using Discord, but at least more on your own terms, consolidating on open source infrastructure.
So, how do we do this? Let’s dive in. (This guide won’t cover installing Synapse, which can be more complicated, but is well documented online and available from many hosting services and distros or through Docker.)
Installing and Configuring
The following is a basic guide to getting rolling with bridging Discord and Matrix, that I did on my Raspberry Pi 4 which also runs my Synapse server and is on Arch ARM. While I will refer to the Arch AUR packages, most of this applies generally. Do check your own distros packages and instructions, as well as the official documentation. AUR packages have pretty readable files for what they do, so that can be helpful (though nothing complicated going on here).
-
Install mx-puppet-discord (for Arch, use the AUR package mx-puppet-discord-git; there is also a Docker image available)
-
The AUR package puts config files in
/etc/mx-puppet-discord/and has a helpful post-install message (where commands are to be run asroot):# after editing /etc/mx-puppet-discord/config.yaml, generate a registration file using: node /usr/lib/node_modules/mx-puppet-discord/build/index.js -c /etc/mx-puppet-discord/config.yaml -r -f /root/registration.yaml chmod 640 /root/registration.yaml chown root:mx-puppet-discord /root/registration.yaml mv /root/registration.yaml /etc/mx-puppet-discord/registration.yaml # the instruction have been slightly altered from upstream to prevent shared secrets to be made world-readable on creation # if synapse runs in the same machine, to grant it permission to access the registration file, all one needs is to add it to the mx-puppet-discord group: usermod -aG mx-puppet-discord synapse -
Edit the config: I updated
domainandhomeserverUrlto my server and added my user toprovisioning:whitelist(to use) andrelay:whitelistsection (for relaying, see below) -
Run the above commands to generate the registration file used by Synapse and make it readable for that user
-
Add this registration file (full path) to the list of
app_service_config_filesof Synapse’s configuration filehomeserver.yaml(located in/etc/synapse/) -
Restart Synapse and start the bridge:
sudo systemctl restart synapse sudo systemctl enable mx-puppet-discord sudo systemctl start mx-puppet-discord -
To check that everything is okay, you can check out the logs with
journalctl -u synapse(ormx-puppet-discord) or withsystemctl status synapse
Bridging worlds
With the bridge set up, we can get to bridging! This is documented in the readme for the bridge, but here are some of the steps and pointers:
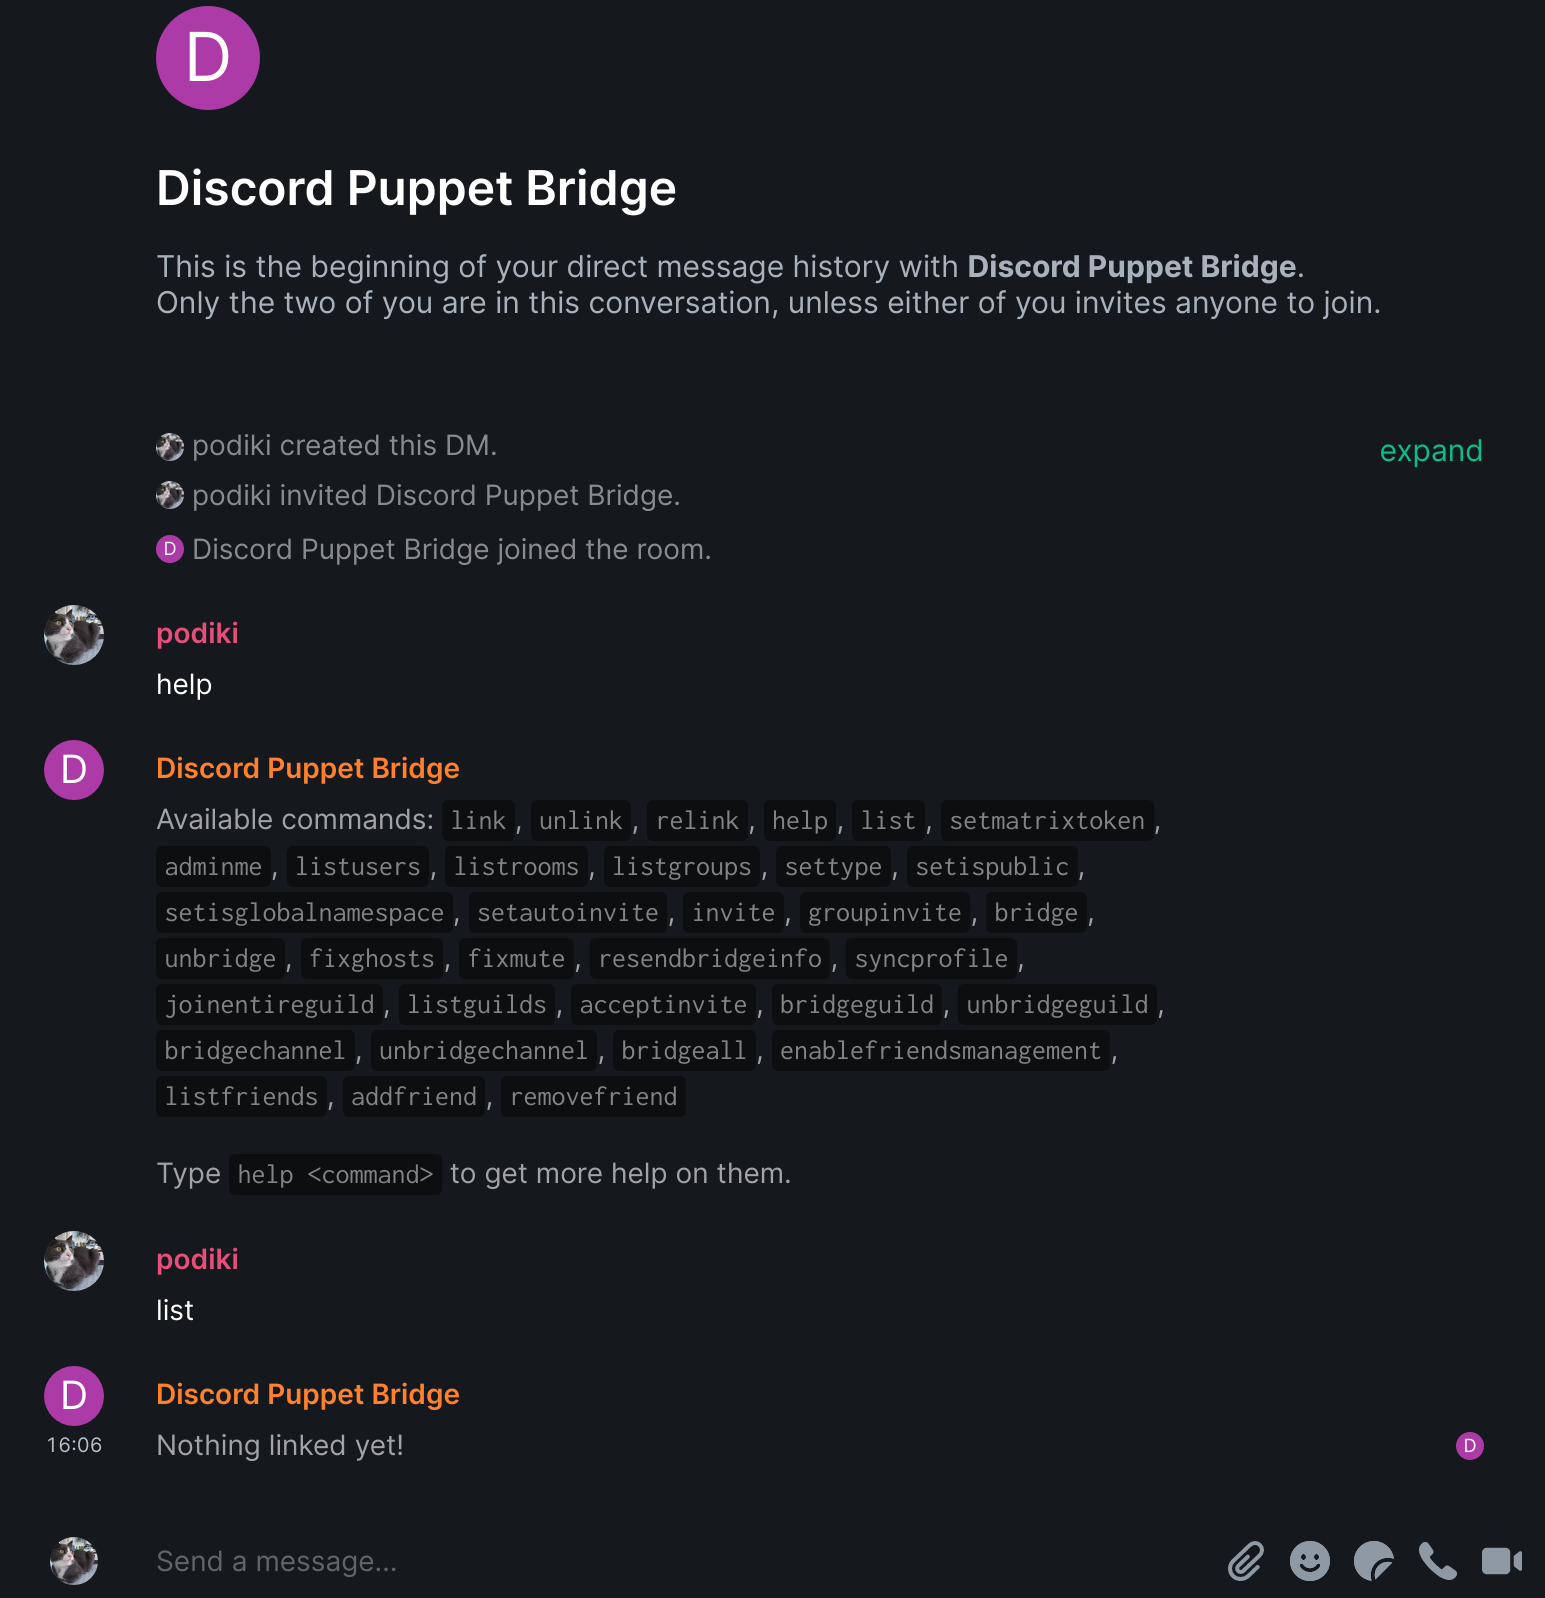
First, start a chat in Matrix with the bot (e.g. @_discordpuppet_bot:yourserver.com). You can send help to get a list of commands and help <command> for brief description of the commands.
There are two options for how to bridge with Discord, both with pros and cons:
- With a puppet bot on Discord
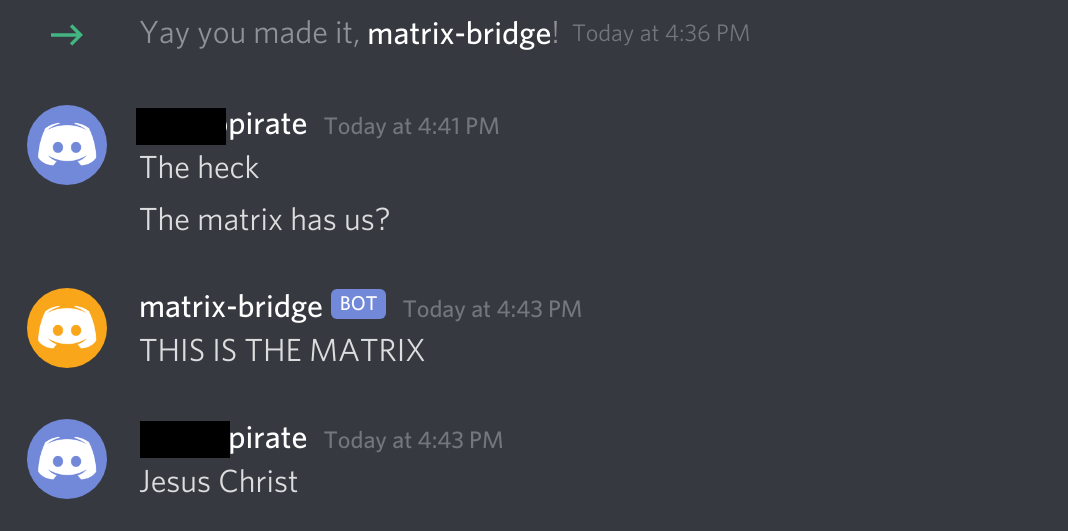
This will require the server administrator to invite your bot, and your messages will have a “Bot” tag, though it will still look like you and have your name. (Reactions also seemed to go only from Discord to Matrix in my testing, but that might have been my configuration and brief testing in this mode, as I believe it should work both ways.) While this requires a little more setup to create a bot on your Discord account, it does not violate Discord’s Terms of Service unlike: - Connect directly to Discord with your account
This is technically against the Terms of Service and could result in banning or other consequences. The benefits are that this is completely invisible on Discord (it is just like you are connecting with their client) and so messages won’t look different. It is also quicker to set up.
For the first option, here’s what to do:
-
Follow the directions on the readme, going to Discord (website) logging in with your account, to create an application, then on the sidebar for “Bot”
-
Go to OAuth2 tab, check “bot” in scopes (see Creating a Bot Account), add permissions as wanted for chat, and include webhooks for proper relaying (to make messages look like they come from the user that sent it)
-
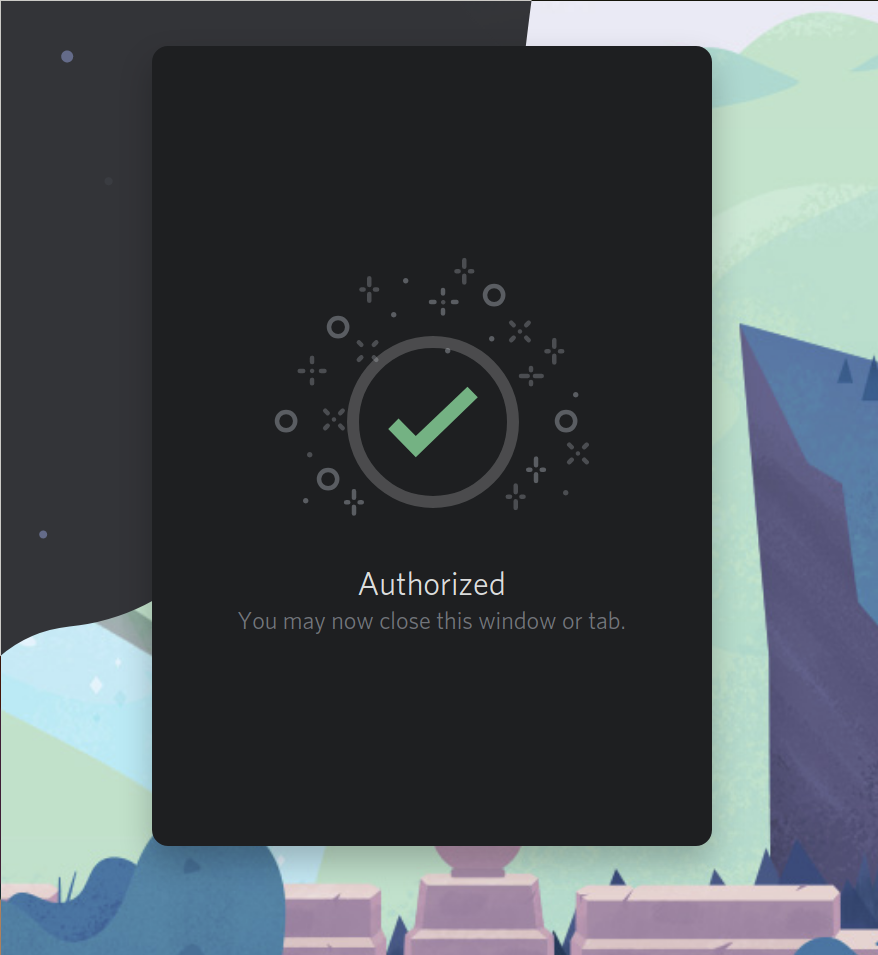
Copy and open the link to invite to a server (that you have permission to manage) and authorize it
-
On the Matrix end you’ll use
link bot <token>with the token from the bot (see readme) -
You should see the server listed when chatting with bot on Matrix and sending
listguilds <ID>(ID is the puppet number fromlist,1most likely); bridge withbridgeguild <ID> <guildID>with the<guildID>shown from the list -
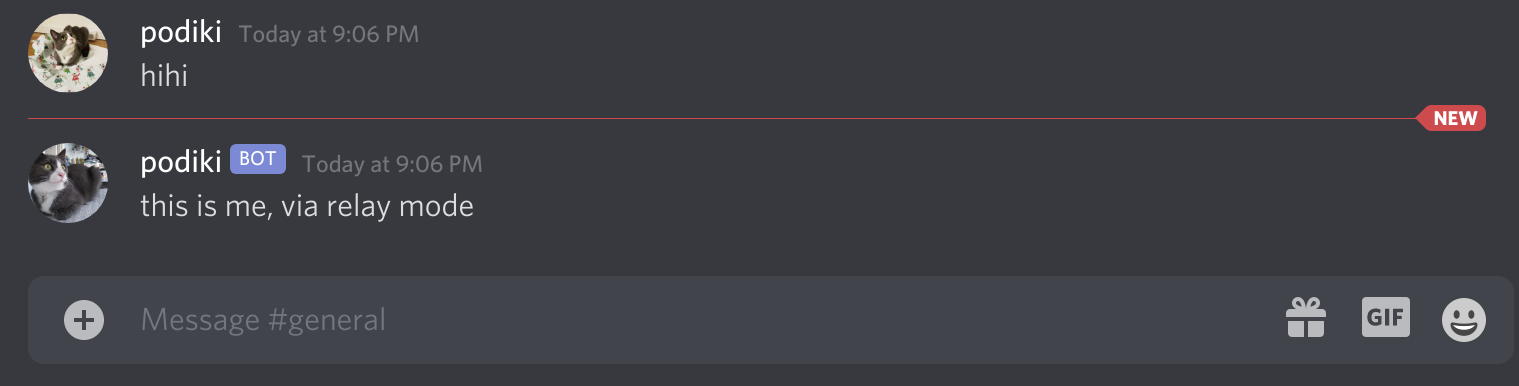
And then it should work! Once you have joined the channel room(s), which the bot tells you how to do, you are bridged. To have it with your name (although avatar was from Matrix end make sure it is set to relay (which uses Discord Webhooks) by sending the bot
settype <ID> relay.
To set up bridging with your account directly, just do:
- Follow instructions to get your user token; for the web app on Firefox filtered on “applications,” there was only one entry, click it and look at request headers
- Link it with sending the Matrix bot
link user <token>(token that you just found); see step 5 above for bridging Discord servers and rooms
If you want to have it look like messages come from yourself on the Matrix side if you send from a Discord client, then you will need to “double puppet”. See the bridge config file for details: add a Synapse server module and generate a shared secret. (The AUR package for this module is not listed for the Pi on Arch ARM, but it is just Python.) If you have .well-known set up for your Synapse server that should be all that is needed, if not I used the command setmatrixtoken <token> with my access token from Element.
There you have it, Discord and Matrix, a bridge between the lands of open and closed source. I’ve been using it for a couple of weeks and overall has worked well. Like running anything on your own server, you’re responsible for keeping an eye on it and fixing any problems. Having used the bridge for the past couple of weeks though, I haven’t had any problems and haven’t had to do anything after the initial setup. And everything is still on Discord, so you always have a fallback. (I still have a Discord client for servers I just occasionally look at messages, and for voice chat once a week.)
I took the Discord bridge and ran with it, adding Signal and WhatsApp bridges to my Matrix server, using their AUR packages. The setups are not too different and once I got the hang of bridges it was even easier. Now I can just have Element open to cover all my usual chatting.
If I can slowly get friends to move to Matrix with other chats bridged until they all come over to open source and open standards, the transition would be complete. A man can dream.